Getting Started | Unboxing
Before setting up your new kiosk, ensure you have received both the Clover Flex terminal and the Samsung Kiosk. These will ship separately.
Samsung Kiosk:
Remove the kiosk from the box and place it on a flat surface.
Locate the small green screwdriver included in the box and set aside.
Remove the protective plastic cover from the screen.
Clover Flex 3
Remove the Flex device and set aside.
Do not put the provided soft case on your Flex terminal.
If you're using the optional stand:
Follow the assembly instructions included in the stand box.
Do not connect the kiosk to power yet.
If you're using wired internet, an ethernet cable should be run through the stand leg.
Setting Up Your Kiosk
Wired Connection
If using a wired connection, you will need to purchase the Ethernet cable of your choice to use, as one is not provided.
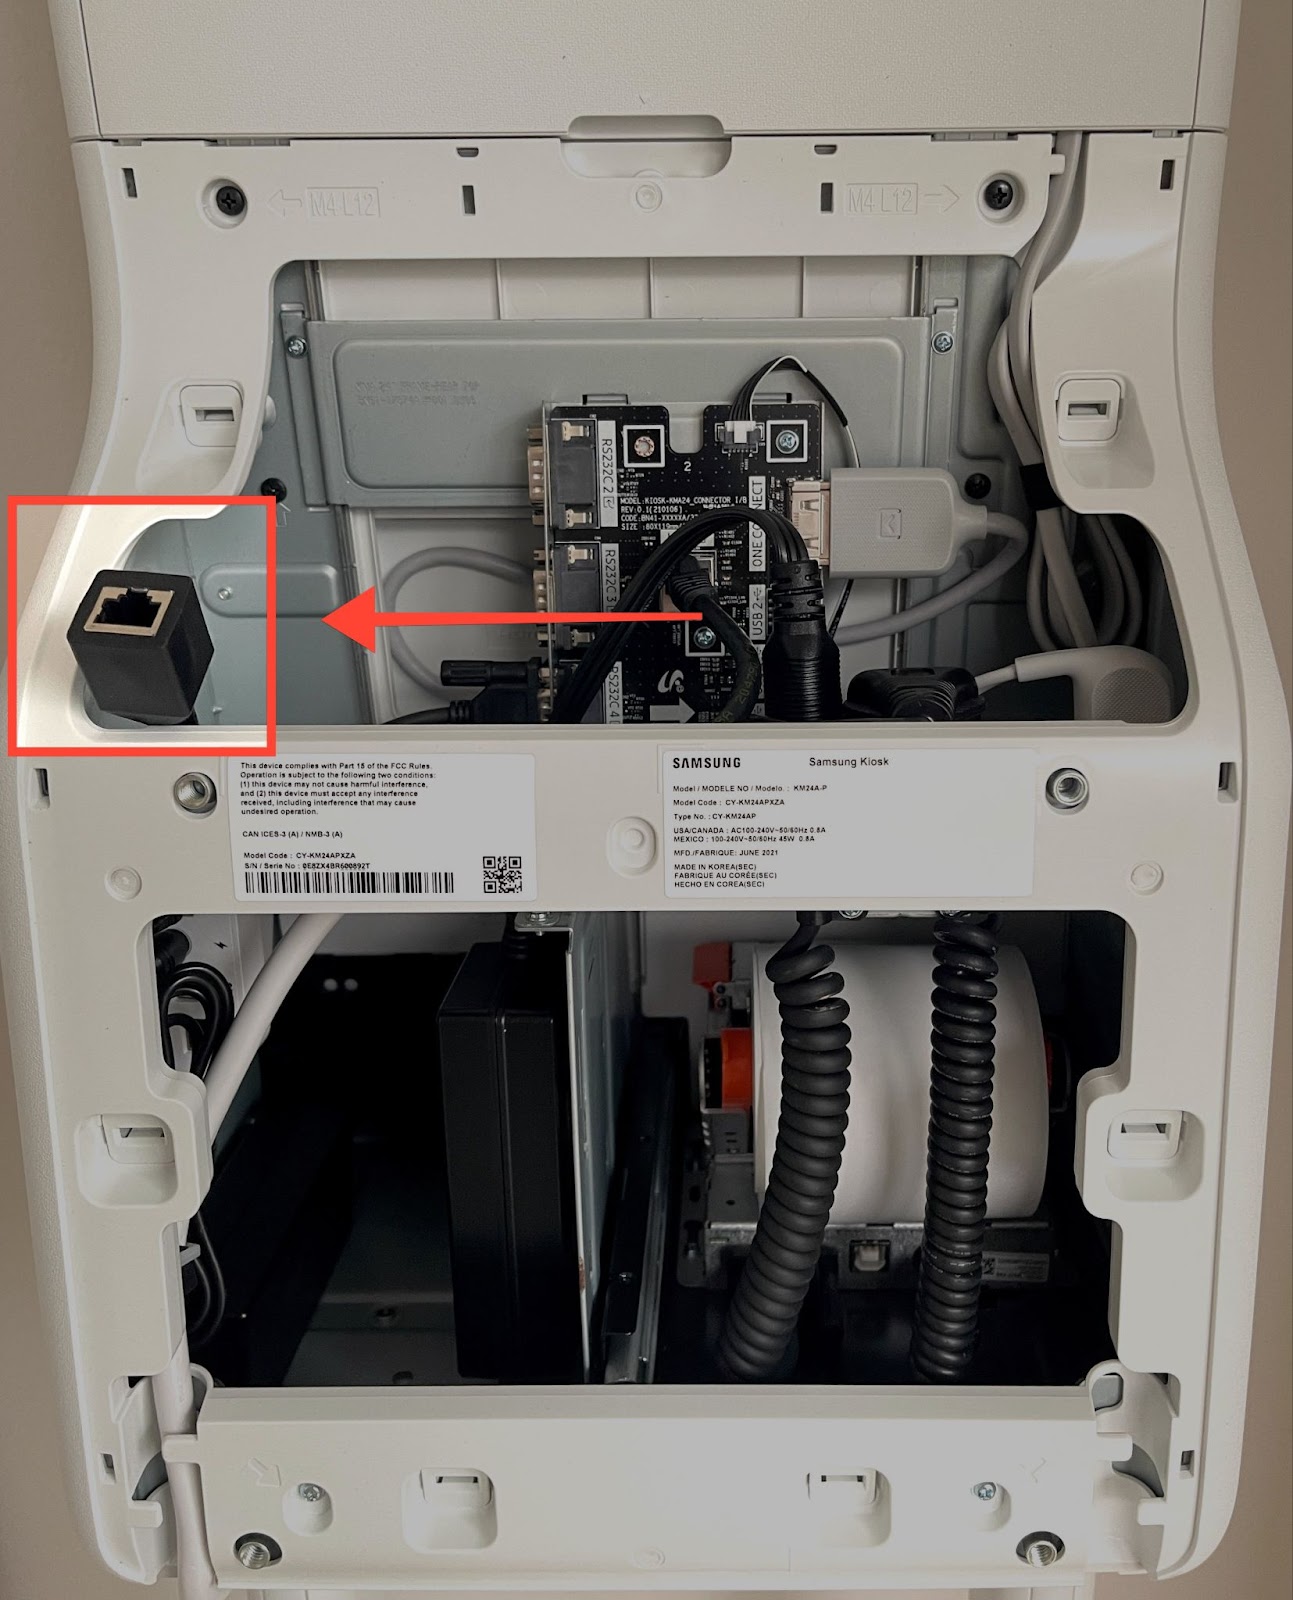
Remove the rear cover by lifting the lower corners of the panel and releasing the tabs along the edges.
Connect an ethernet cable from your modem/router to the Ethernet port located on the lower right corner of the kiosk. Insert the cable into the RJ-45 receptacle on the kiosk.
Replace the rear cover by sliding in the top tabs first, then firmly press down from top to bottom.
Plug in the main power cable to an outlet. Once connected to power, the kiosk will automatically power on.
Wi-Fi Connection
To connect the Kiosk to Wi-Fi, ensure the device is powered on.
Hold the bottom left corner of the screen for two seconds. A popup will appear requesting you to enter your four-digit PIN (0000 by default).
Select the Settings icon from the menu at the bottom of the screen and navigate to Network > Open Network Settings > Select Wireless.
Select your preferred Wi-Fi network.
Input the password if required.
Confirm by tapping OK.
Mounting the Flex
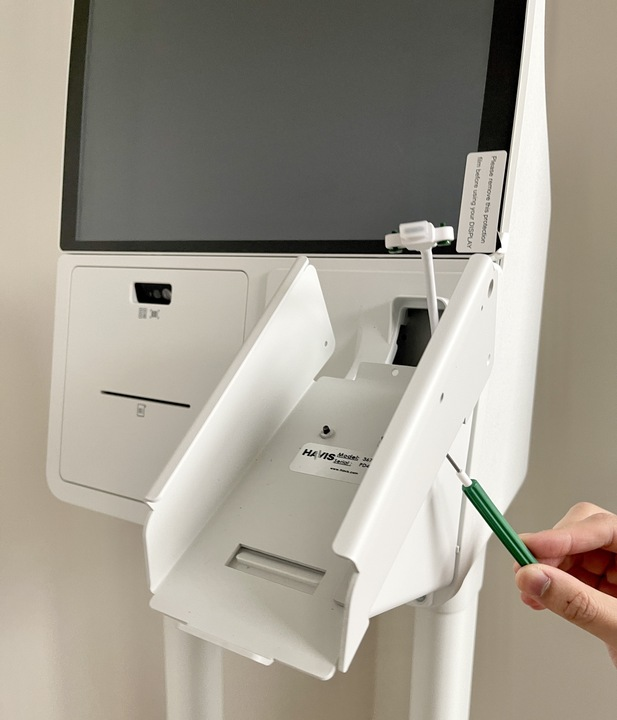
The Kiosk will come with the mount partially assembled. In the box, you will find a plastic bag with the cable cover for the Flex mount and a small green screwdriver with screws. Remove this from the box and unwrap it.
Begin by connecting the Clover Flex device to the power cable extending from the Kiosk.
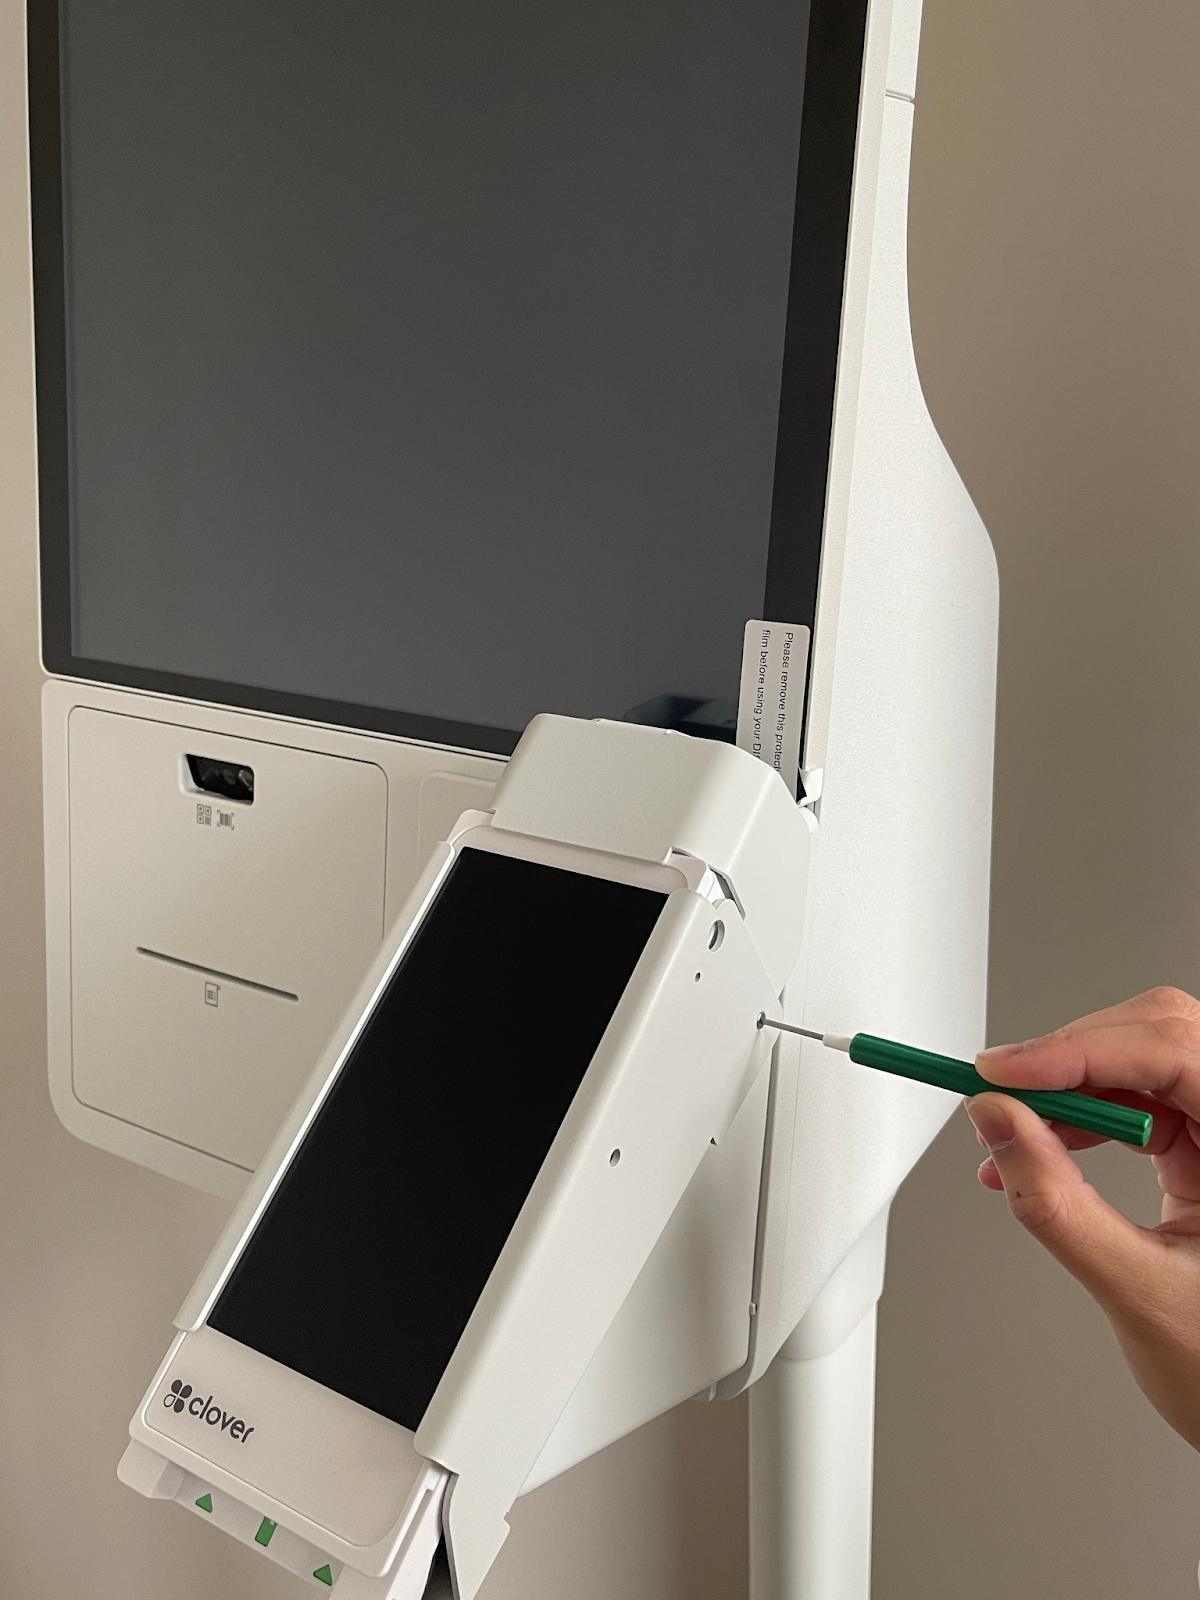
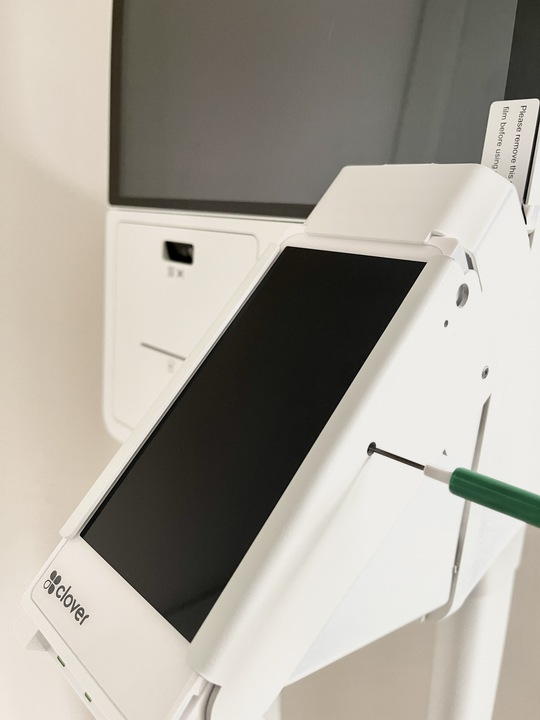
Using the provided green screwdriver, unscrew the two screws located on the underside of the right side of the mount. See here:
Insert the Flex into the mount, ensuring the power cable is not excessively protruding from the kiosk.
Replace the right-side plate and tighten the bottom screws using the green screwdriver.
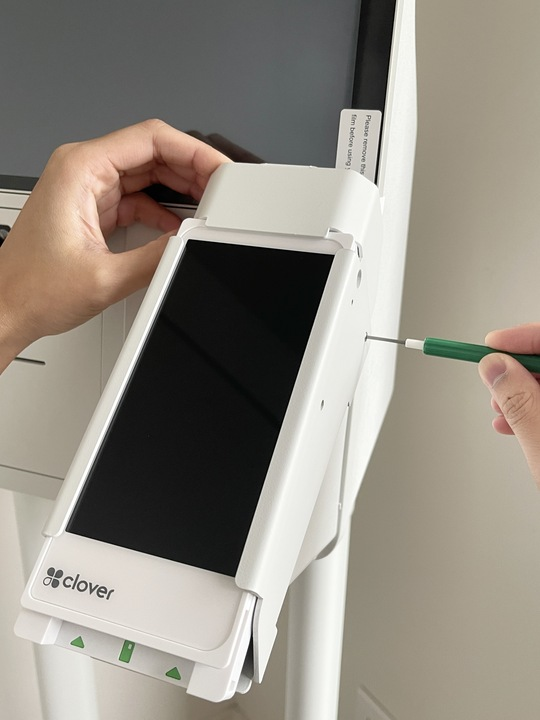
Locate the cable cover and position it on top of the Flex device, covering the power cable. Secure both the left and right screws using the green screwdriver.
Clover Flex Setup
Ensure that the kiosk is powered on and the Flex device is connected to the power cable extending from the kiosk.
Using the screwdriver provided, hold down the power button on the right side of the Flex (accessible via a small hole in the mount).
Follow the on-screen instructions to complete the setup process for the Flex device.
Choose your preferred language and connect to your Wi-Fi network.
Once connected to the internet, proceed by tapping the “Next” button.
If your Flex hasn’t been activated for your Clover account yet, you’ll receive a new device activation code via email from Clover. Enter this code when prompted.
The Flex will then download applications and settings, which may take a few minutes. Once finished, it will proceed with the setup process.
You don't need to insert paper into the Flex and can skip this step.
Navigate to Setup > Online Ordering > Service Types and toggle on all service types, including dine-in, pick-up, and delivery.
Download the CloudPay app:
Note: You must download the CloudPay app to process payments on the Kiosk.
On the Flex Device, select the “More tools” icon
Using the search field in the top right-hand corner, search for the “CloudPay” app
Tap download. When the download is finished, tap “Open.”
Note: The CloudPay app must be opened for you to log into the kiosk and process payments. To exit out of the app, tap all four corners of the Flex screen at the same time.
Receipt Printer
Note: Ensure the kiosk is powered on before setting up the receipt printer.
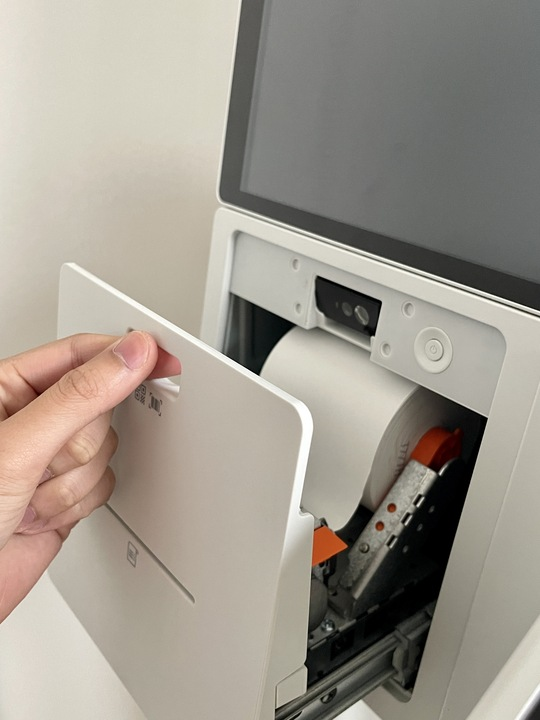
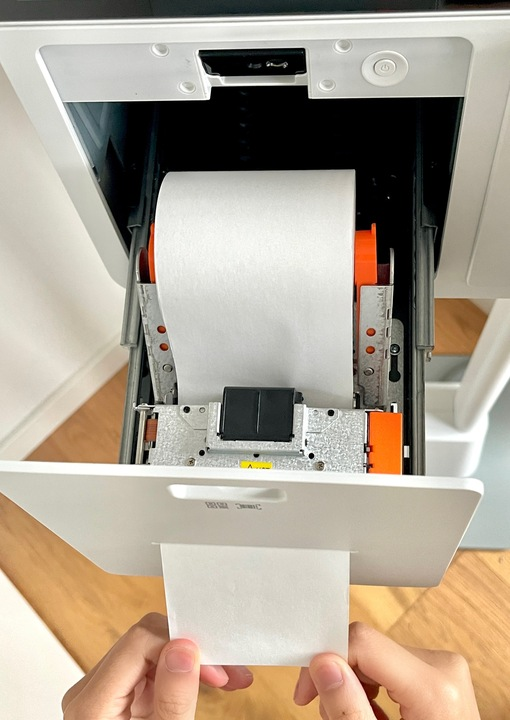
The printer compartment can be accessed by pressing down on the barcode scanner located above the receipt slot. From here, pull out the printer tray until it clicks into position.
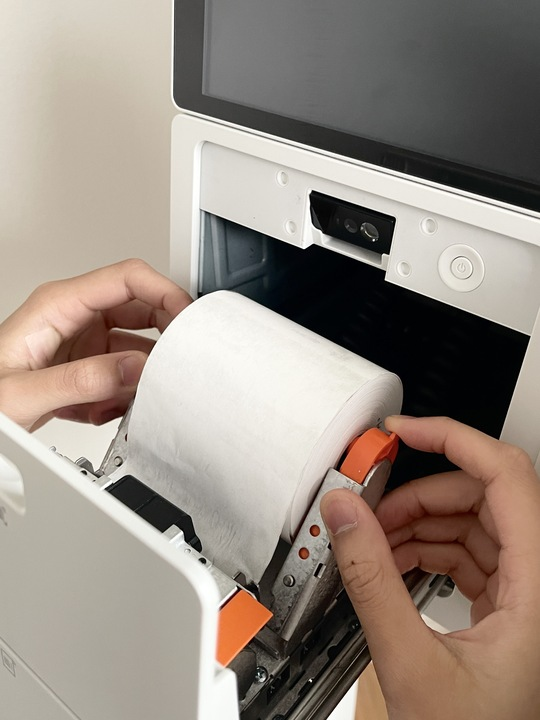
Insert the paper roll between the two orange tabs, verifying that it rotates smoothly and feeds from over the top, as demonstrated.
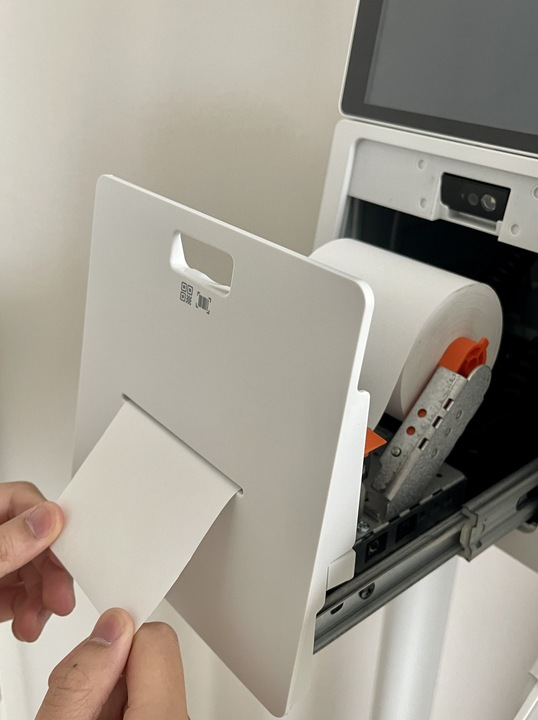
Raise the printer head by releasing the tab on the right side, then guide the paper through the front slot of the kiosk.
After loading the paper, close the printer head; the excess paper will be automatically advanced and cut.
Gently push the printer tray back into the kiosk.
Your kiosk is now ready to print receipts!

