How to add tickets to your website
Once you create a ticketed event, here are several ways to add tickets to your website.
Create a Ticketed Events Landing Page
Add a ticket to an alert
Link the ticket to your Events page
Link it to any Multi button field of your website
Ticketed Events Landing Page
A ticketed events landing page is a specific page template that displays all of your existing tickets. That page will have thumbnails of all your tickets, as well as Ticket Names, Dates, and Times.
Click here to read an article on how to add a page to your website.
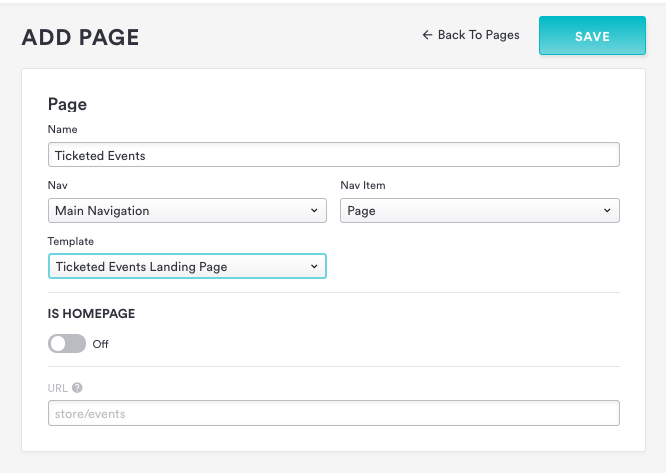
Tip: In order for your new page to function as a ticket listing page, you'll need to select the fields to match the example below:
How to Add a Ticket to an Alert
You can use alerts to promote your ticketed event on your website homepage. To do this, you’ll need the permalink for the event.
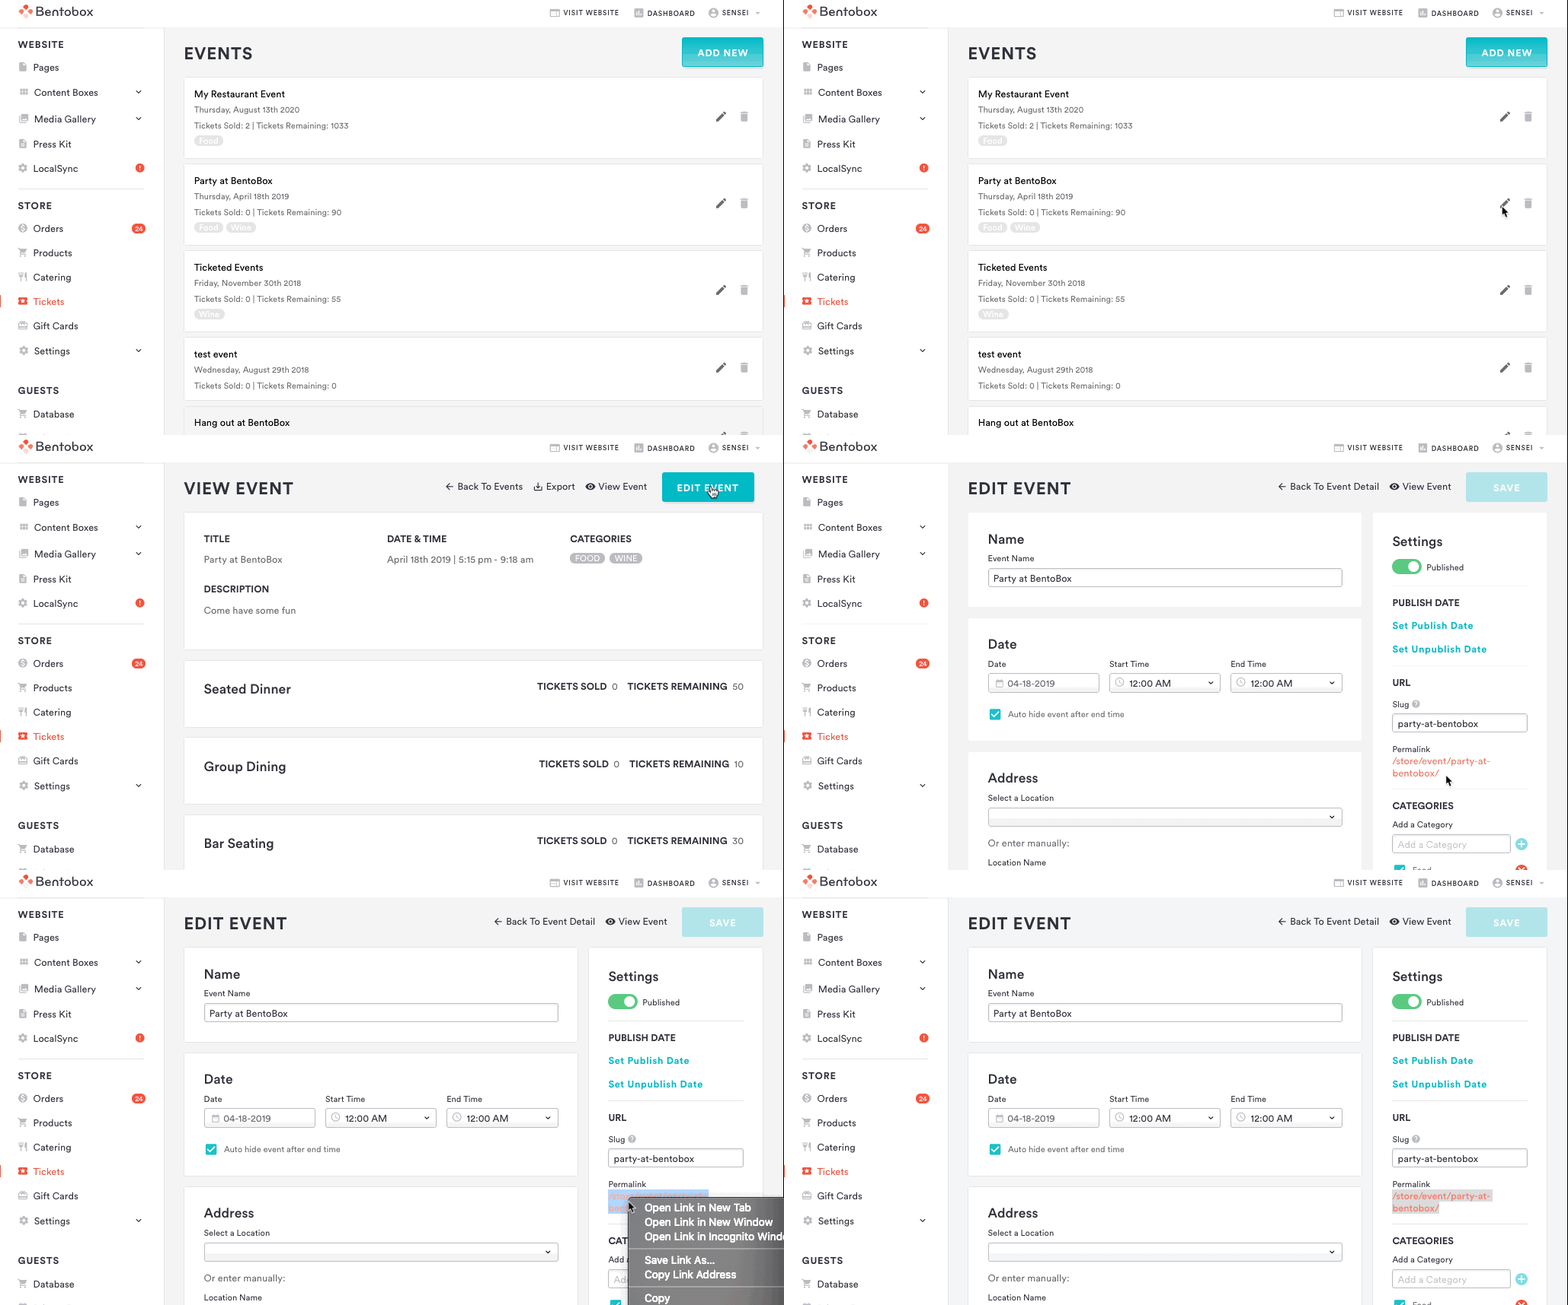
On the left hand navigation in your back end, click on Tickets under the Store heading. Open the specific event you want to promote, click the "Edit" button in the upper right corner, click on the permalink, then paste the URL you’re taken to.
Once you have the URL, there are multiple places to promote your event.
Landing Content
Add Tickets to your Events Page
The events page is also a good place to sell your tickets if you don't want to create a ticketed events landing page. It will automatically create a button below the event information that will direct your guests to complete the purchase.
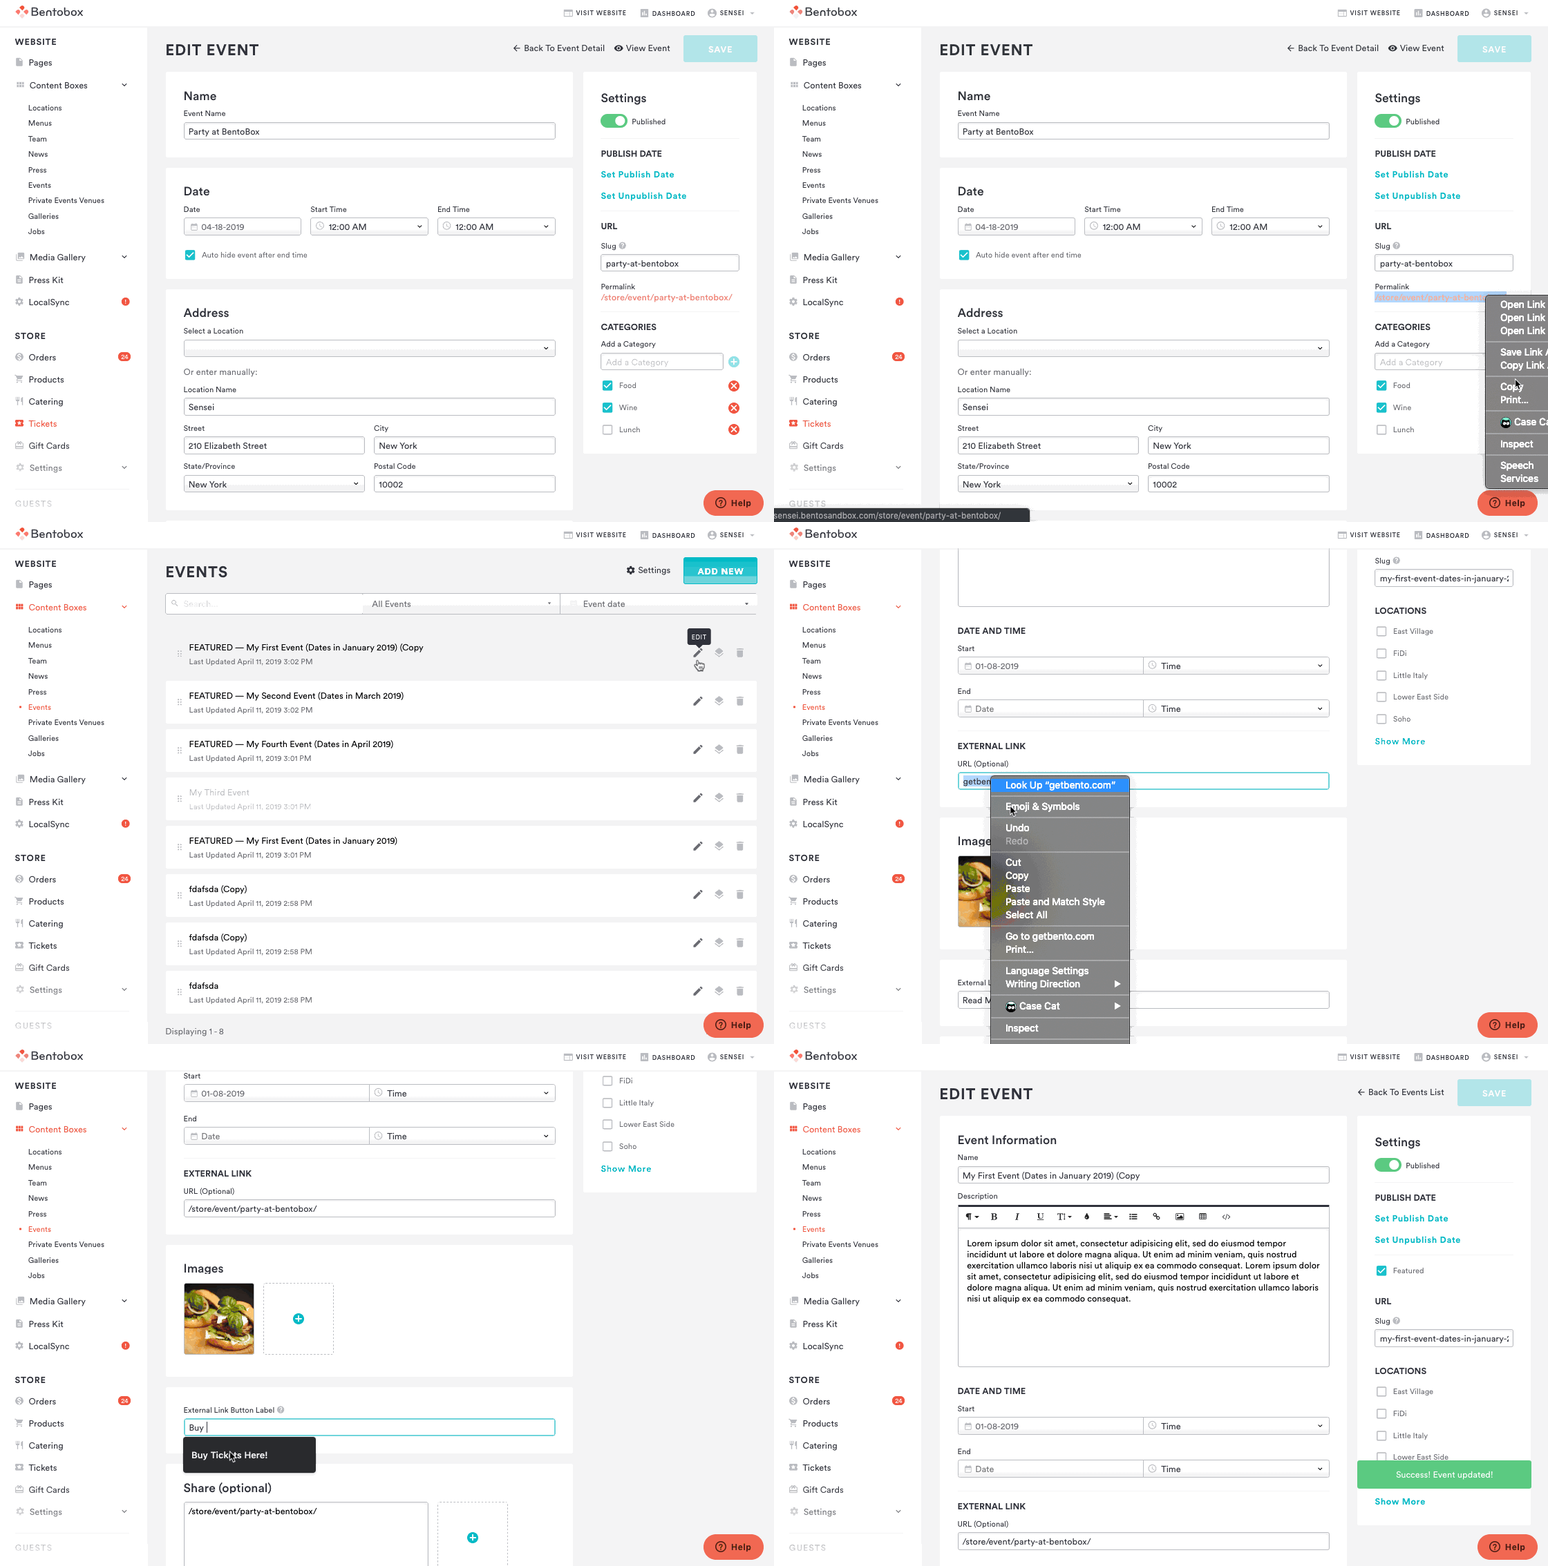
Copy the permalink from your ticketed event.
Go to Content Boxes > Events.
Paste it in the desired event under the External Link field.
Type in the External Link Button Label.
Save & View Event.
Adding Tickets to a Multi Button
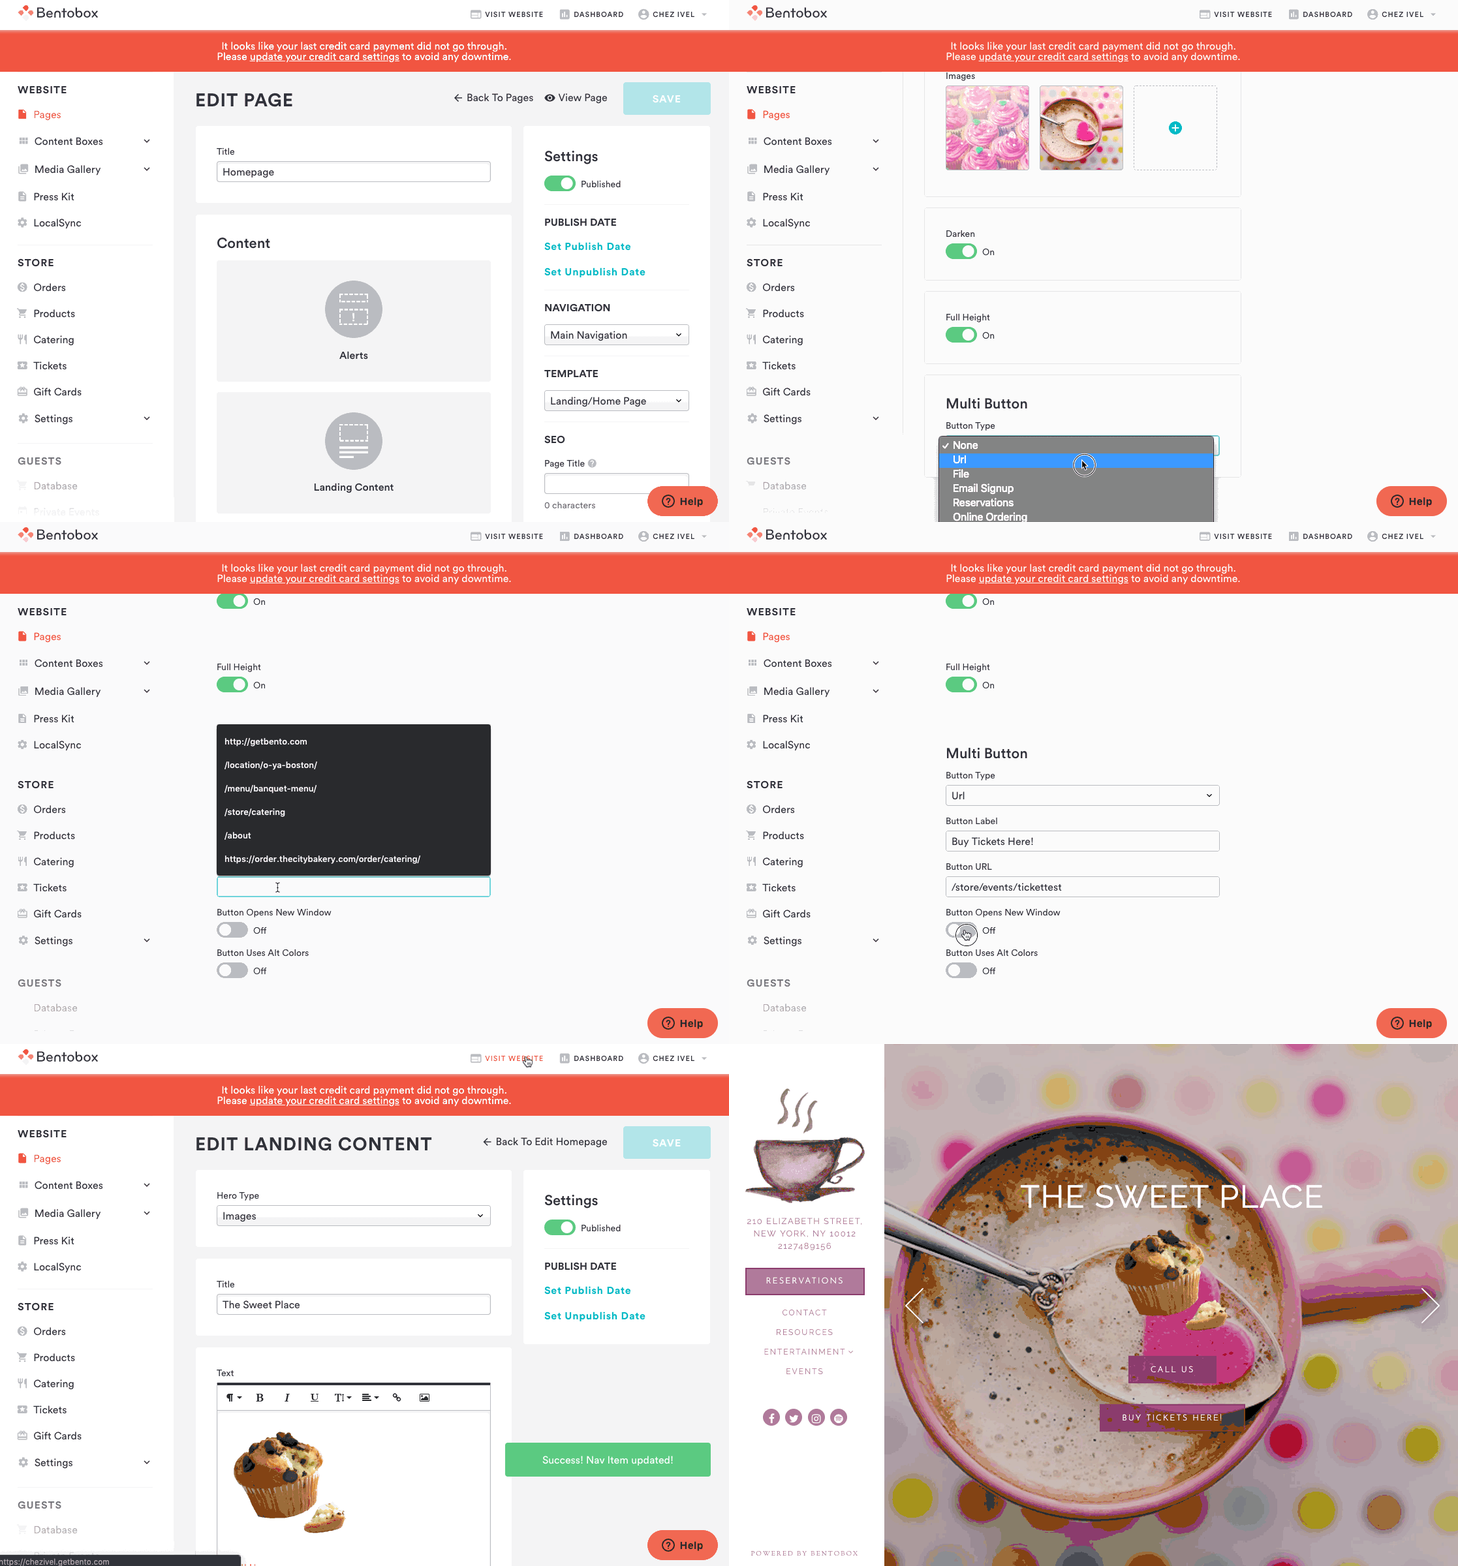
Some sections of your site support what’s called the multi button. Typically you’ll see this when editing a page’s hero section, intro box, or flexible content.
In the example below, we've added a ticketed event to the multi button field in the Landing Page of our website.
All set! Once you start selling tickets, you can export your guest list at any time.


