
Email Campaigns User Guide
What are Email Campaigns?
We are excited to introduce you our Email Campaigns, specifically built to help your restaurant connect with your customers.
Key Features include:
• Target Campaigns: Pinpoint your audience, based on spending habits, dining preferences and more
• Seamless Integration: Craft email marketing with your brand assets to your diners already in the BentoBox platform
• AI Powered: Use built-in AI tools to create copy or images for your email content
• Performance Insights: Monitor campaign success with real-time analytics
• Scheduling: Plan campaigns in advance to reach diners at the perfect moment
• Customizable Templates: Use templates already in your restaurant’s brand and customize for the perfect message
Using our built-in Email Campaigns, you can boost customer engagement, enhance their dining experience and watch your restaurant thrive. Let’s dive in!
User Permissions for Email Campaigns
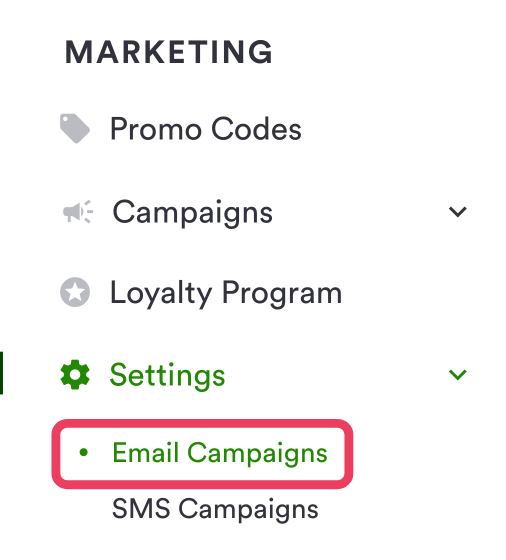
Please note that Users that have Admin or Manager roles assigned will have access to Email Campaigns by default. Users with a 'By Section' and 'By Location' roles will need to have the 'Email Campaigns' checkbox checked to have access.
Setting up a Reply-To Email
If you would like to enable response emails to your marketing emails and engage with your subscribers, configure a reply-to email in Marketing > Settings. If this is not configured, recipients will receive marketing from a no-reply email and will not be able to respond with questions or inquiries.
Navigate to Email Campaigns
Navigate to the backend's dashboard, and click on the Campaigns > Email tab in the Marketing section of the main navigation.
From there, you will see the landing page where you can view your active and past campaigns.

Creating Email Campaigns
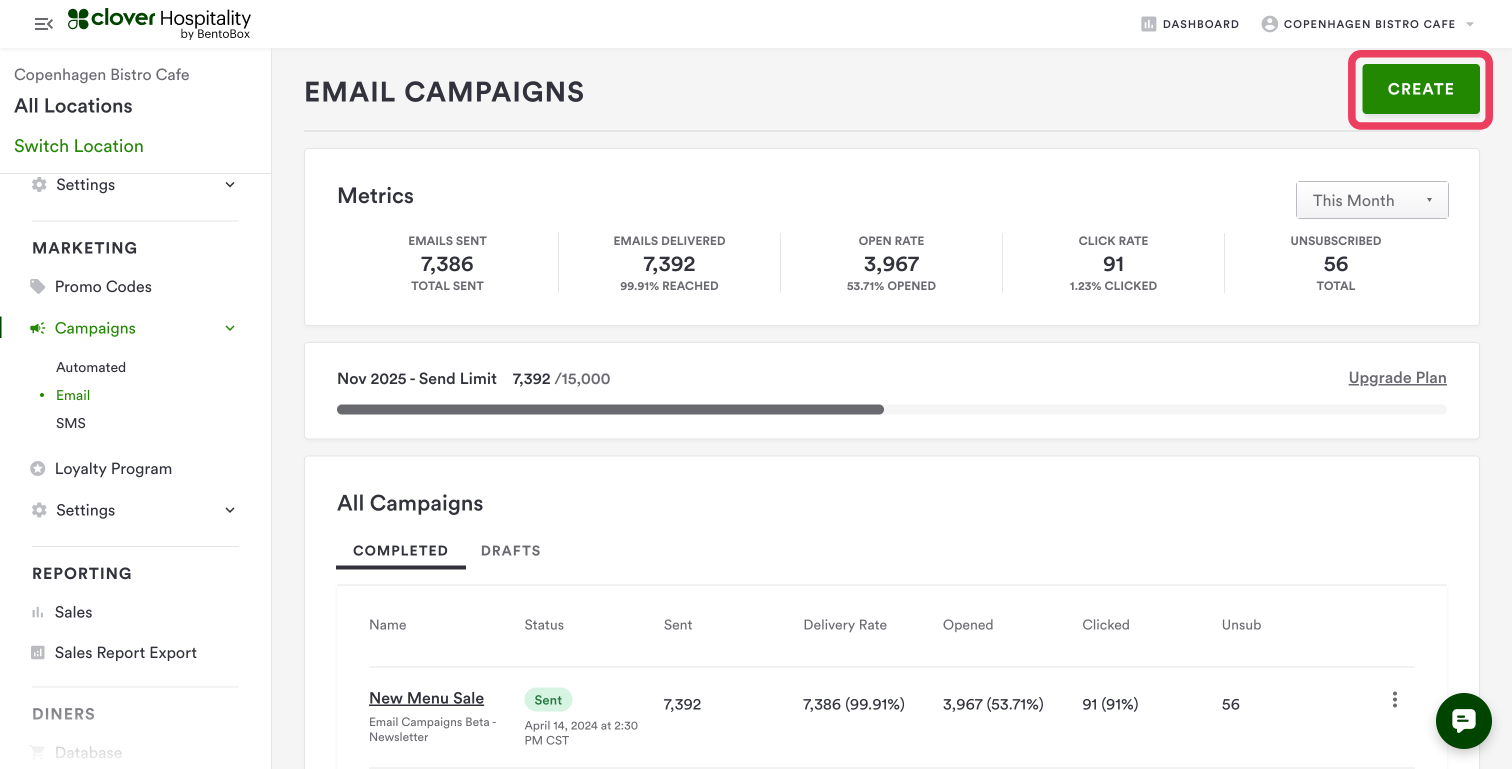
To create a new email campaign, navigate to Campaigns > Email. Click “Create” in the top right corner.
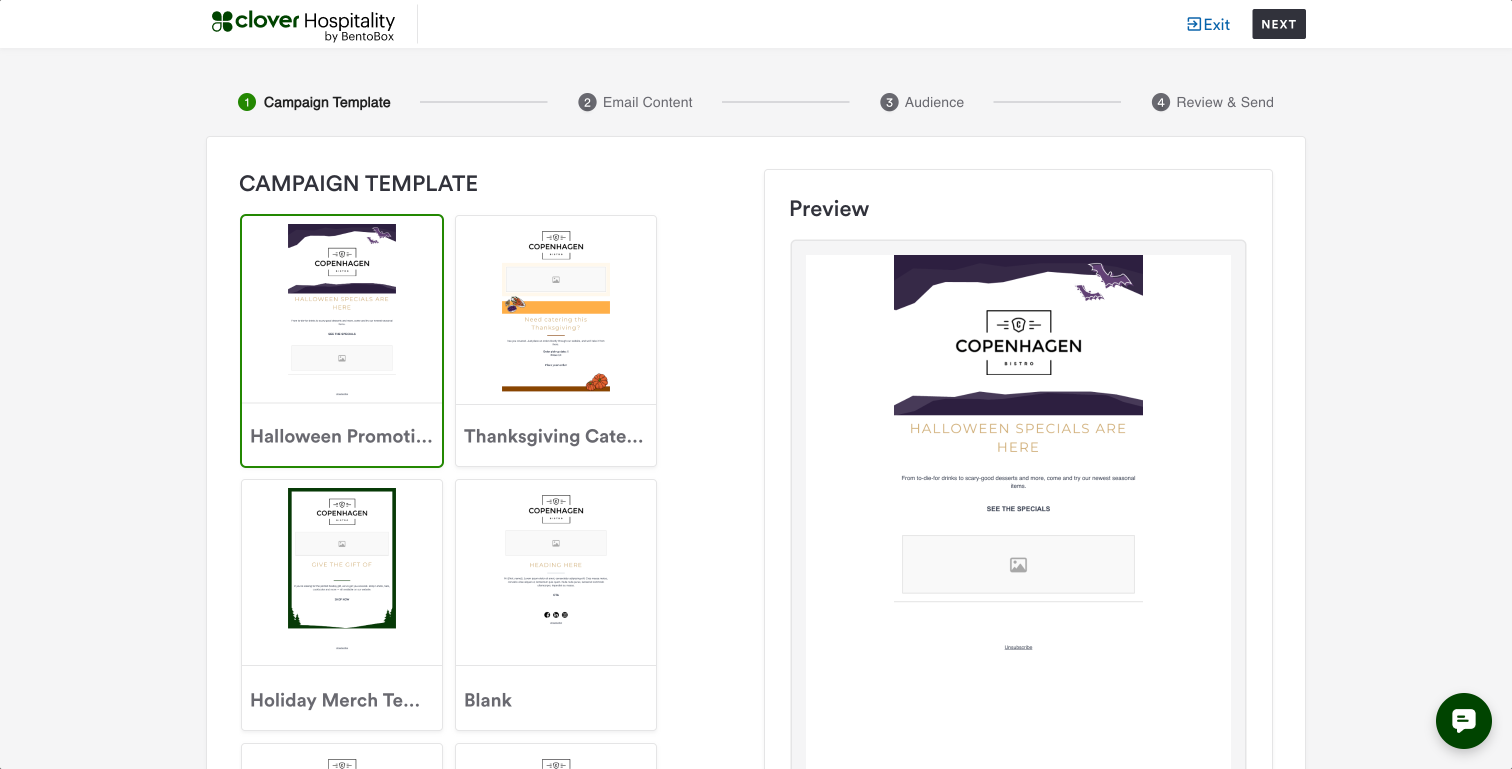
Select a template:
Name your campaign — this is how it will appear in your list of campaigns, and is internal only, so feel free to add the date or current menu item you are sharing.
Add email content — We’ve made pre-designed templates branded to match your website, such as new menu announcements or newsletter, but you can customize the email campaigns to your need.
You can add new text boxes, images, buttons, social media links, and more!
Edit text styles using a wide library of fonts that are safe to send to all email services
Andale Mono
Arial
Arial Black
Book Antiqua
Cabin
Comic Sans MS
Crimson Text
Courier New
Georgia
Helvetica
Impact
Lato
Lobster Two
Lucida Sans
Merriweather
Monsterrat
Old Standard TT
Open Sans
Oswald
Oxygen
Pacifico
Playfair Display
Poppins
Quicksand
Raleway
Source Sans Pro
Symbol
Tahoma
Terminal
Times New Roman
Trebuchet MS
Ubuntu
Verdana
Sending Email Campaigns
Once you have prepared your email content, choose your audience of diners.
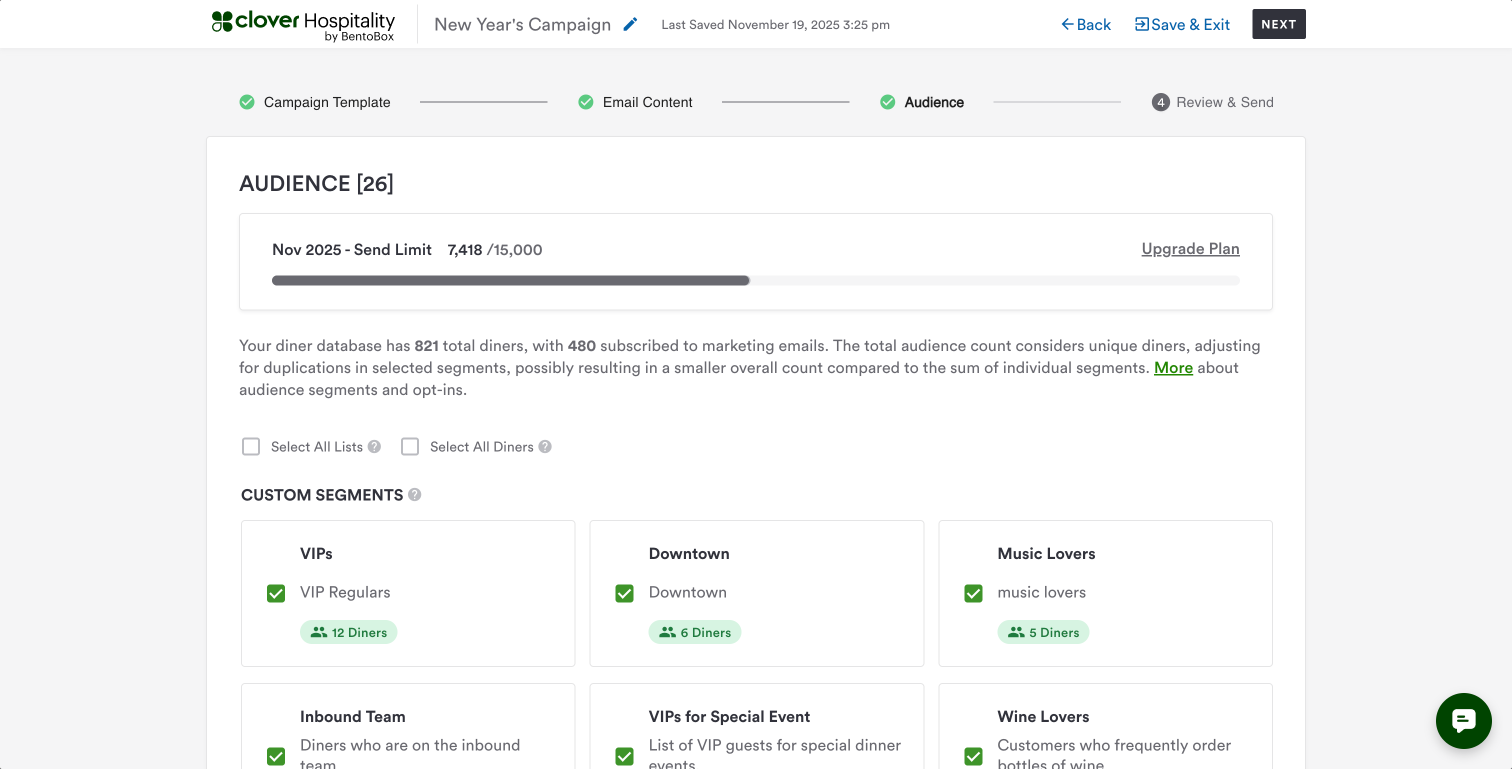
Checking the Select All Lists box will select diners segmented in any list, not necessarily all diners in your database. Those who have opted out of the email marketing will not receive an email.
Checking the Select All Diners box will select all diners in your database. Those who have opted out of email marketing will not receive an email.
Pro Tip: You can choose to send to all opted-in diners in your database, or market to specific segments such as your online ordering customers for a new delivery special.
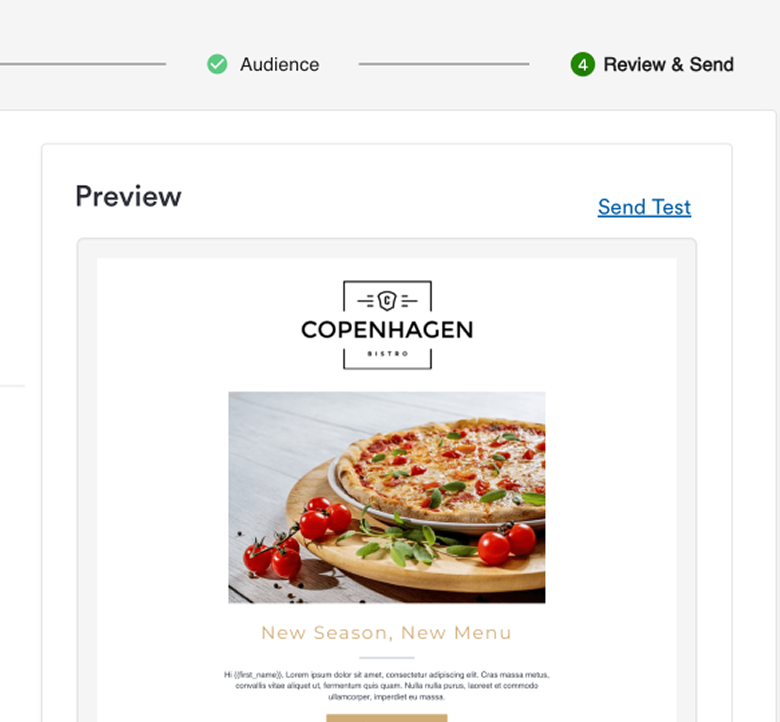
Review — add a subject line. You can optionally add a description for your team to reference in the future, descriptions are for internal use only. You’ll also be able to send a test email here too.
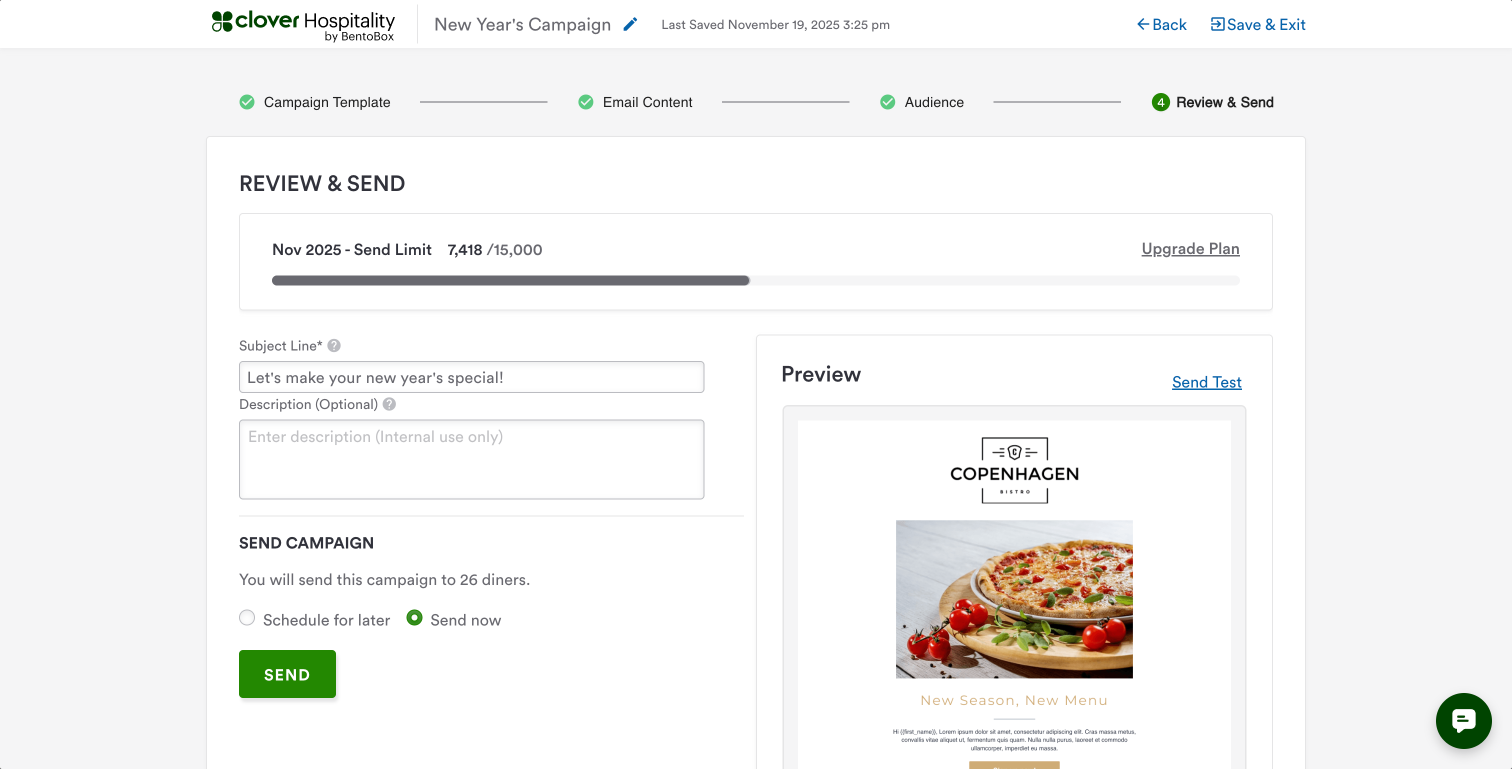
Schedule or send — you can choose to send your email now or schedule for a later time. Once you hit send, your campaign should now appear in the list of campaigns in the “Email Campaigns” tab.
Pro Tip: If at any point you want to save your progress and come back later, click “Save & Exit” in the upper right hand corner. It’ll save as a draft. You’ll be able to restart building your campaign at any time.
List of Campaigns
You can view all the campaigns and drafts you’ve created in the Campaigns > Email tab in the Marketing section of the main navigation.
On the Completed tab, you’ll see your scheduled and sent campaigns.
For Sent campaigns, you’ll be able to see how many emails you sent, their open and click-through rate, and their unsubscribe number.
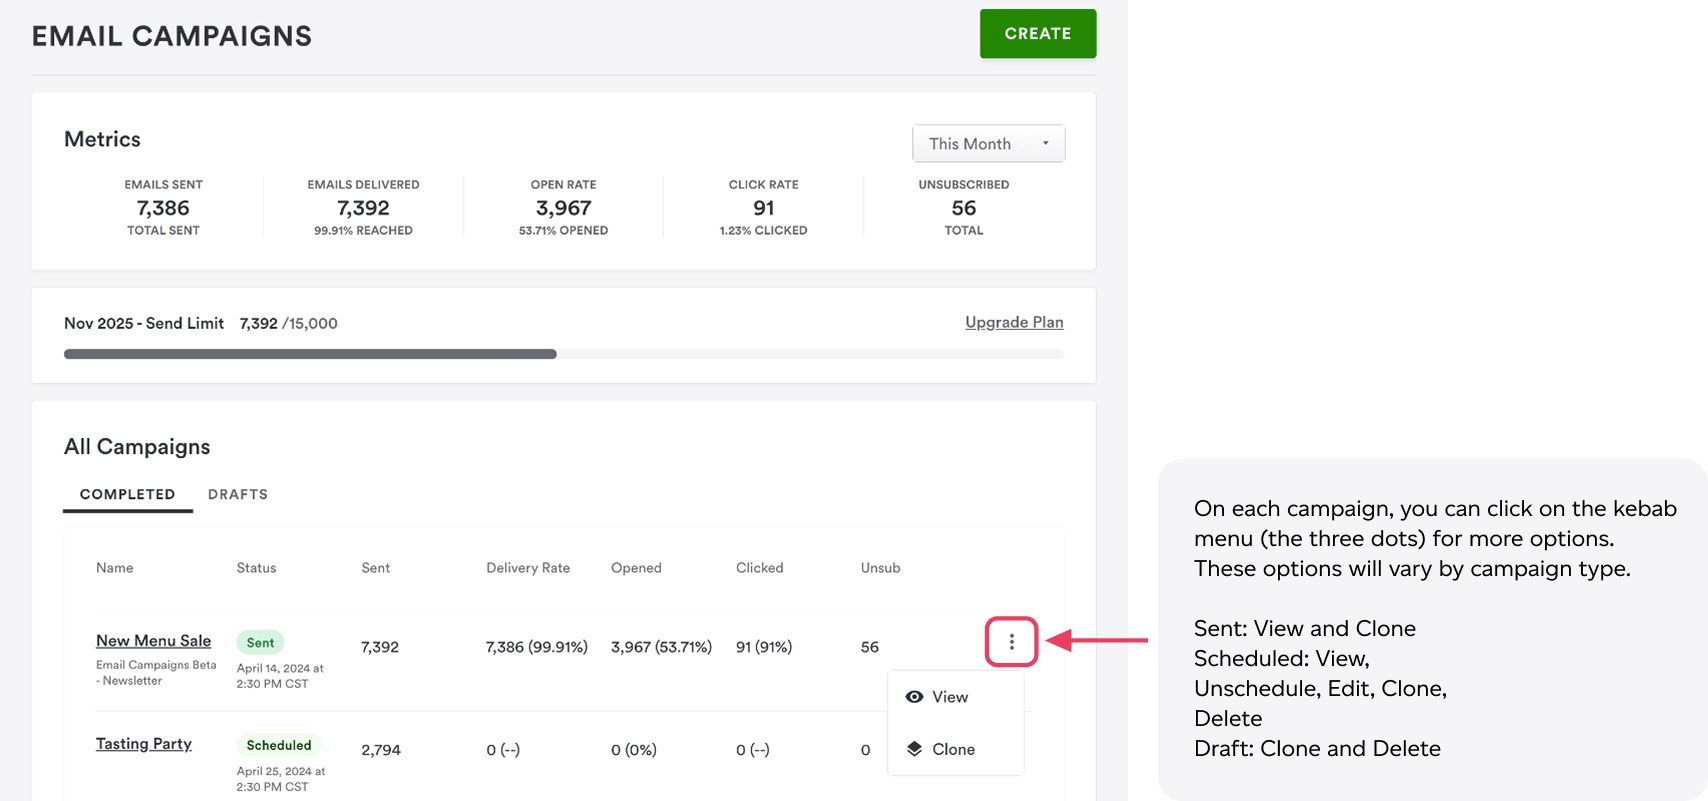
For Scheduled campaigns, you’ll be able to see when they’ve been scheduled to be sent.
On the Drafts tab, you’ll see your draft campaigns.
Performance and Usage
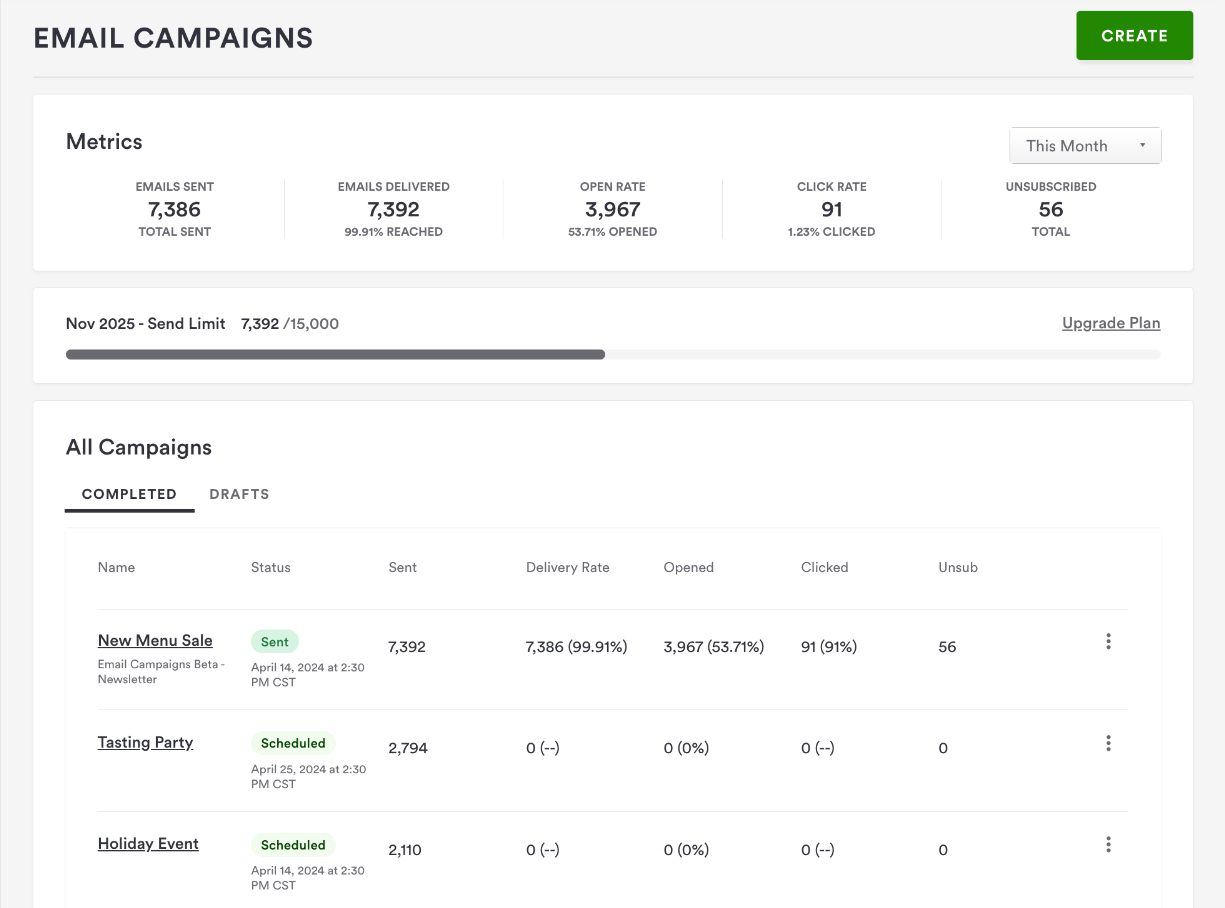
You can view the performance of emails you’ve created in the Campaigns > Email tab in the Marketing section of the main navigation.
You'll be able to see your current send limit and usage throughout the email campaigns area. It shows you the current monthly limit based on your selected tier as well as send and scheduled emails for the month.
If you would like to update your monthly send limit, use the upgrade flow in the usage bar to let us know, we're happy to help.
If you would like to schedule for a future month, go through the campaign creation flow and select a date in the future when scheduling. The usage bar will update to show you available sends for the selected month.
You’ll be able to change the time frame to either ‘This Month’ or ‘This Year’.
You’ll be able to track the number of emails sent, emails delivered, open rate, click-through rate, and unsubscribe rate, both by month-to-date and year-to-date.
Emails sent is the audience selected minus any opt-outs that may have occurred between scheduling and sending the campaign.
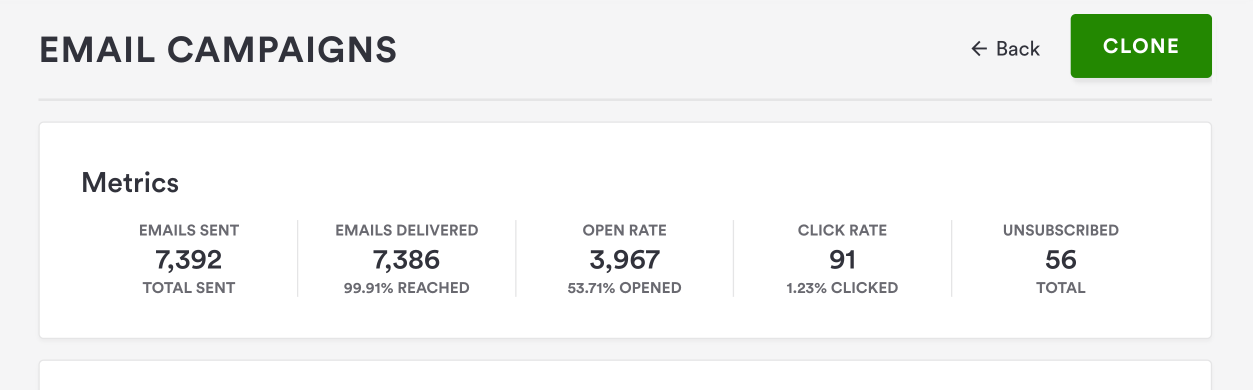
You’ll also be able to view the performance of individual Sent Campaigns.
You’ll be able to see this by clicking on the name of the campaign on the campaigns list or by clicking on the actions menu (the kebab), and clicking “View”.
You’ll be able to track the number of emails sent, emails delivered, open rate, click-through rate, and unsubscribe rate.
Adding Diners to Your Database
Diner Importer is a feature that allows restaurant operators to easily upload large amounts of diner contact information, such as email addresses, phone numbers, and birthdays, in one go using a template excel file into their Diner Database. By using Diner Importer, you can can easily manage their diner database and stay connected with your customers in a more efficient way.
How does it work?
You can download your diner contact lists from existing sources like Mailchimp, Resy, or Opentable.
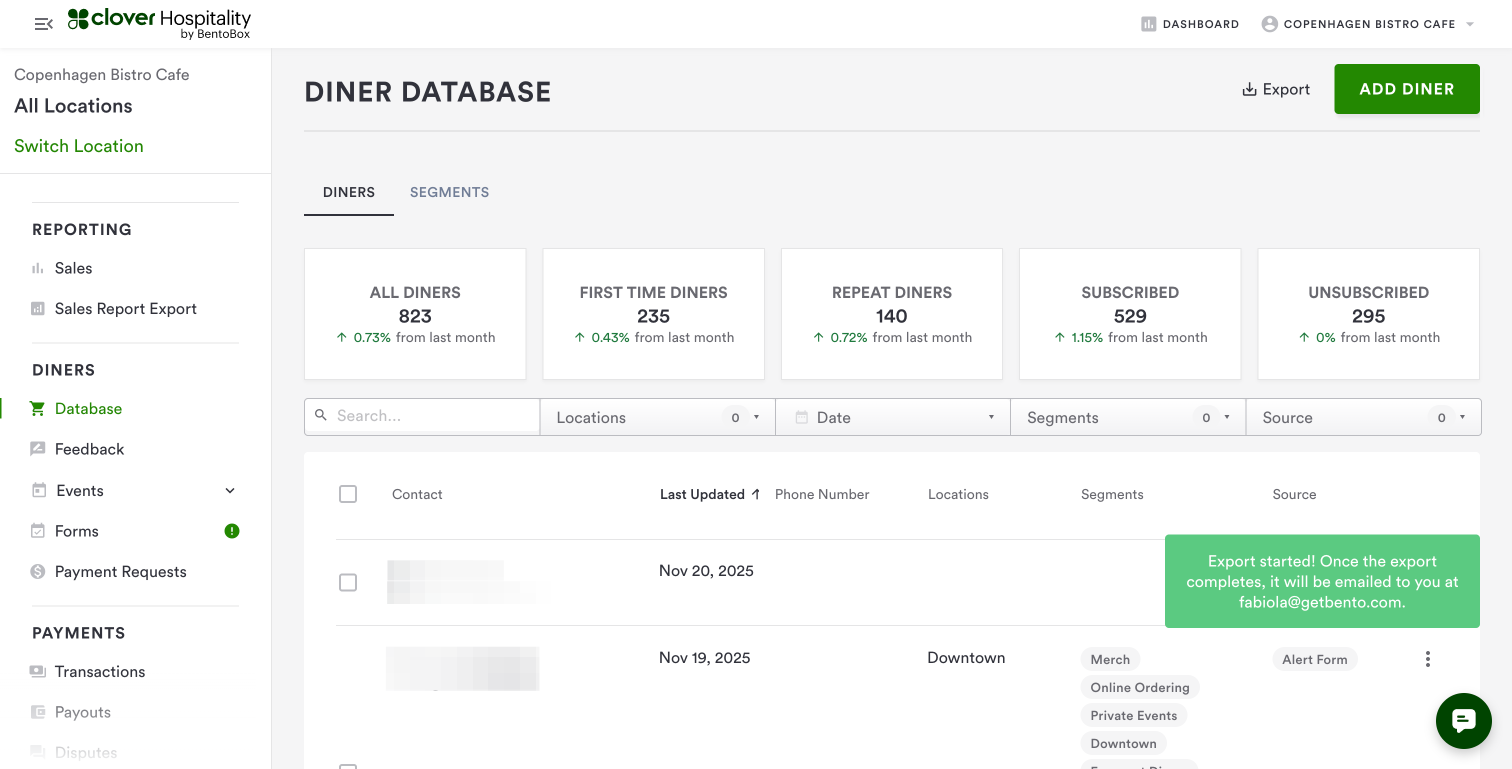
Once you have downloaded your contact list, you can use the “Add Diner” button in their Diner Database to upload a .csv file using the BentoxBox template.
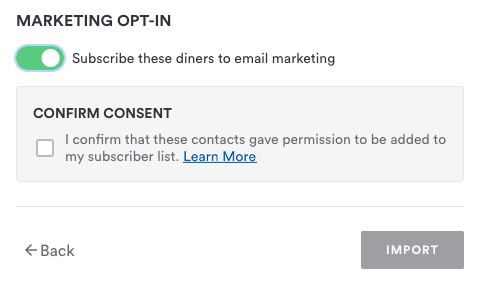
You will have to indicate the source of the list and whether diners are subscribed to email marketing communications and must confirm that they have obtained permission to subscribe diners to marketing communications.
Only diners that have opted-in to email marketing will be added to your audience list on the email campaigns tool.
The Diner Importer tool adds the diners to your restaurant’s database and updates existing diner records with new information.
The tool also provides a downloadable report that shows any diners that failed to import.
How can I collect more Marketing Opt-ins?
You can collect marketing opt-ins at various points in our platform, as shown below. Your diners can opt-in themselves, such as during checkout.
Opt-in Locations | SMS | |
Diner Importer | Yes | Yes |
Diner Signup Website Form | Yes | Yes |
Online Ordering Checkout | Yes | Yes |
Catering Checkout | Yes | Yes |
Reservations | Yes | Yes |
Merchandise Sales | Yes | Yes |
Gift Card Sales | Yes | Yes |