
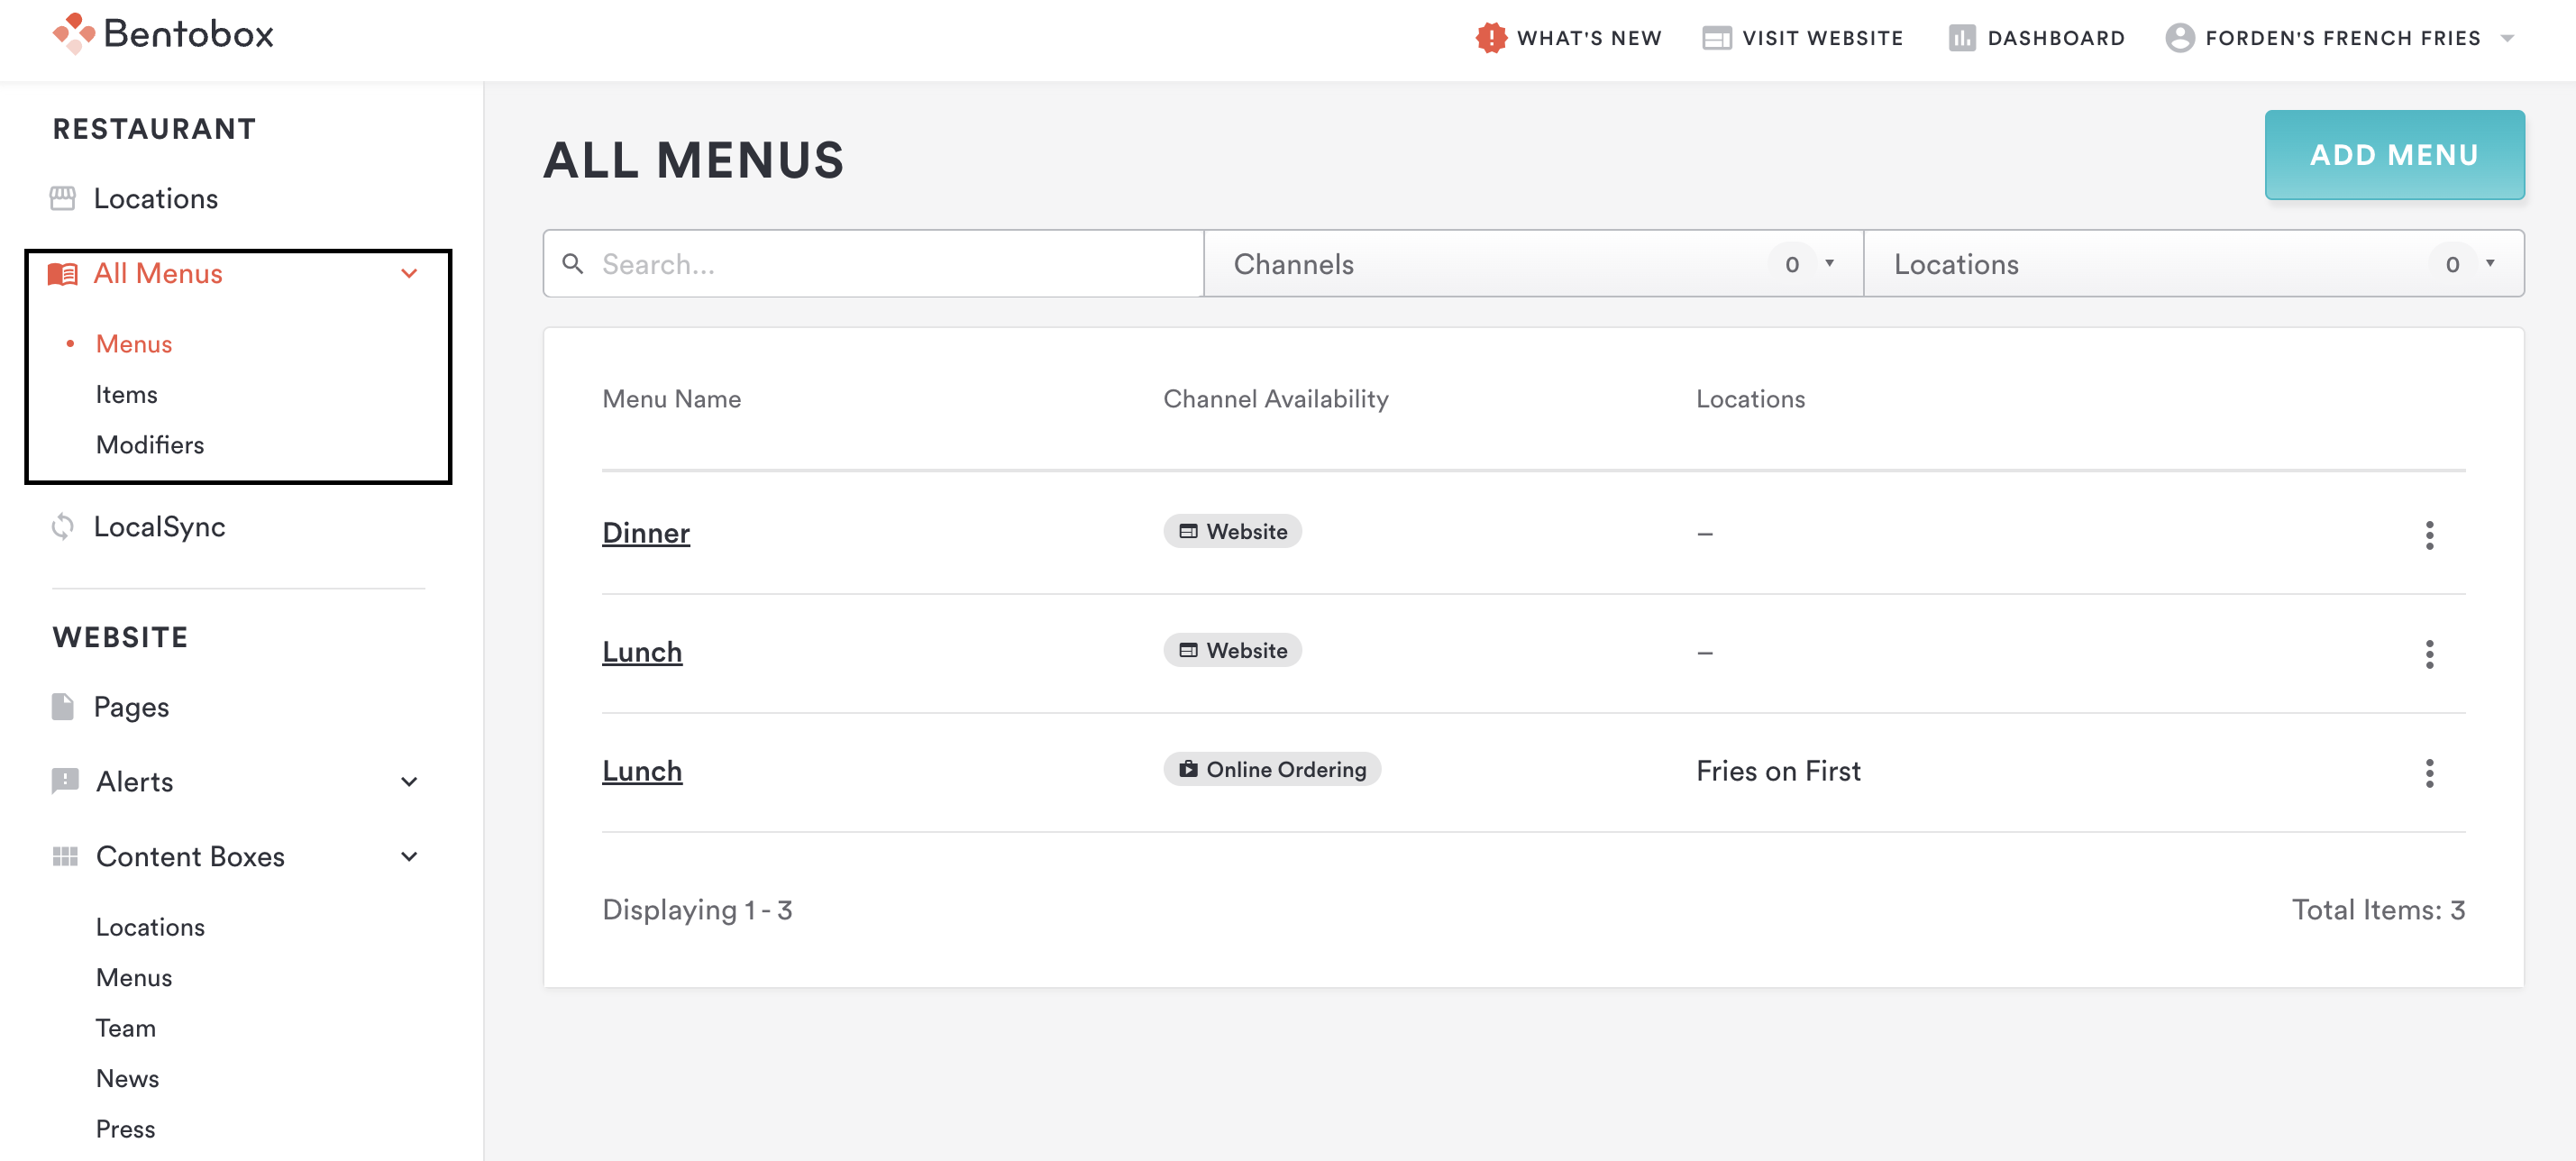
To create a new Menu, you will navigate to All Menus > Menus on the left-hand navigation.
Select Add Menu in the top right corner to begin building a new menu. You will need to select which channel this menu will be for. Each menu can only be associated with one channel, but you can easily clone a menu and associate it with another channel if a menu is shared across channels.
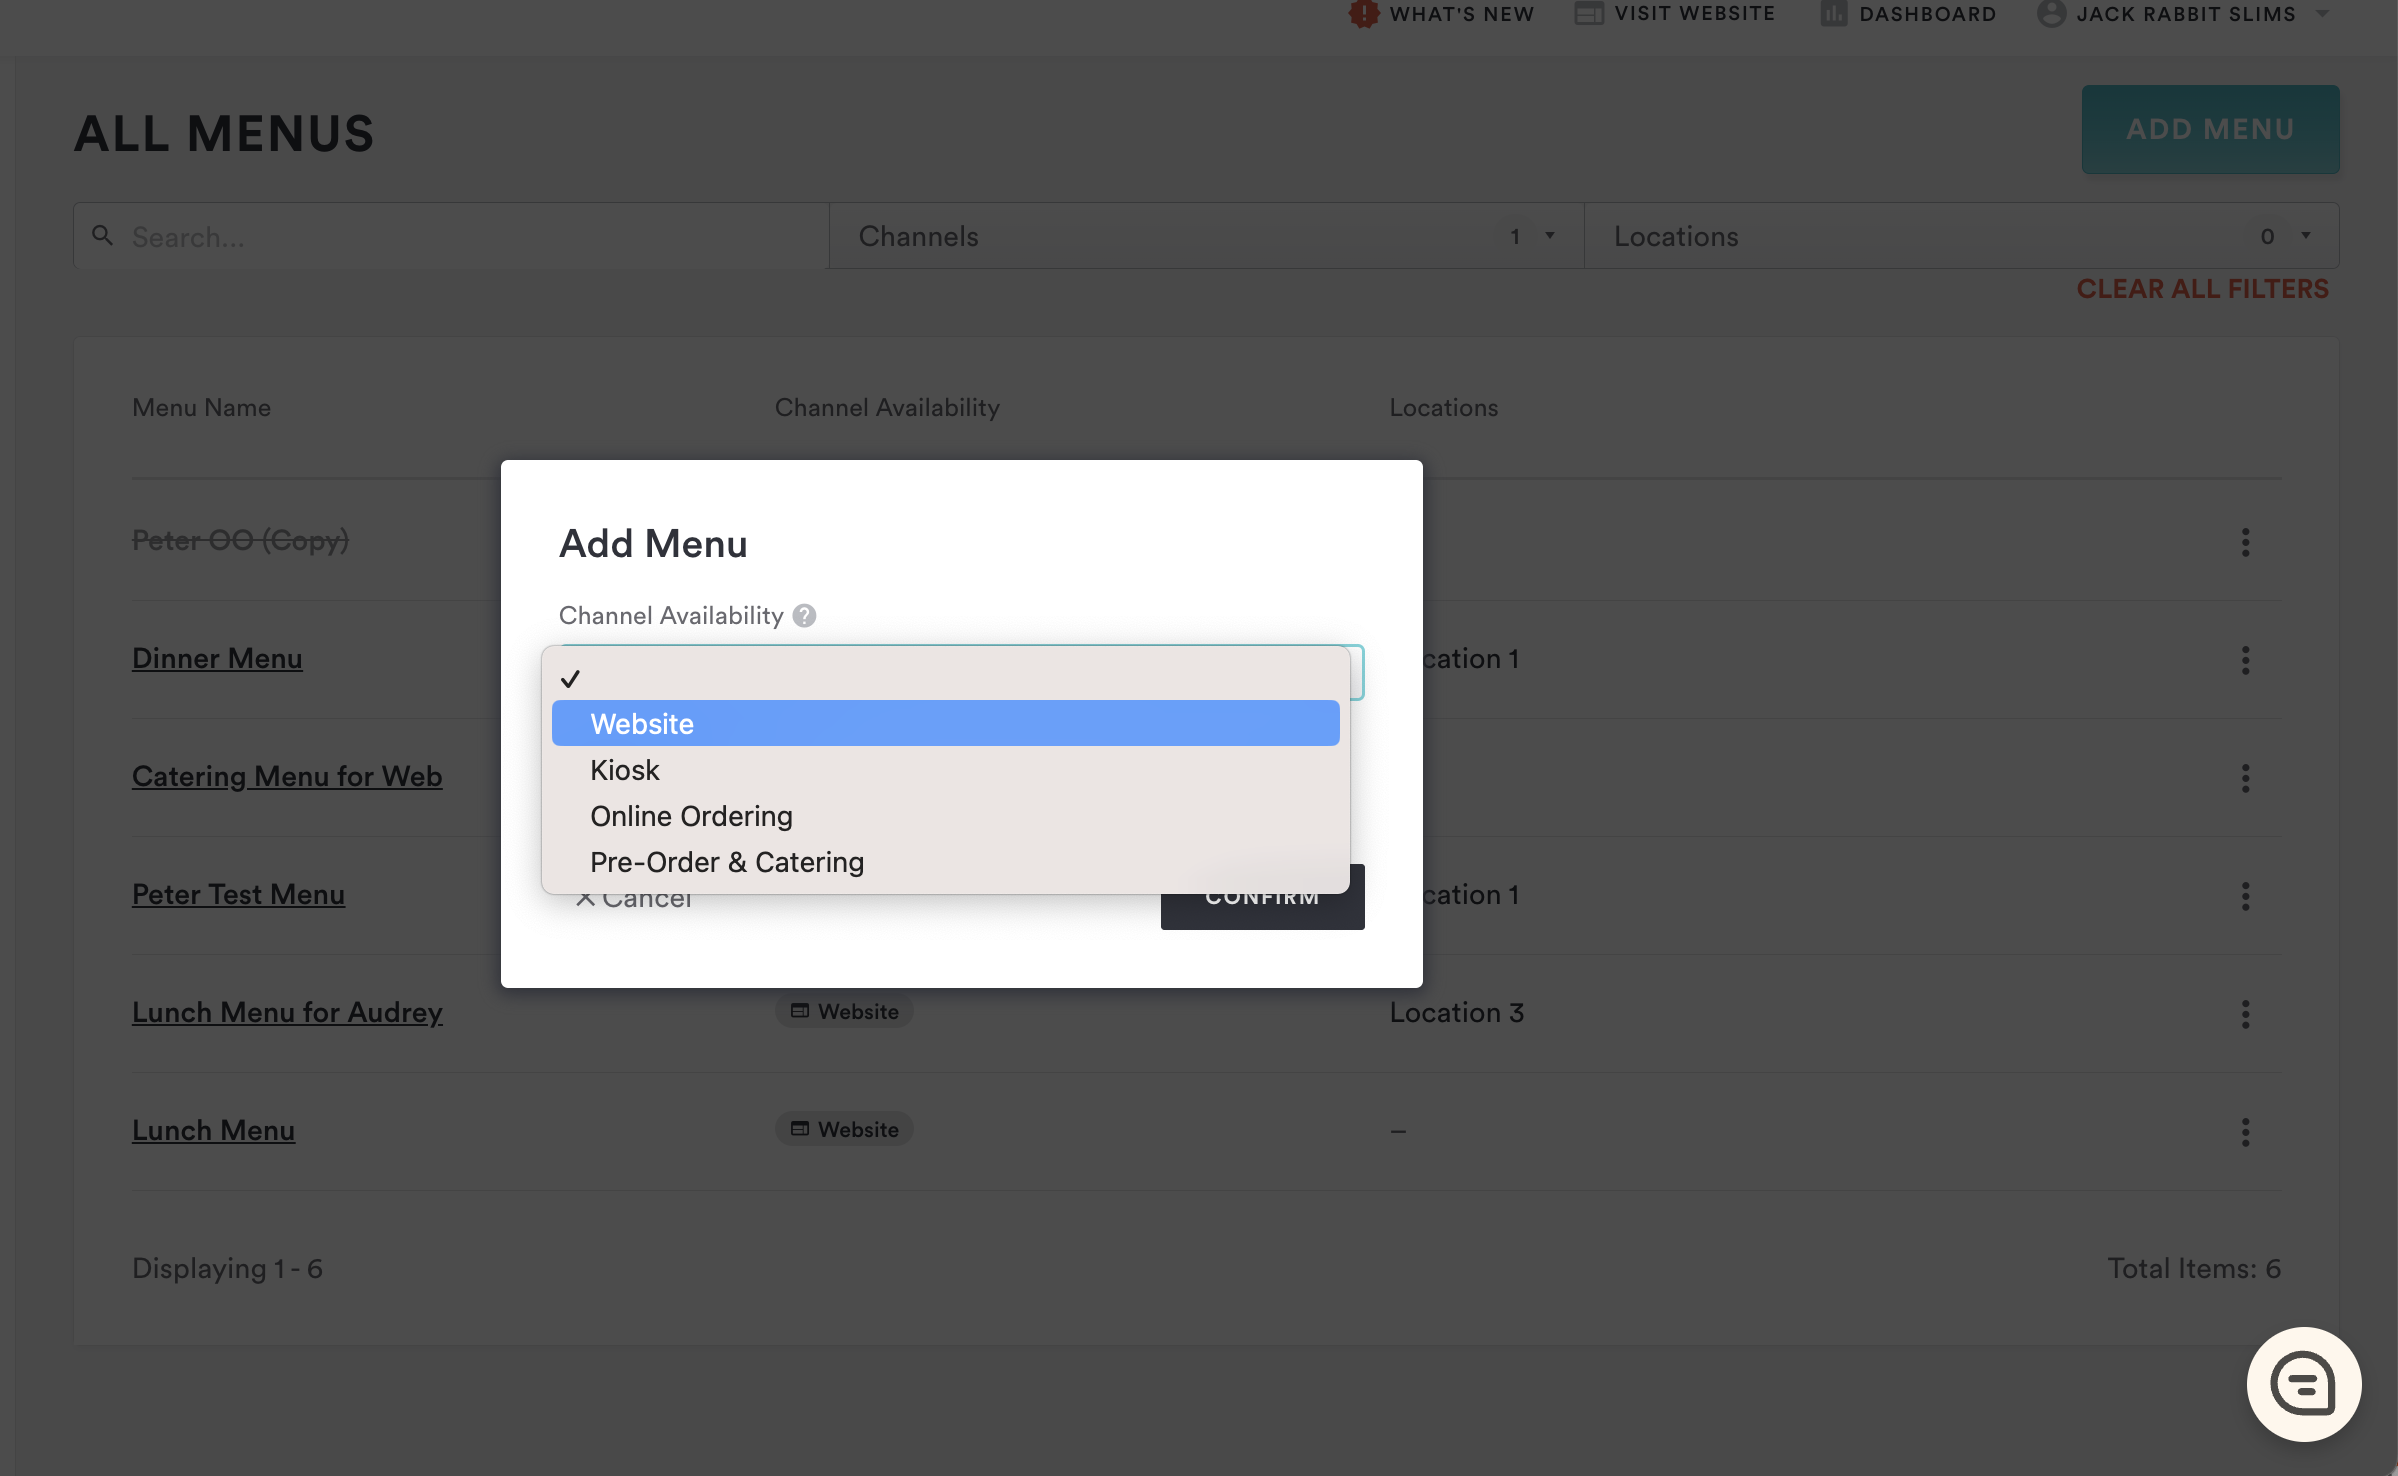
Once you have selected the channel you will move on to building your menu.
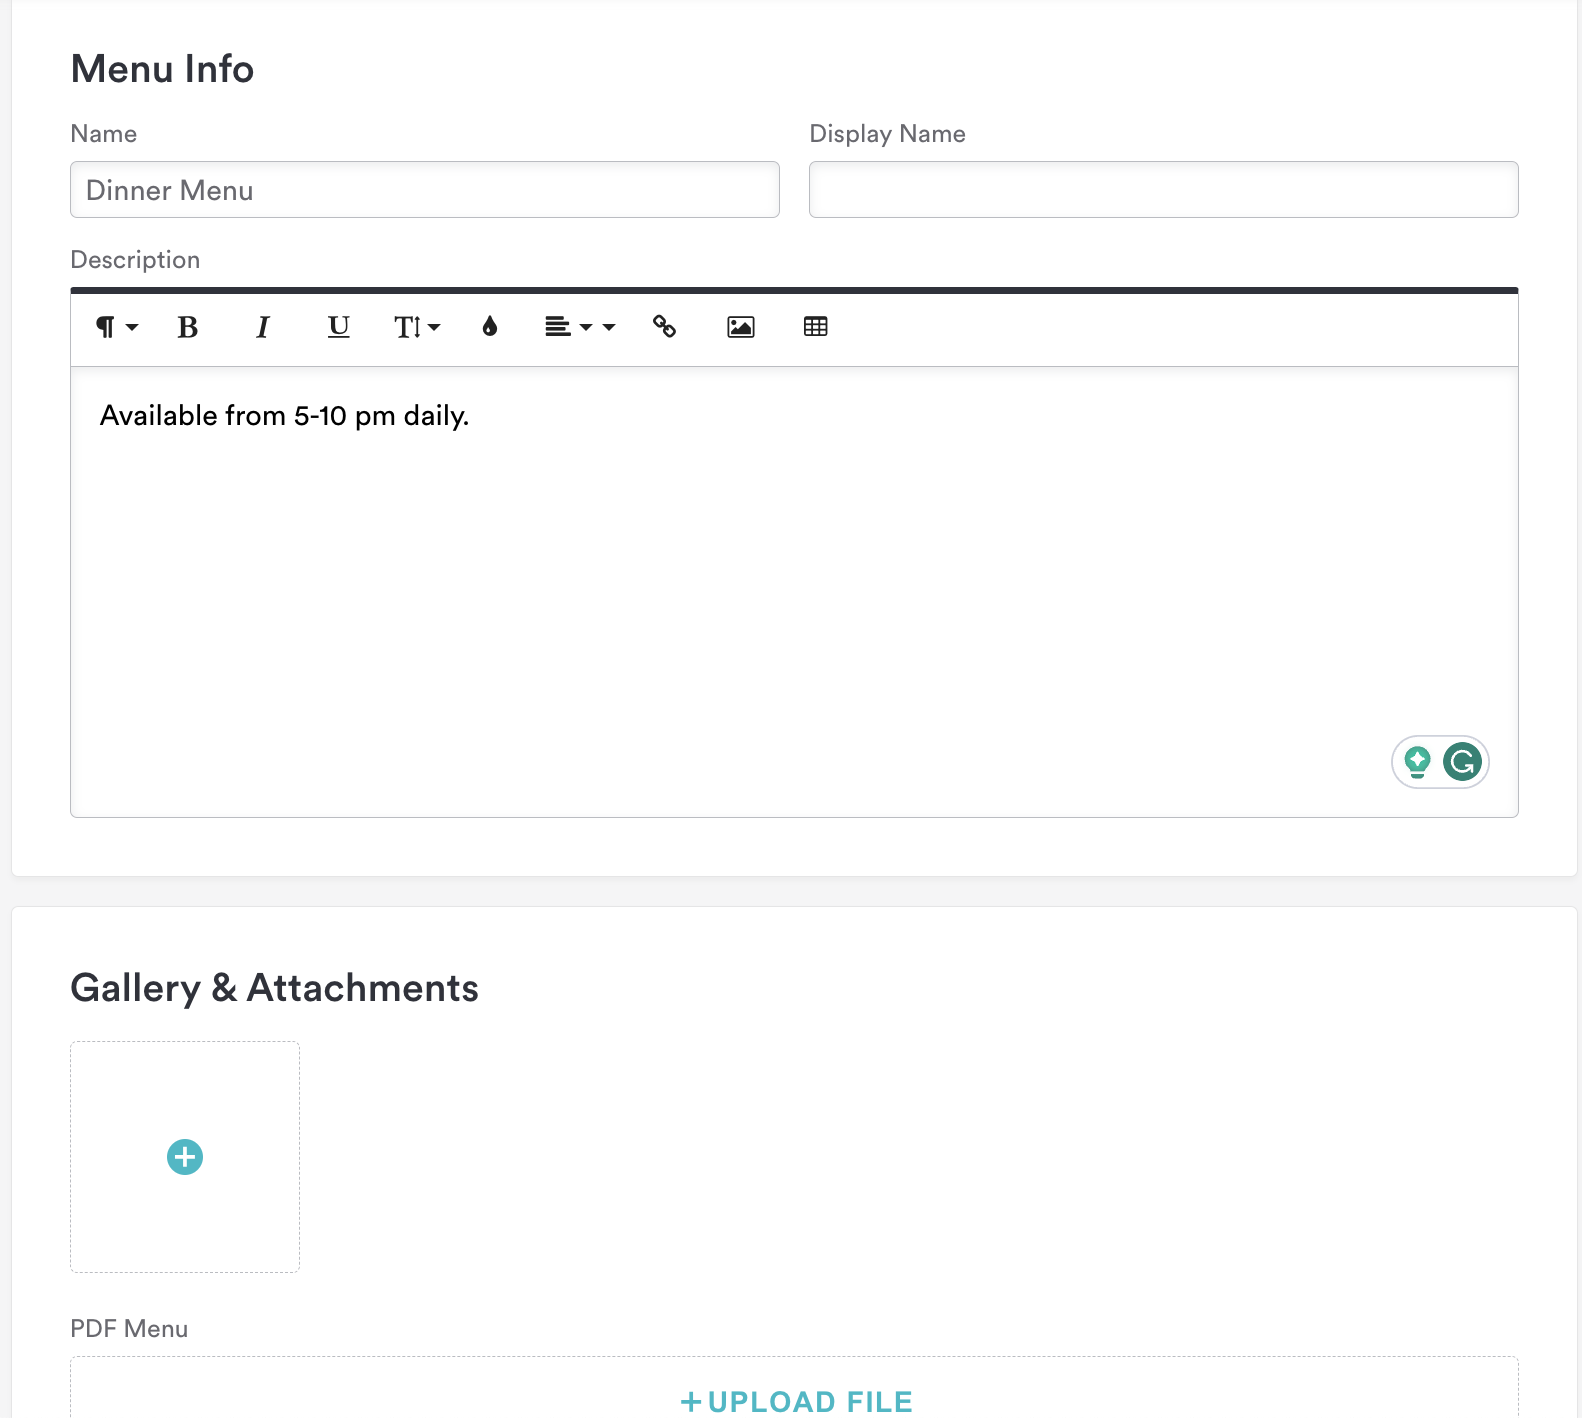
At the top of the page, you will add your Menu Name and Description of the menu. You can also add an image to display with your menu, as well as a downloadable PDF version of the menu if you wish, though not required.
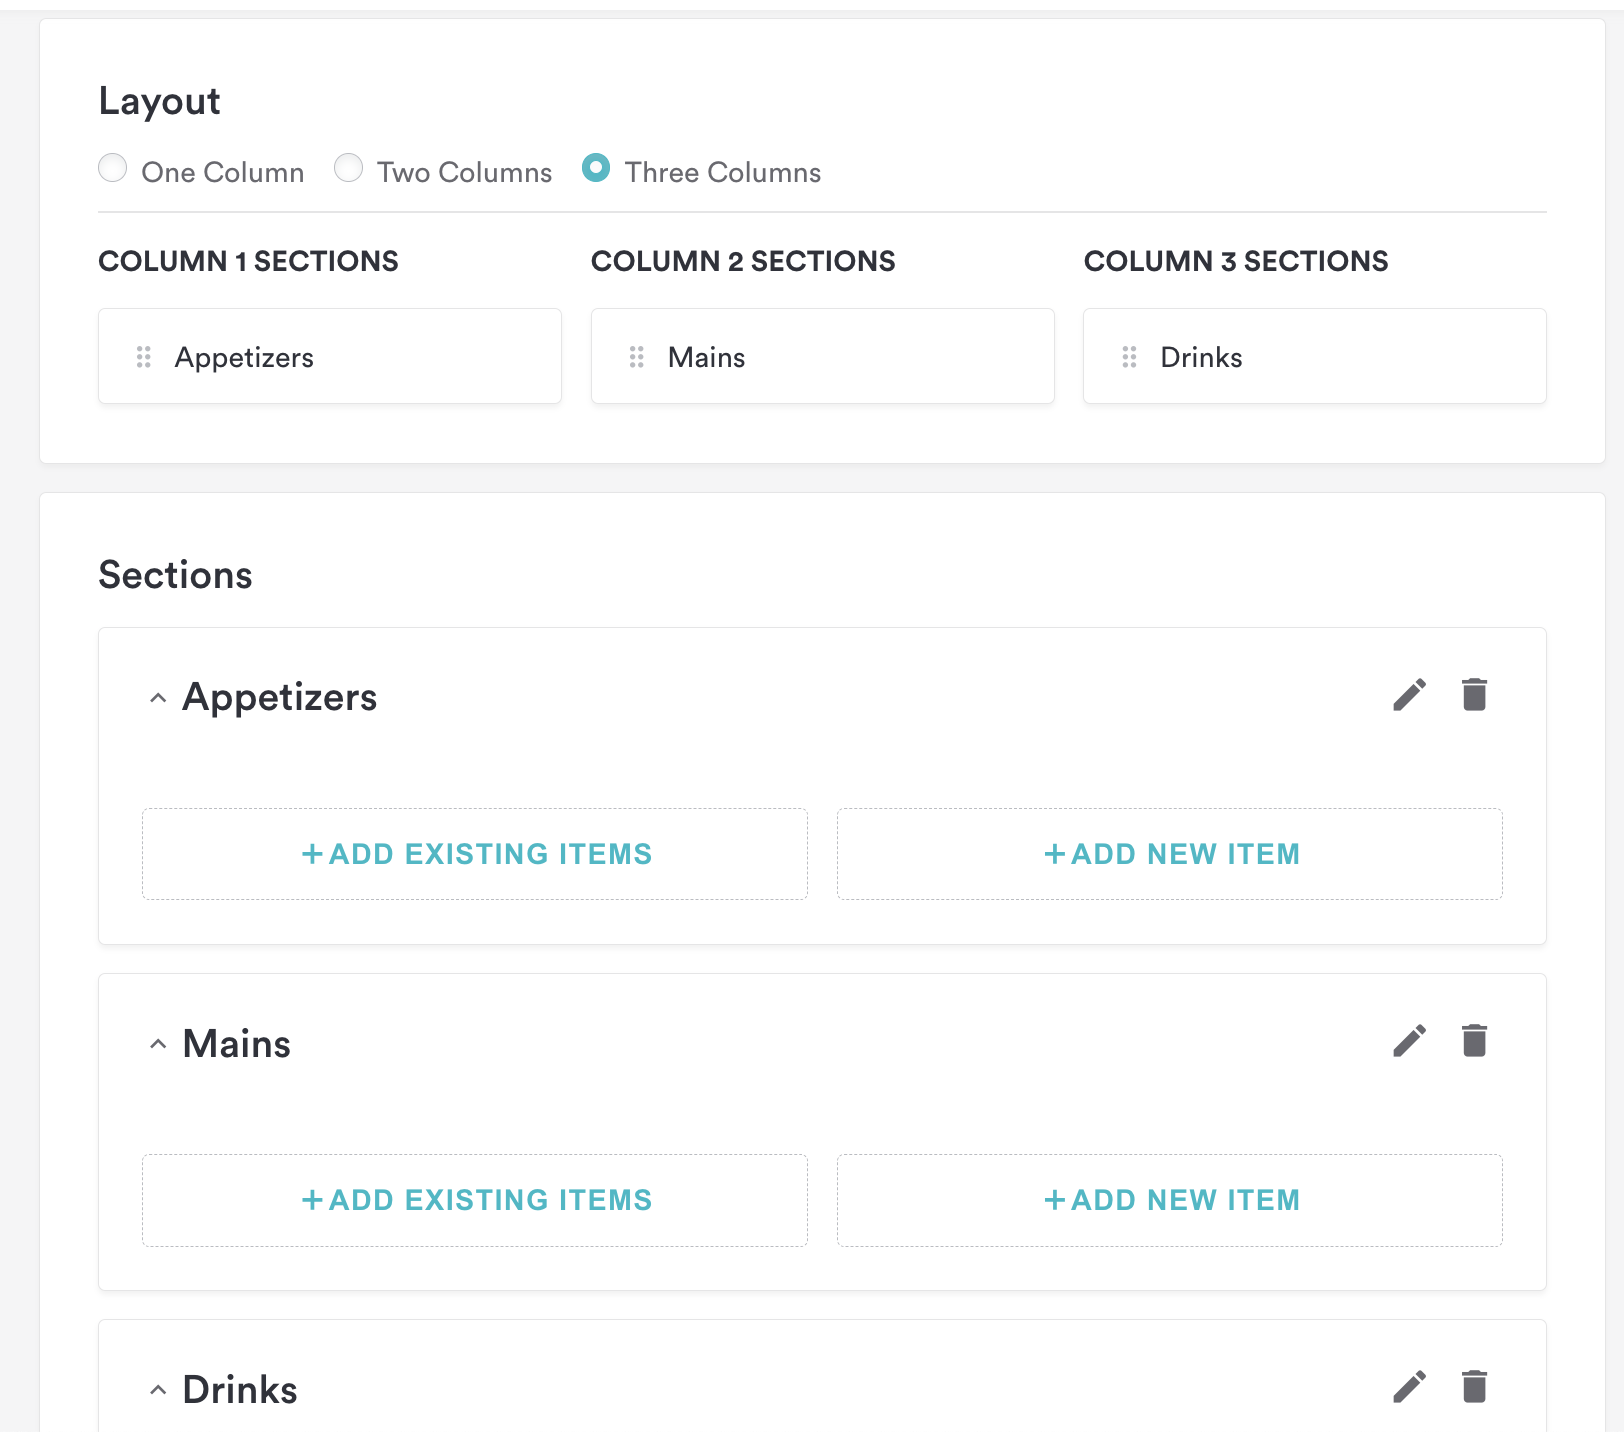
Your menu will be made up of different sections, which can be displayed in a few different layouts: 1 column, 2 column, or 3 column.
You will add menus to these sections; all items must be added to a menu for them to be displayed on your site. You can easily add menus that already exist in your Item bank here by selecting Add Existing Item, or you can create new items right here by selecting Add New Item.
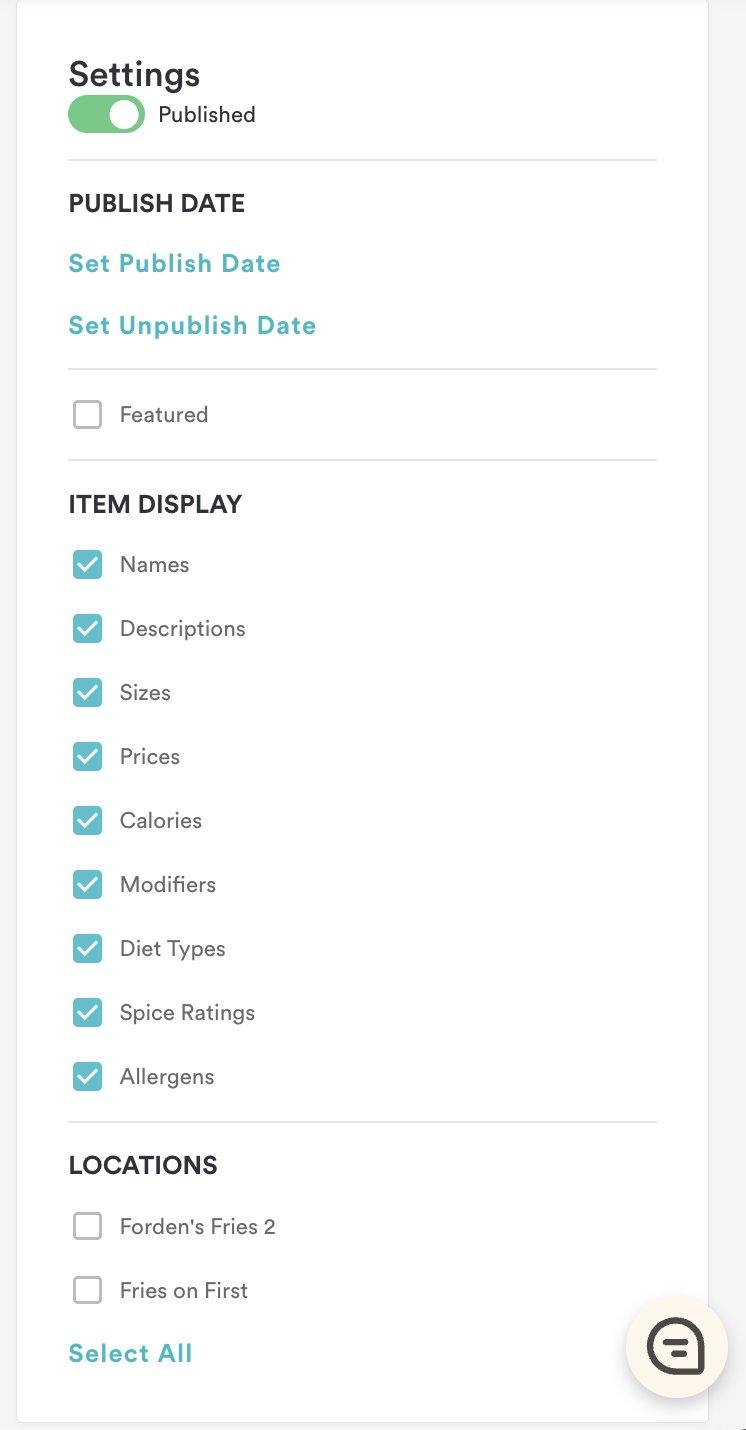
Within the Settings section on the right-hand side, you can adjust your menu to fit your needs. You may publish and unpublish menus at any time, which is especially handy for seasonal menus.
You may also select which features of the items are displayed on each menu, this is helpful if items have a lot of detail for your Online Ordering menus, but don't require as much for your Website menus.
And lastly, you can select which location(s) a menu is available for here.
Once a menu has been created, you can always revisit it and make edits to it by simply returning to the All Menus page and clicking on the menu you wish to edit. The only thing that is not editable is the Channel availability.
If you need any assistance with creating or editing menus, please reach out to our Support Team here.