How to add and edit itemized menus
Edited

Itemized menus are the type of menu we typically recommend for your website. With itemized menus you can add one or more menu sections that each contain items, prices, and optional extra fields like descriptions, spice ratings, dietary types, and calorie counts.


Note that these instructions only apply to itemized menus. Click here for instructions for updating PDF or JPG menus.

Adding a new section to an itemized menu

Itemized menus are organized using sections. Before adding your items, create one or more sections that will house the individual items.

  1. Log in to the BentoBox backend and click on Content Boxes, then select “Menus” from the list that appears.

    Image_2019-04-02_at_10.39.20_AM__1_.png

  2. Click on the blue “Add New” button at the top right corner of the page.

  3. Fill in the fields below on the “Menu Information” dialog that appears.

    Image_2019-04-05_at_11.28.31_AM.png

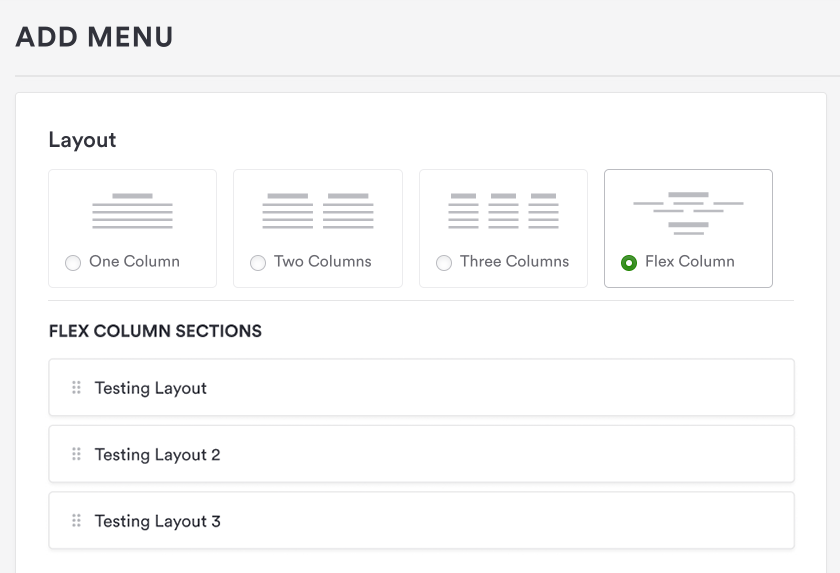
    • Layout: choose a layout from the dropdown with the preferred column display

      • One Column: will display a one column menu.

      • Two Columns: will display a two column menu.

      • Three Columns: will display a three column menu.

Note that if you need to switch the layout later, you may lose any menu content that you’ve already added, so make sure you’re selecting the correct layout from the dropdown.

  • Menu Name: the name of the menu you are editing.

  • Item Options: Note that you can enable these item options but leave them blank for menu items which they don’t apply to. You can also return at any time to add or remove options.

    • Spice Rating: display an icon for spicy menu items.

    • Dietary Type: display if an item is vegetarian, vegan, kosher, halal, and/or organic.

    • Allergens: display if an item contains allergens such as dairy, peanuts, gluten free, and more.  

    • Calories: display a calorie count for the menu item.

    • Description: display a short description of the menu item.

  • Locations: If your business has multiple locations, check any locations that correspond to the menu you are editing.

Editing Menu Sections

To edit an existing column or section, click on the new section to type in the name and description (if any).

  1. Enter a title and optional description for the menu section.

  2. Click "add menu item" and a new modal will prompt.

    Screen_Recording_2019-04-05_at_11.48_AM.gif

  3. You can now add items to the section (see below), or click the “Save” button to save your changes. Now if you click the “Visit Site” link at the top of the screen, you will be able to view your changes.

Adding items to a section

Once the menu item modal prompts, you'll be able to add each item and choose their respective pricing options and dietary indications.

  1. Click “Add Another” to prompt a new item and the "Done" button once all of them are completed.

  2. Enter the item’s title and price and fill in any other applicable item options.

    Image_2019-04-05_at_1.04.31_PM.png

  3. To associate an image with a menu item, select the menu item to prompt the modal and click on the "featured photo" thumbnail at the bottom right. Click the blue “Add” button that appears and choose an image.

    featured_photo.png

  4. To add pricing options to a menu item, select the desired options in the top right of the modal.

    pricing_options.png


    Check the boxes for the pricing options you’d like to add.

    1. Price Label: display a label next to the price.

    2. Price Unit: display a price per unit for items that come in multiples (“per dozen”).

    3. Price Range: display a price range for items that vary from a minimum to maximum price.

    4. Calorie Range: display a calorie range for items that vary in their calorie count.

Item Add-ons: display add-ons for an item, with a name and price or price range.

Continue adding items, or click the “Save” button. Now if you click the “Visit Website” link at the top of the screen, you will be able to view your changes.

Adding or editing text sections

In order to customize your menu with some free form content, you may want to add a text section to your itemized menu. This allows you the flexibility to add some introductory or explanatory text. To add a text section, follow the steps below.

  1. Click the blue “Add Text Section” button.

  2. A text editor will appear. Click here for instructions on using the text editor.

    add_text_section.png

  3. Enter the text or other content you’d like to include in the text section.

  4. When you’re done editing the text, click the “Save” button. Now if you click the “Visit Website” link at the top of the screen, you will be able to view your changes.

Reordering itemized menu sections and items

Reorder menu sections

To reorder menu sections, log in to the BentoBox backend and click on Content Boxes, then select “Menus” from the list that appears. Hover over the menu you want to update and click the edit icon that appears.

Click on the chevron arrows next to any of the menu sections for the modal to prompt.
Now you can drag and drop by clicking and dragging the grid icon to the left of each section.


Reorder menu items

To reorder menu items within a section, click on the section that houses the item you want to reorder. You’ll now see a grid icon to the left of each item.

Drag and drop by clicking and dragging the grid icon to update the order of the menu items.

Removing itemized menu sections and items

Remove menu sections

To remove a section from an itemized menu:

Option 1: Locate the section you want to remove and click on the "delete" icon; this will prompt a confirmation message.

Option 2: If you are editing the section, a red button will appear where you can also click to delete the entire section & menu items.

Screen_Recording_2019-04-05_at_02.02_PM.gif

Note that this cannot be undone. To remove a single item, see below.

Remove menu items

To remove an item from an itemized menu, edit the menu, then locate the item you want to remove and click on the delete icon.

Image_2019-04-05_at_2.05.21_PM.png