
Creating & editing items
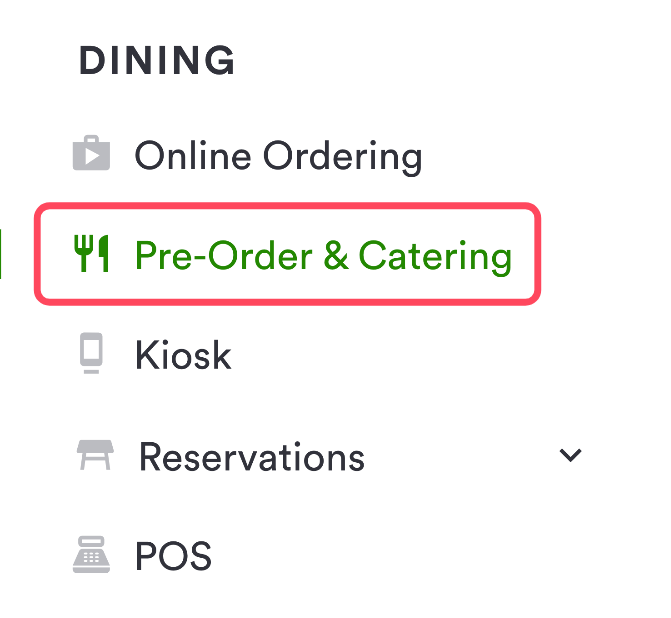
Log in to the backend and navigate to the Pre-Order & Catering backend.
Go to MANAGE MENUS > Items > ‘Add Item’ button at the top right to create a new menu item.

Here are the details you can add or edit for each menu item:
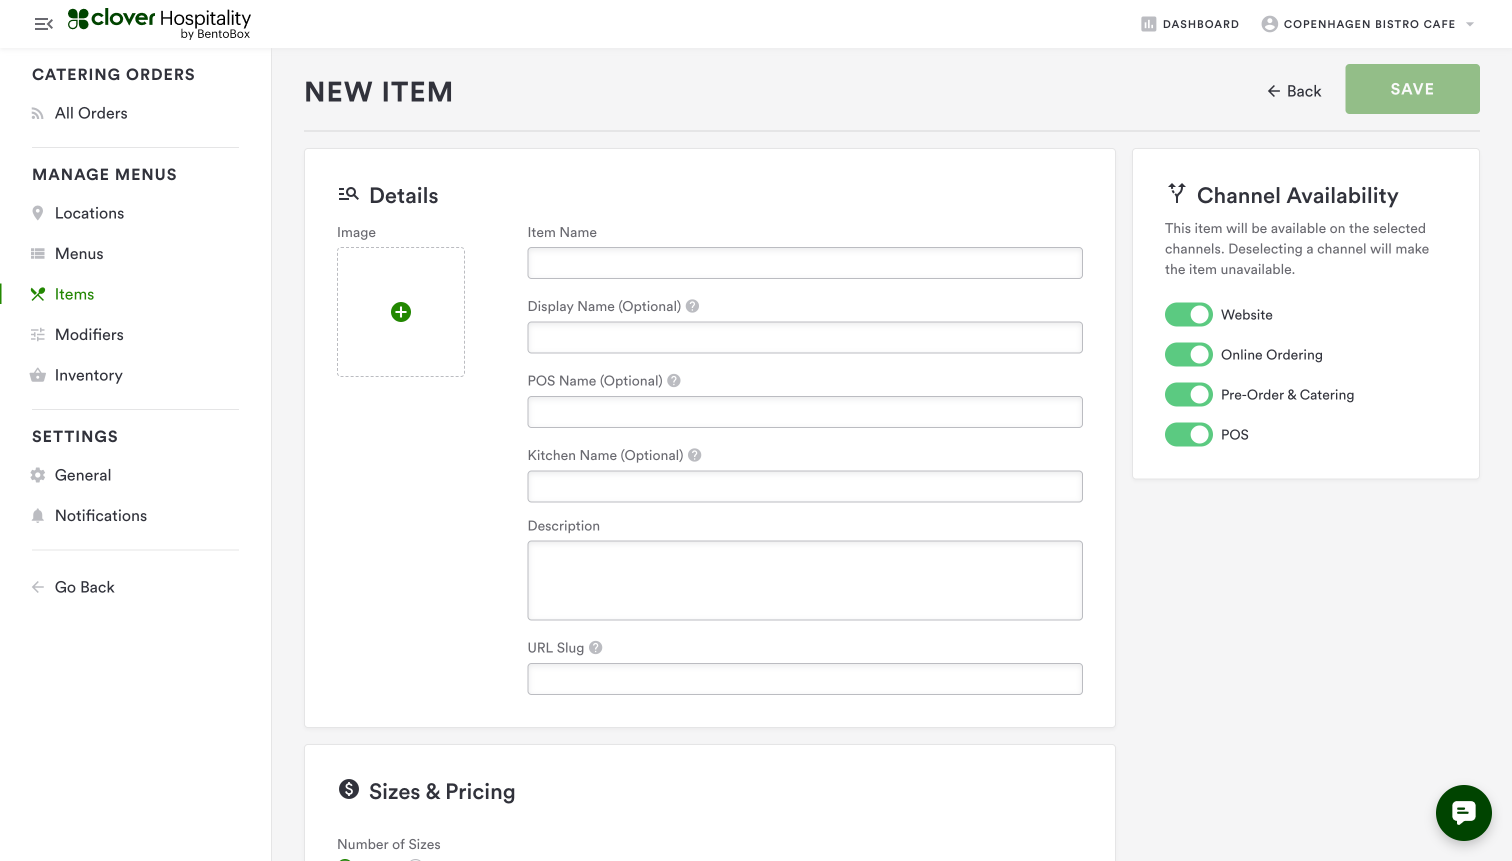
Item name: This is what the item will be called within the backend, and what your guests will see on menus if you do not add an item display name (keep reading).
Item Display Name (Optional): If you set this, it becomes the name that your guests see when the item appears in your Online Catering store on your website.
Description: This will appear in your Online Catering store for your guests to see, to give them more information on an item.
Menus: This where you will later see all of the menus that this item is associated with.
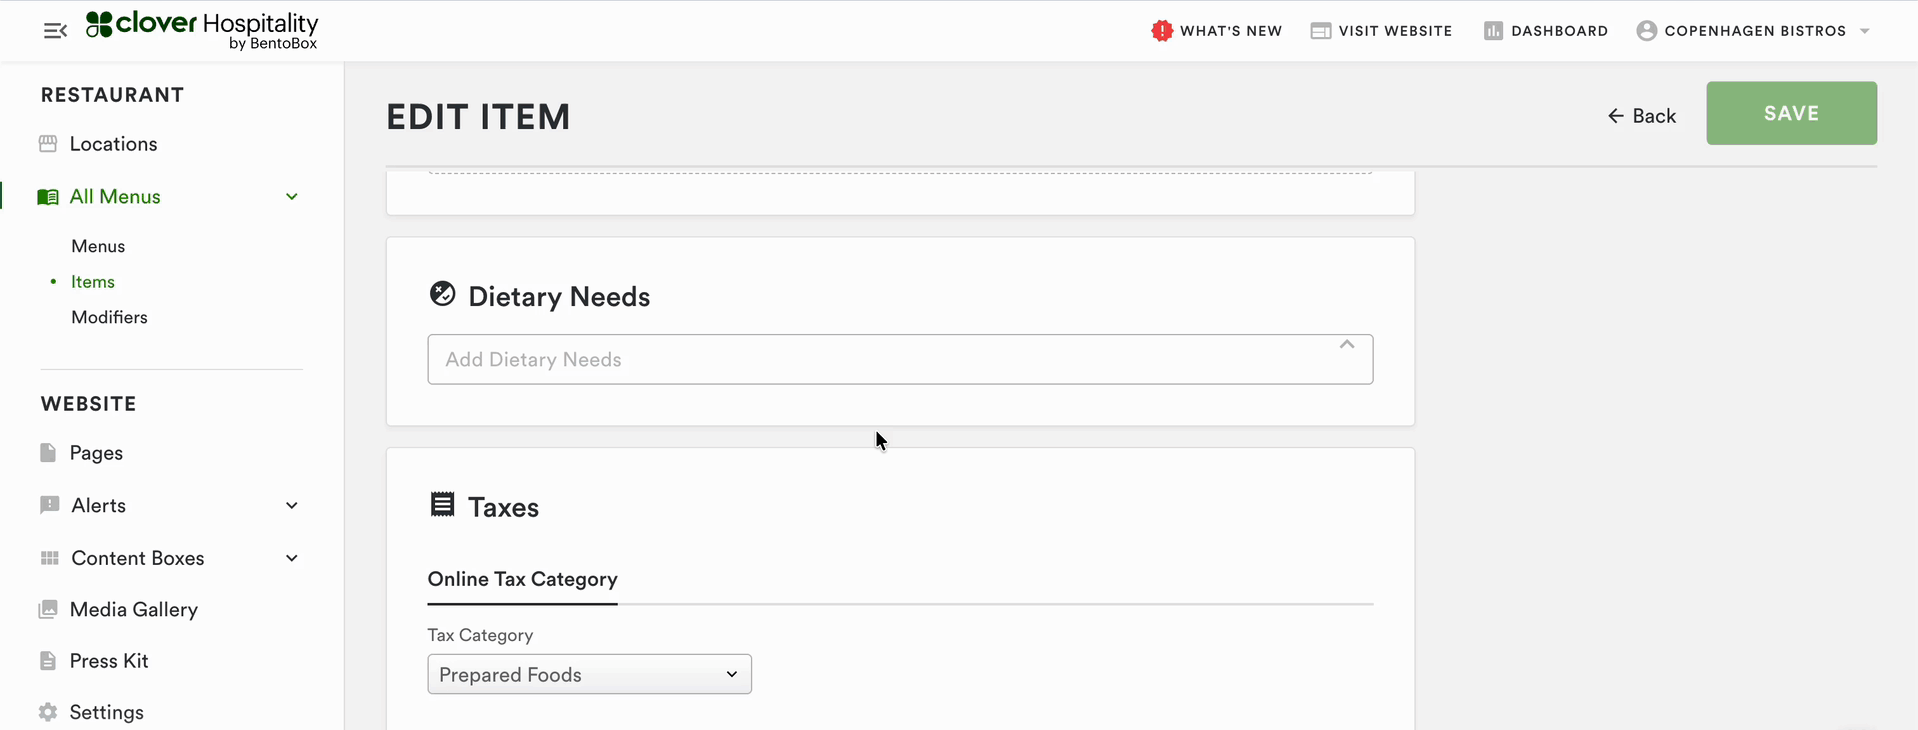
Item Image: Optional. If you add an image of your item here, it will show up in your Online Catering store. Images should be at least 1800px wide and 1260 px tall. Learn more about photography specs.
Charge Type & Quantity:
This determines how the pricing and quantity for this item works.
Per Dish: Total price is item price multiplied by selected item quantity.
Per person: Total price is item price multiplied by selected number of people.
Per order(Flat Rate): Total price is set at a fixed item price.
You can optionally set a minimum item quantity or per person quantity.
Sizing & Pricing: This determines whether the item is offered in one size, or multiple (e.g Small, Medium, Large).
Tax Category: Some items have special tax treatment that may depend on your local laws. Choose the relevant tax category here.
After making edits to any of the fields above, click the “Save” button to add or update the item.
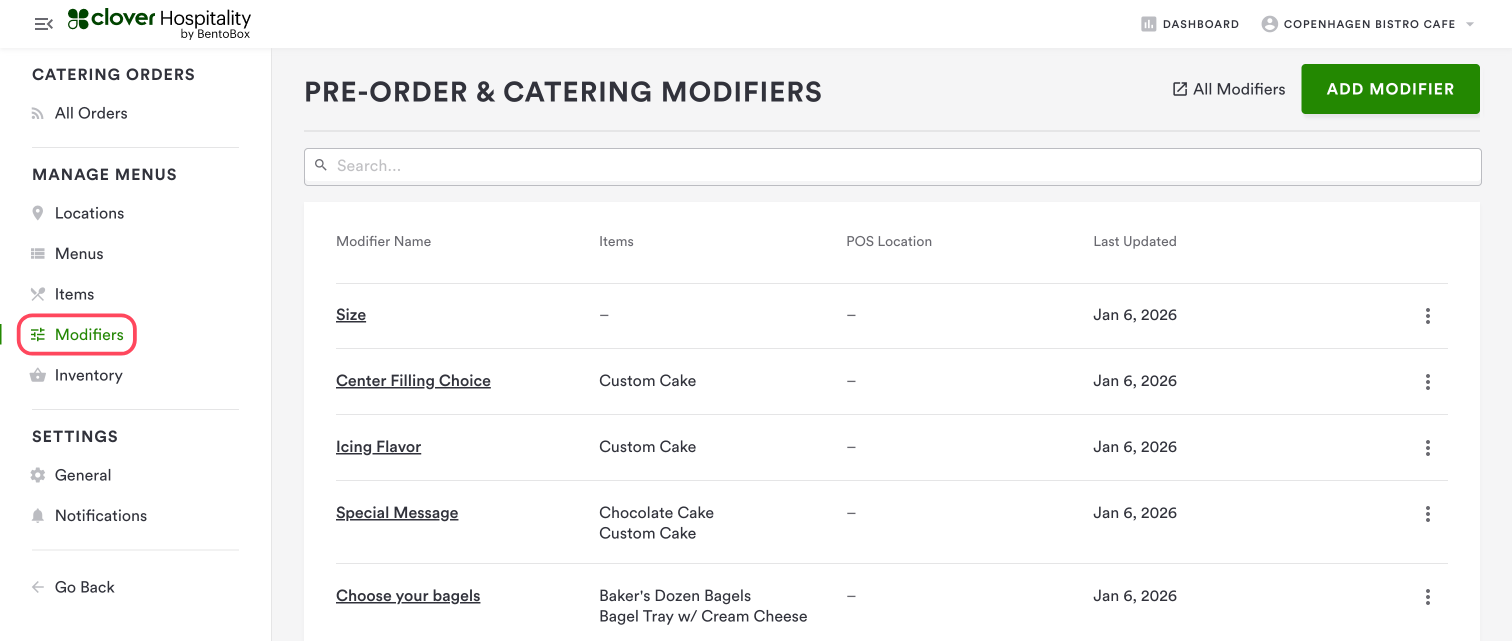
How to add item modifiers to items
Item modifiers provide optional or required customizations to menu items for your guests.
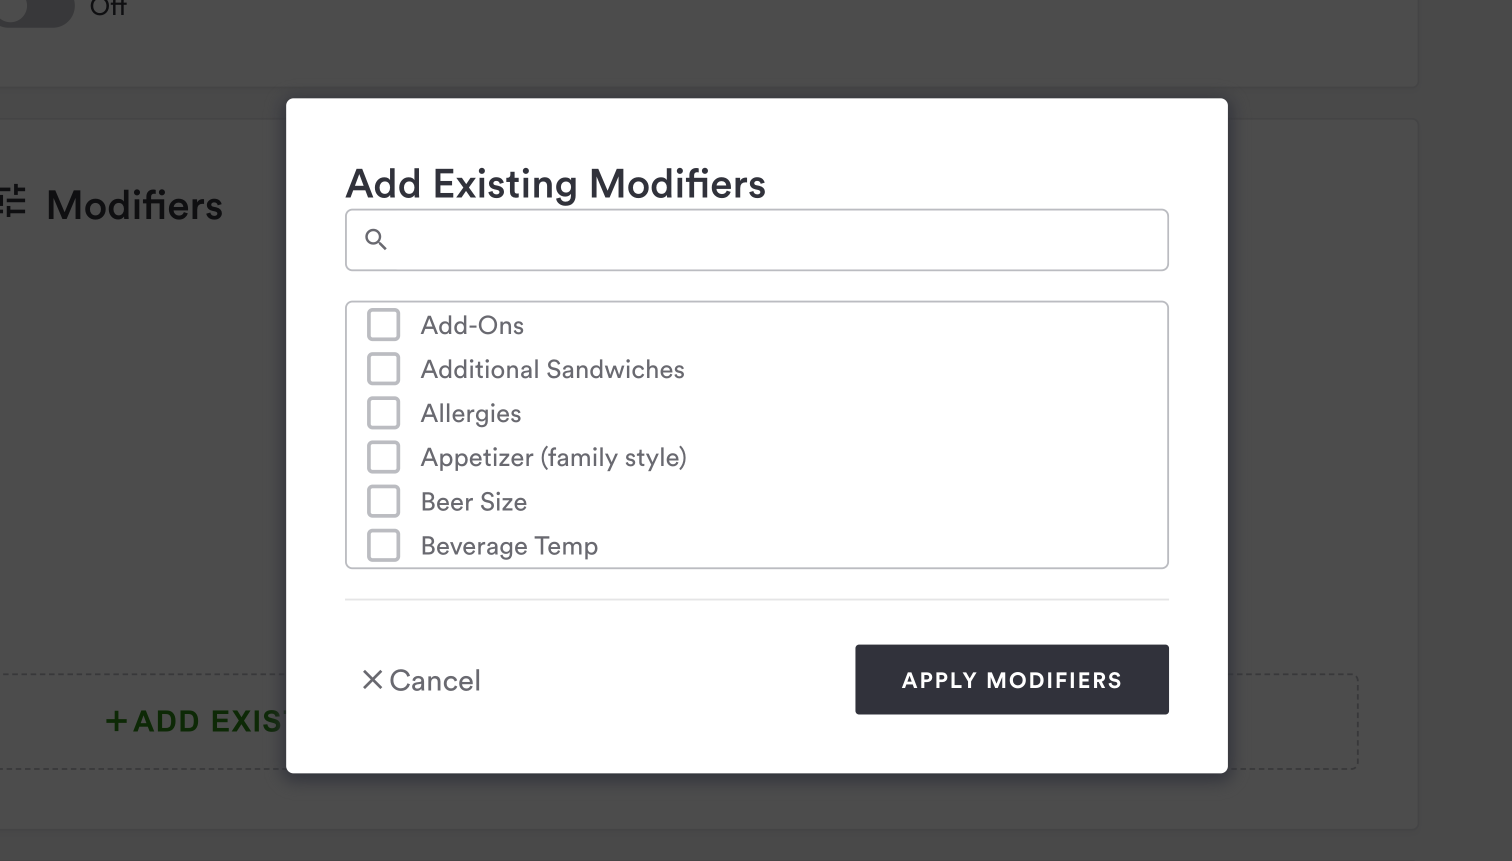
Modifiers are created in the Modifiers section on the left-hand side, and once created they can be applied to multiple items to simplify the process.
Modifier Name: This is the name that will show to your guests within your store menu.
Helper Text: Optional. Enter a brief description in this field to help your guests make a decision (i.e. “Please choose at least one topping.”).
Modifier Selection: Choose how you would like your modifier options to be selected. “Select” will allow one or more options with checkboxes. “Set Quantity” will let a quantity number be set for each option. “Input Text” will show a freeform text input to capture special instructions, e.g. a name for icing on a cake.
Number of Choices Allowed: Set the lowest and highest number of choices that can be selected.
Example 1: If you have 3 choices of bread for a sandwich, you would want to input a value of “1” for both “At Least” and “At Most” followed by the three types within modifier option. This would translate to requiring your guest to choose only 1 bread type from 3 options.
Example 2: If you have a burger item, you may have a modifier called “Cheese” with a few options like “Swiss” or “cheddar”. Since cheese may be optional for a burger, you would input a value of “0” for “At Least” and a value of “1” for “At Most”. This would translate to having cheese be optional on the burger, with a maximum choice of 1 option for Cheese.
Modifier Options: Add the individual values for modifiers and any price variances. These prices will be totaled across modifier choices, then combined with the item price before being added to cart. For example, if a burger is $10 and Swiss cheese is $1 someone’s order would total to $11 before taxes if they added Swiss cheese on their burger.
Once a modifier has been created, you will be able to select and apply modifiers to items within the item settings.
How to add dietary restrictions to menu items
For each menu item, you have the ability to add dietary needs information using a type ahead dropdown search bar.
Click 'Save' once you have made your selections.
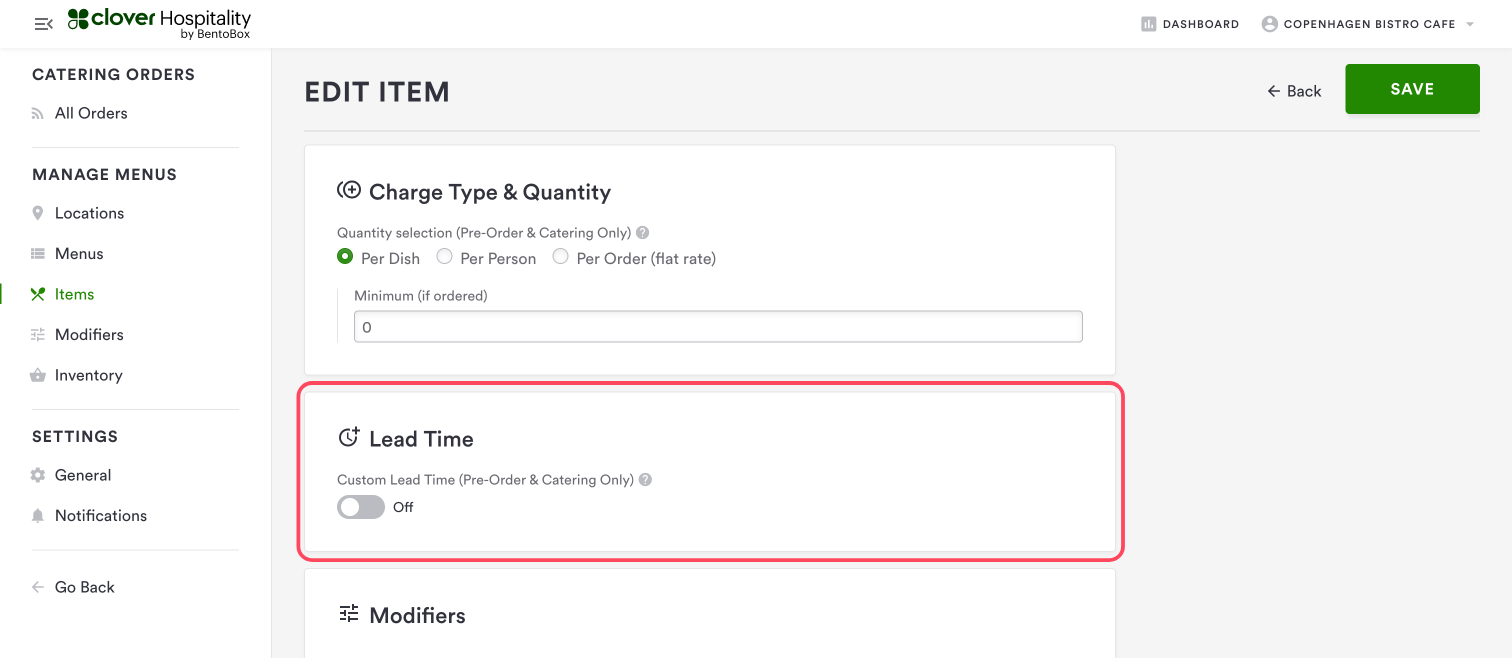
Setting an item-level lead time
Online Catering lets you set a lead times for your guests. A guest can only order food if they choose a fulfillment time further in the future than the longest applicable lead time.
You can set lead times for an entire menu, but you can also set an optional lead time on an item. When determining if a guest can order a particular item, we look at the item level or menu level lead time - whichever is longer - and use that to determine if they can add an item to their cart.
For example, if your menu lead time is 2 hours, guests would normally need to order at least two hours in advance. If you have a special item that requires 1 day of item-level lead time, for a guest to be able to add it to their cart and check out with that item, they would need to choose a fulfillment time at least one day in the future.
To turn on an item-level lead time, toggle on the Custom Lead Time toggle. Select a time in hours or days.
Go Back: Location settings for Online Catering
Next: Creating & editing menus