
Creating & editing menus
To create a menu for Online Catering, you associate existing items to that menu, and then attach the menu to one or more locations. You can have a menu attached to multiple locations, and you can have one item on multiple menus. You can re-use existing menus and items and share them across many locations.
While each location can have many menus, only one menu is available and visible at a time. Two menus cannot show up at the same time in your Online Catering store for your guests. Lastly, your Pre-Order & Catering menu exists separately from your general website menu, which is also located in your backend by going to Content Boxes > Menus.
When managing menus for Online Catering, it is most helpful if you already have a few menu items ready, including names, descriptions, and prices.
Creating or editing a menu
To create or edit a menu, go to MANAGE MENUS > Menus, and either click the pencil icon next to a menu to edit an existing menu, or click ‘Add New Menu’ in the top right to create a new menu.
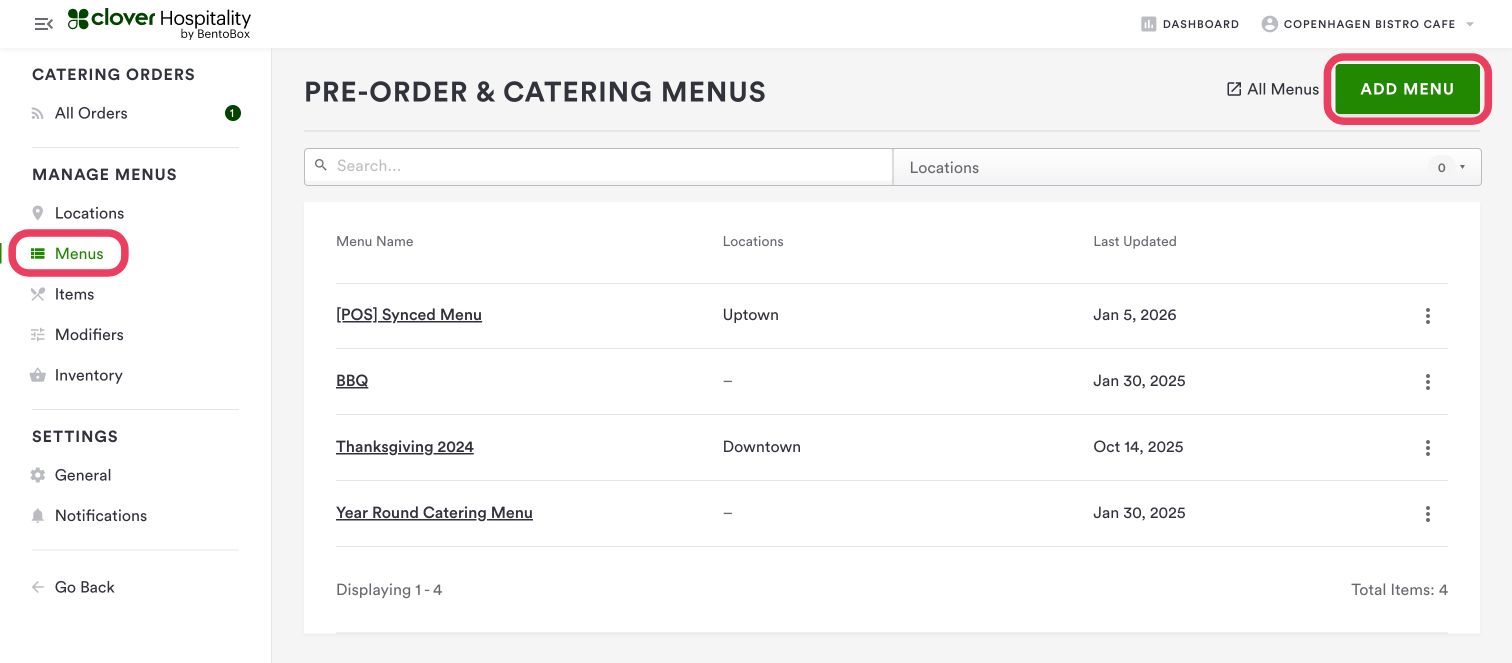
You can also duplicate a menu by clicking the icon, or delete it by clicking the trash can icon.
Add and edit the fields below to set up your menu:
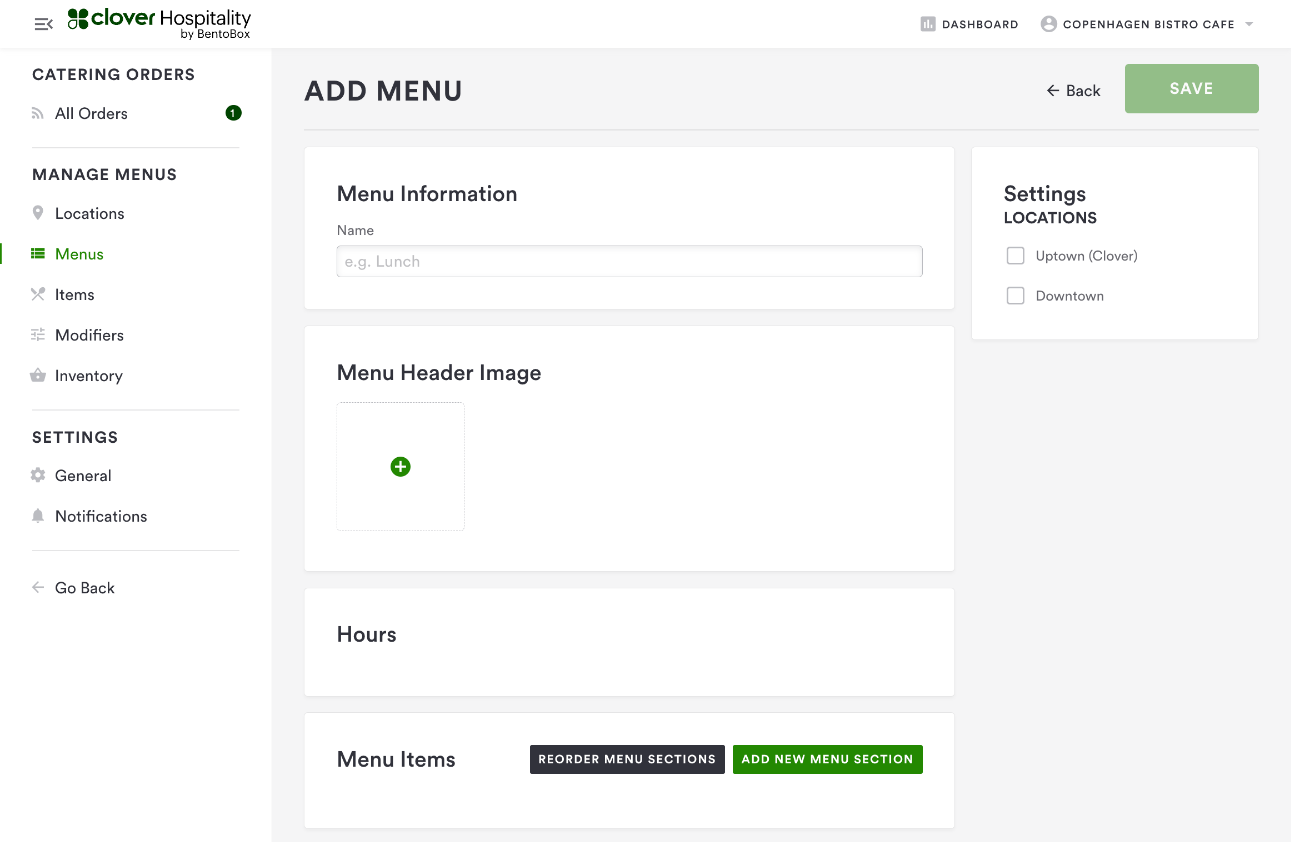
Name: this is the name of the menu, used for organizing in the backend, or for differentiating if you have multiple menus for guests.
Menu header image: Recommended. For the best image quality on your website, we typically suggest uploading wide photos, instead of tall ones. If you upload images that are vertical, Clover Hospitality by BentoBox will stretch the image from side to side in order to fill the full width image field. Learn more about photography specs here.
Hours: When you have set up the menu on a location, its hours will show up here for reference. To edit them, you’ll go to your location settings page.
Assigning a menu to a location
Locations: Check the location(s) that you would like this menu to be available for. Guests will not see this menu until you set up the menu on the location.
Adding items to a menu
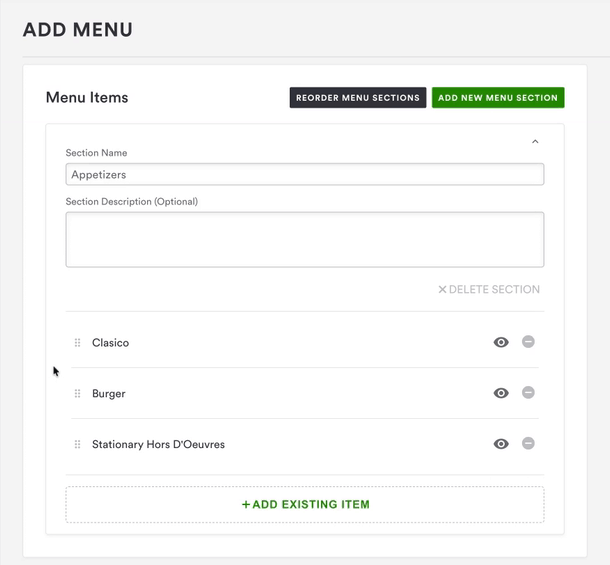
After adding the name and image for your menu, press “Save” before moving on to add sections and items; click “Add New Menu Section.”
Section name: This is a category within your menu. For example, a Dinner Menu could have the following Menu Sections: Appetizers, Entrées & Desserts. Sections allow your guests to easily sort through longer menus. Each menu must have at least one section.
Next, you can add existing menu items to the newly created section. This is done by clicking the “Add Existing Items” button.
Add Existing Items: This button opens a list to easily search for and view all of your existing items within Pre-Order & Catering.
After selecting your desired items, click the button “Add Items” to add all selected items to the menu section.
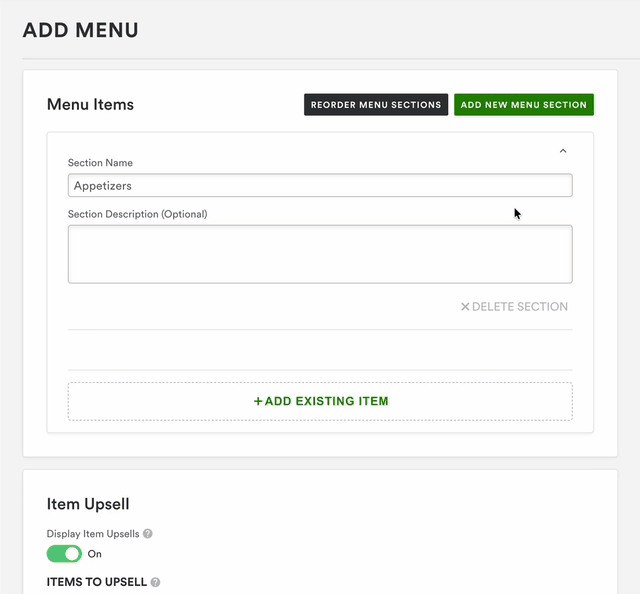
Reorder Menu Sections: You can rearrange your menu sections by clicking on ‘Reorder Menu Sections’, dragging and dropping, and hitting ‘done’.
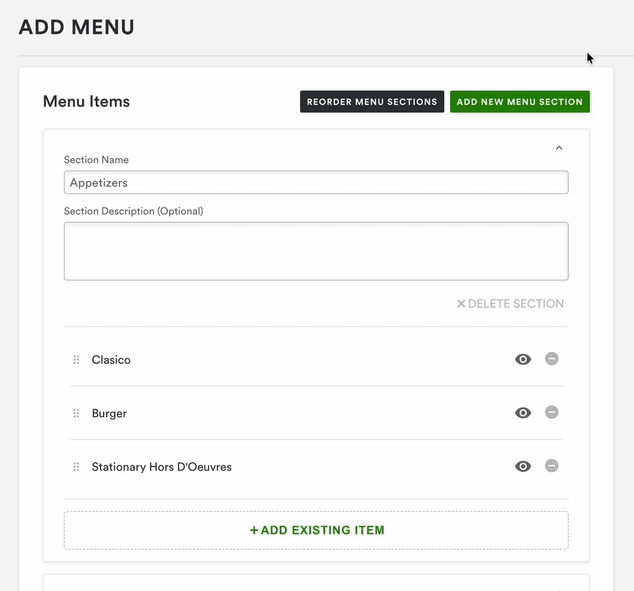
Reorder items
To reorder menu items within a section, hover your cursor over the 6 dots to the left of the menu item, then click to drag the item to the desired location.
Go Back: Creating & editing items