Note: The BentoBox team will assist in the software setup process. If you’d like to get started on your own, follow the steps below.
Clover Settings
Configure Items
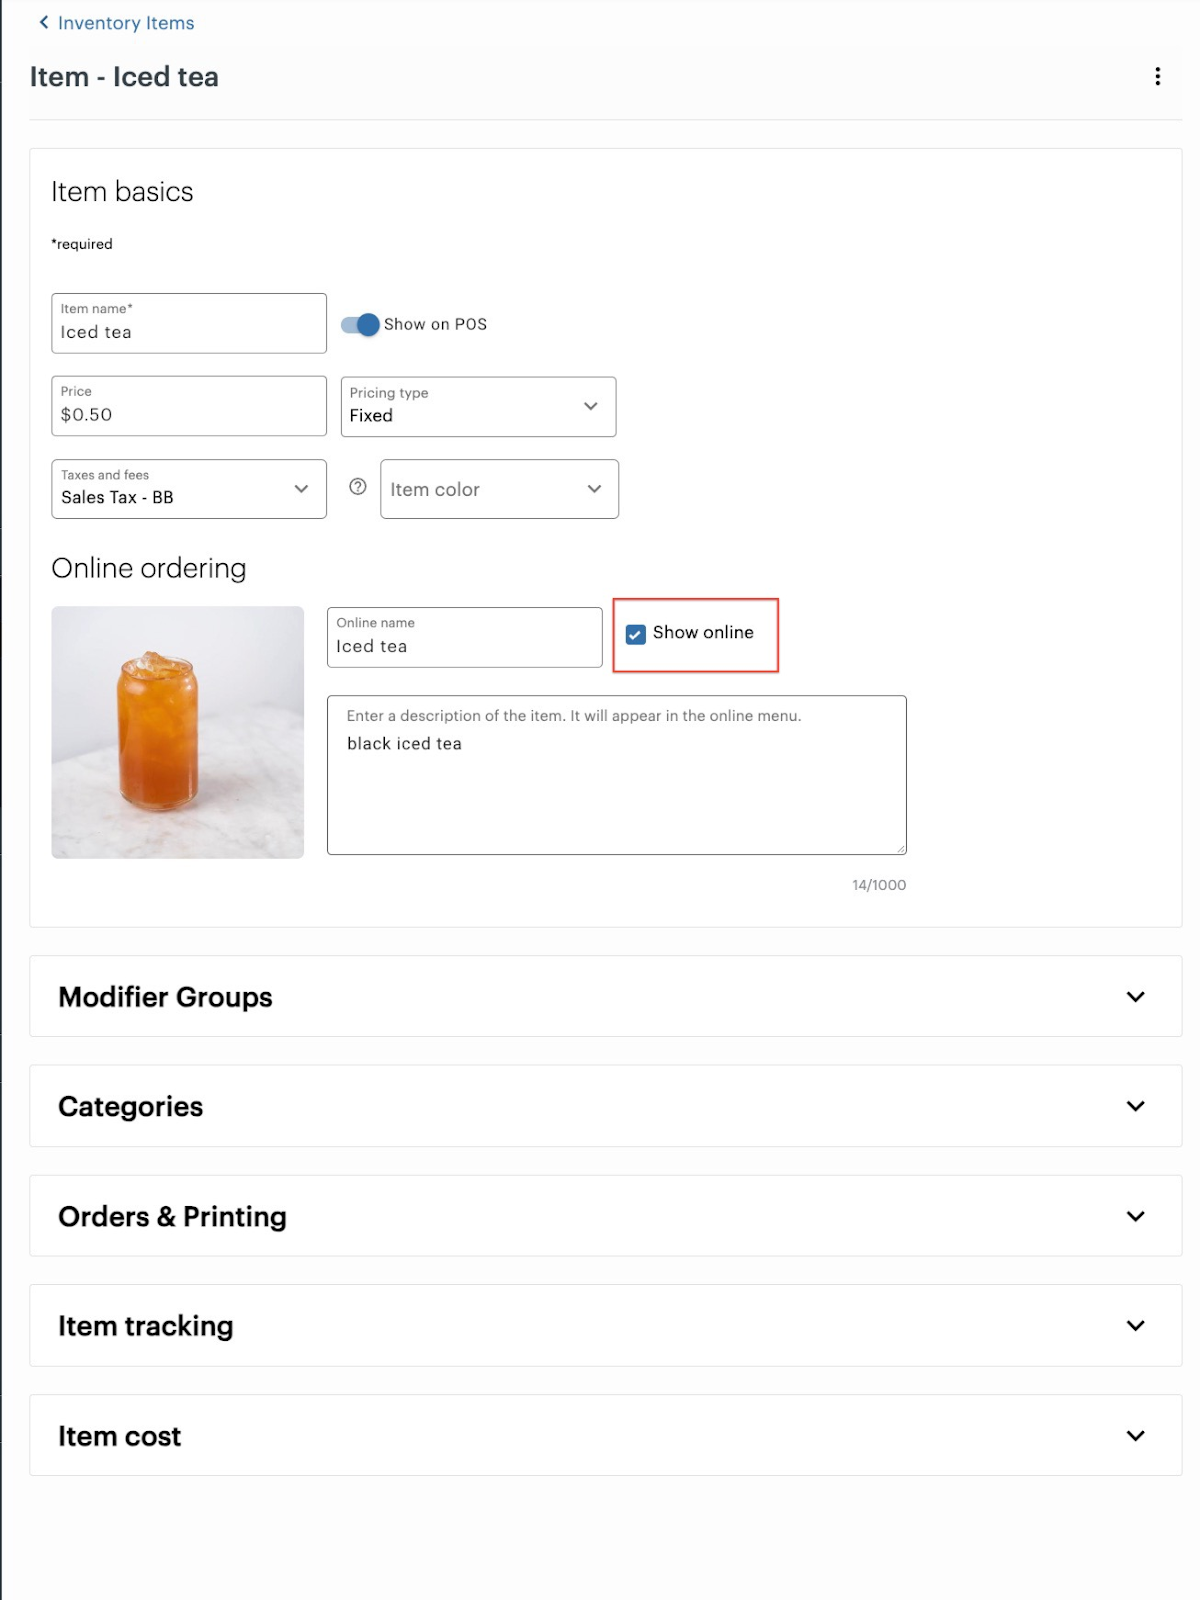
In order to be imported into BentoBox, “Show Online” must be checked for all items, modifiers, and categories. Navigate to the Clover dashboard and select Inventory > Item, and confirm that all of the items you’d like to make available on the kiosk have “online” checked.
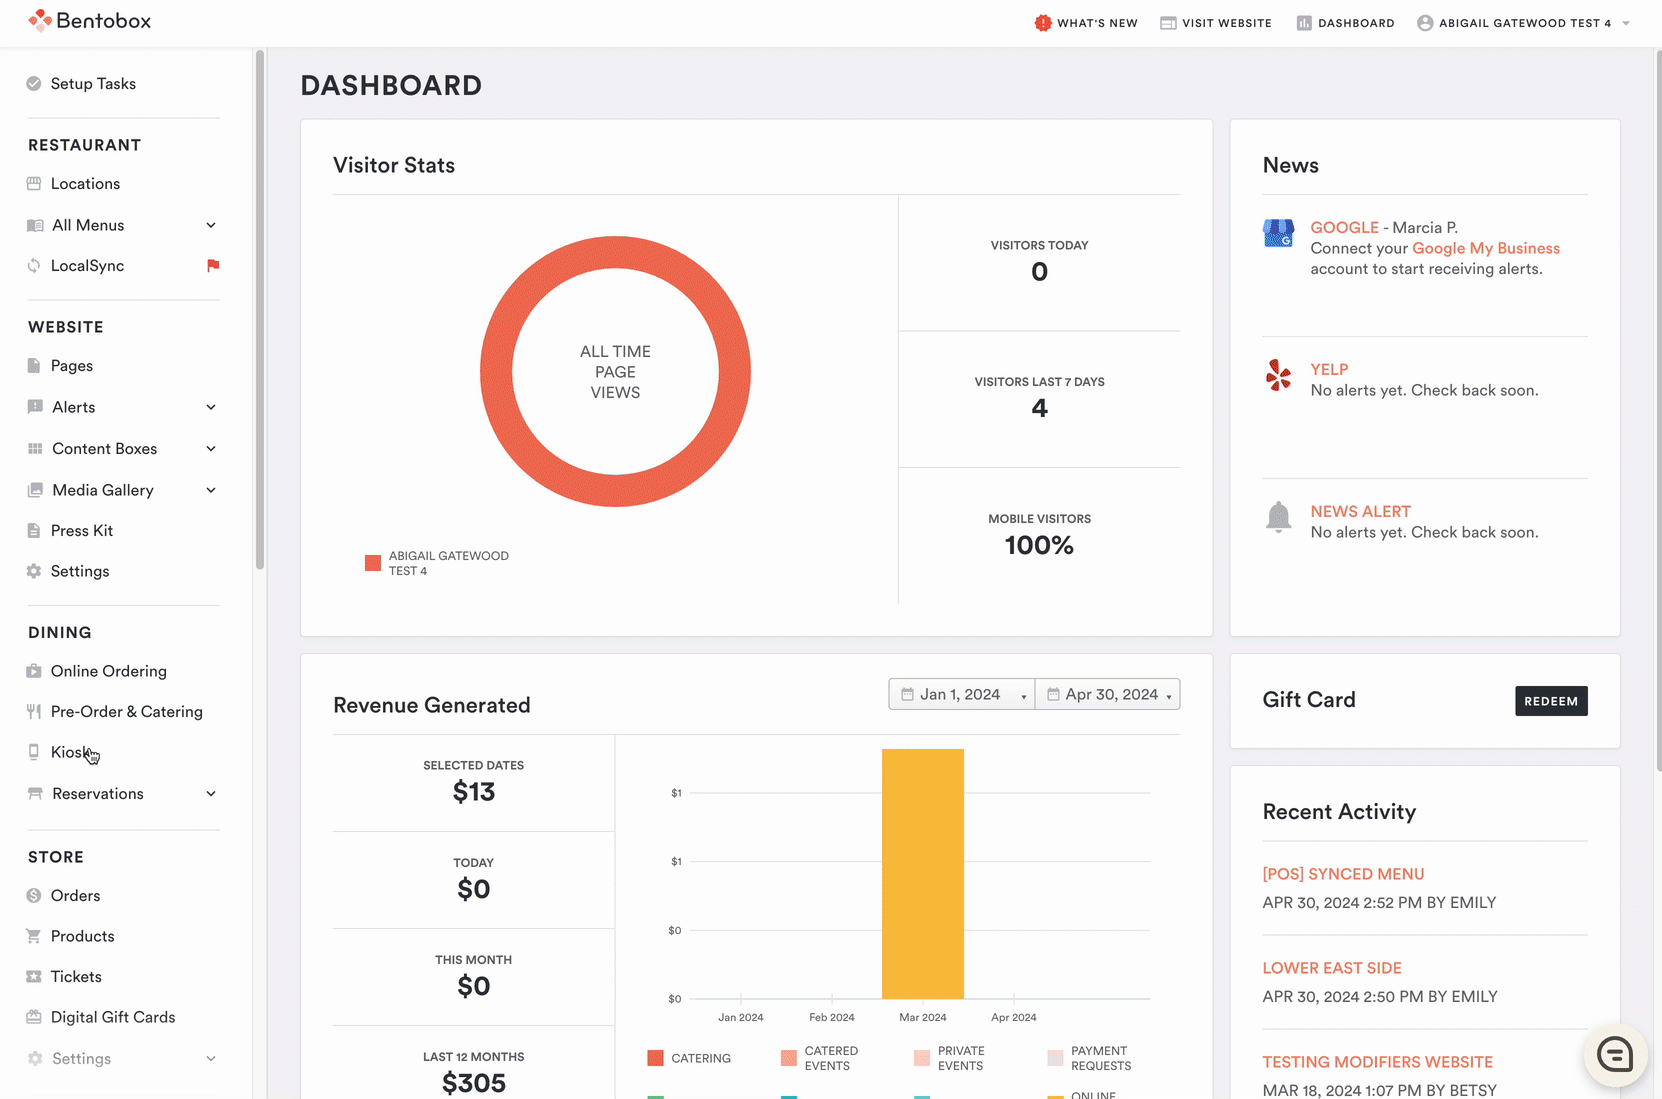
Once the Clover integration has been enabled in your BentoBox account, a [POS] Synced Kiosk Menu will be created in BentoBox with these items (see below for more details).

Configure Settings
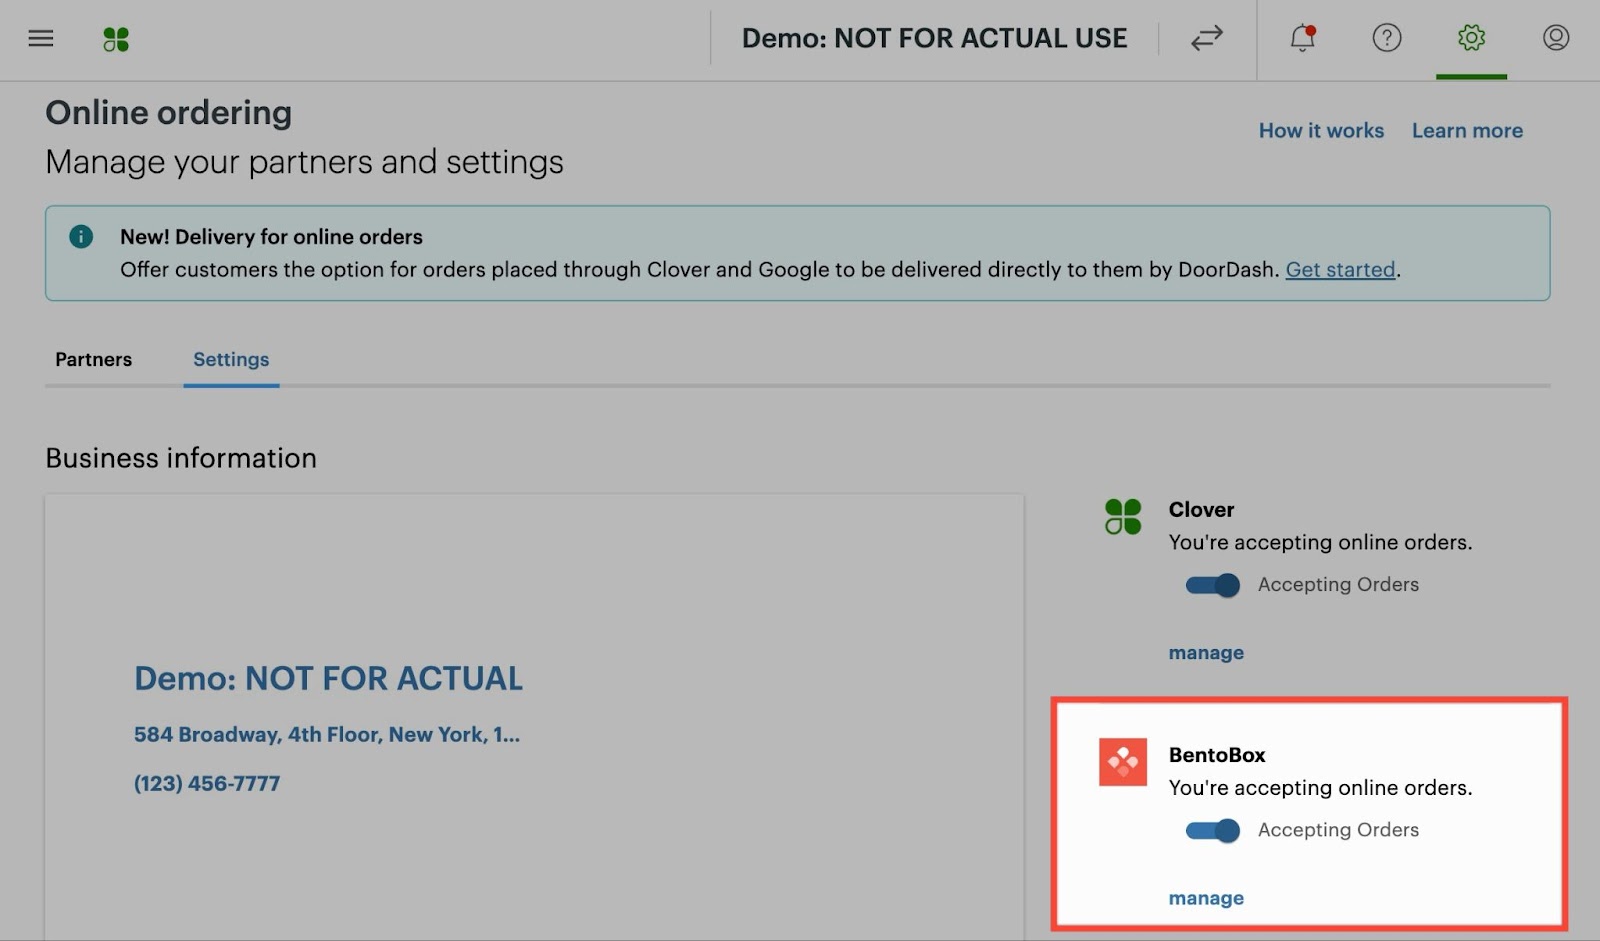
BentoBox Online Ordering and Kiosk order types must be enabled on the POS and Flex device. Ensure “Accepting Orders” and fulfillment methods are enabled in Clover. To do so, navigate to the Clover Dashboard > Settings > View All Settings > Online Ordering > Settings. Ensure BentoBox is enabled and “accepting orders”.
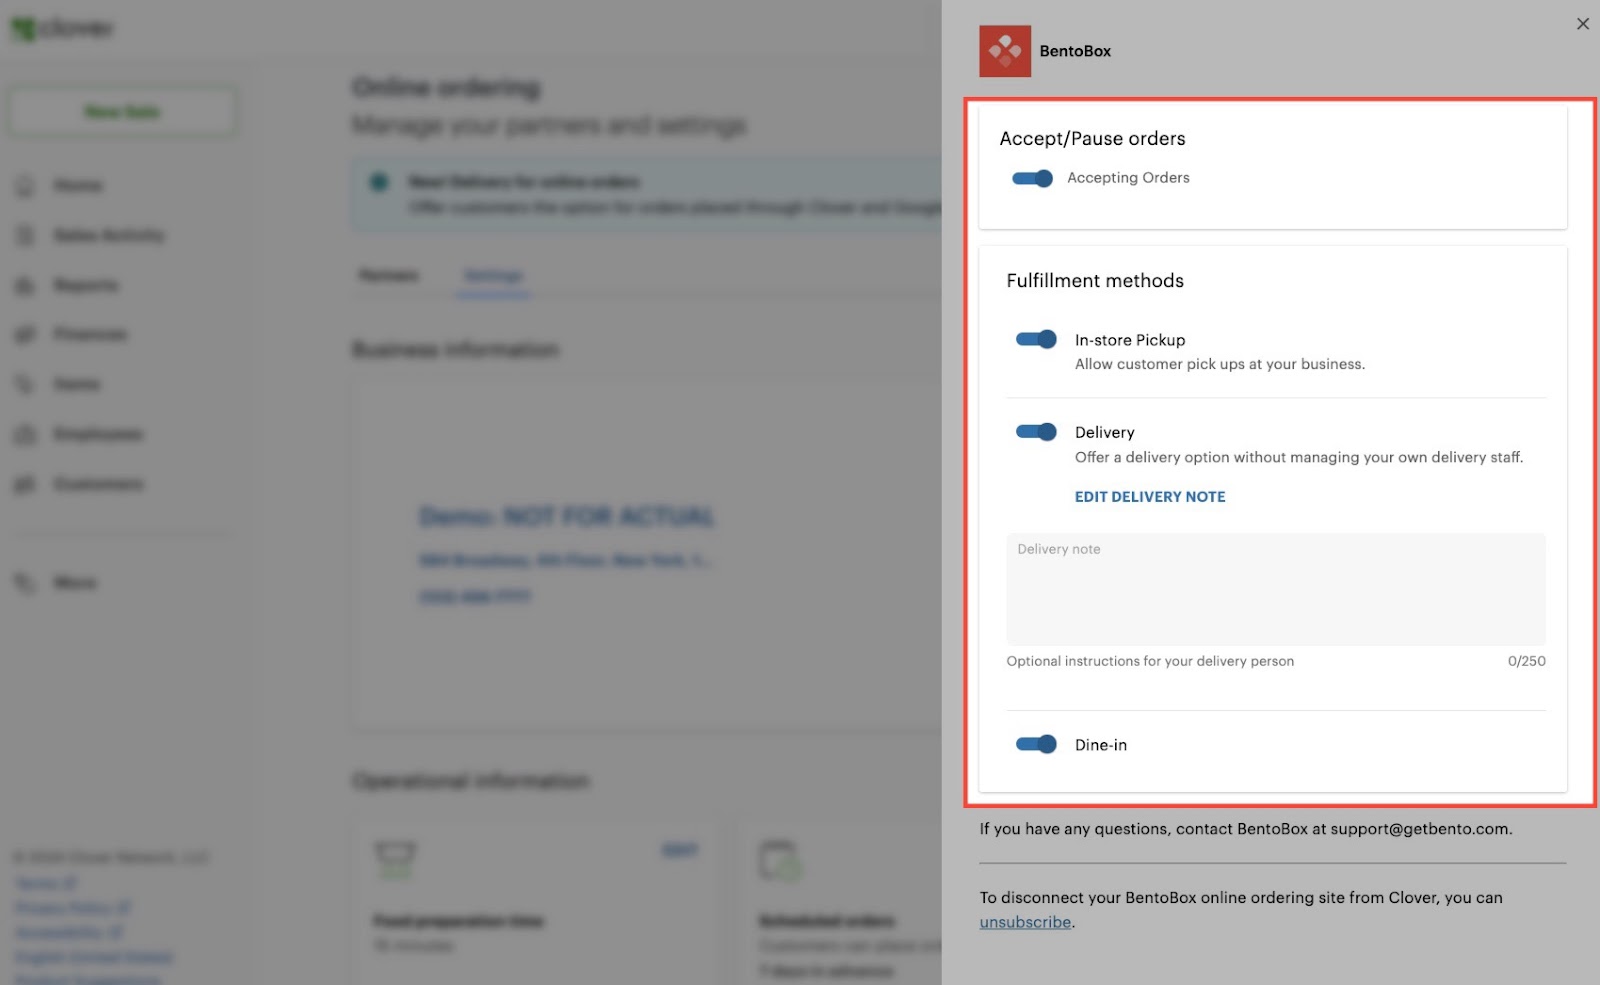
From here, select “Manage” and confirm that all fulfillment methods are enabled.
Note: If you’re currently using BentoBox Online Ordering and do not want to offer Online Ordering delivery or dine-in, simply remove the hours from your BentoBox Online Ordering Location Settings. Do not disable delivery/dine-in fulfillment methods in Clover. If you need assistance with this, please email us at support@getbento.com.
BentoBox Account Setup
Connect Clover Integration
Once you’ve completed the above steps in Clover, you can enable the Clover integration within your BentoBox account.
To do so, navigate to your BentoBox account > Integrations > Clover > Connect > Select the location from the dropdown. From here, you’ll be directed to Clover and will be prompted to enter your Clover ID. Enter your Clover ID and select it from the list. You will then be directed back to BentoBox.
Toggle to enable kiosk and sync images. Once the integration has been enabled, click “Sync Now”.
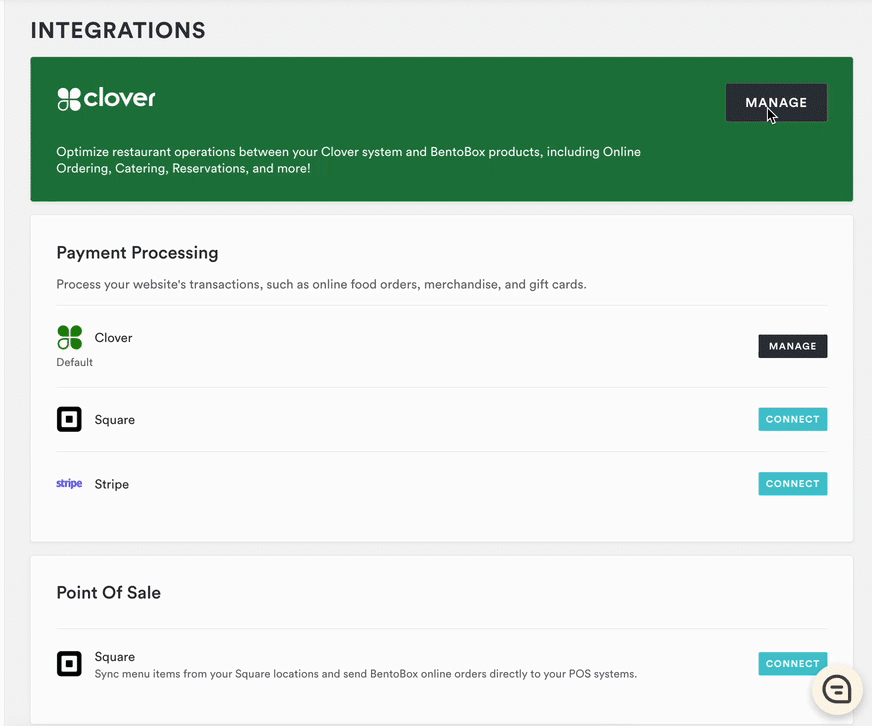
Payment Processing
You’ll also need to enable the Clover Payment Processing integration. Navigate to the Payment Processing tab on the Clover integration page. Toggle on to enable the payment processing integration.

BentoBox [POS] Synced Menu
Once the Clover Kiosk integration has been enabled, items, modifiers, and categories are automatically pulled from your Clover POS as a read-only [POS] Synced Menu. To view your menu and items within the BentoBox backend, navigate to Kiosk > Menus > [POS] Synced Menu.
Here, you can select a menu header image that will be rendered on the kiosk menu page.
Note: Items cannot be added/removed from the original POS Synced Menu within BentoBox.
Duplicate a Menu
If you would like to add/remove items from the [POS] Synced Menu, you can duplicate the original menu. To do so, navigate to All Menus > Menus > Select “Add Menu” > Select Kiosk from the channel availability dropdown > Toggle “Copy Existing Menu” > Select existing [POS] Synced Menu > Confirm.
Open the duplicated menu to add or remove items as needed. Note: Non-POS items should not be added to the menu as it will result in an error when a user attempts to checkout.

Upload a Splash Screen & Logo
If you’d like to have a customized landing page for your Kiosk, this can be added in the Kiosk Location Settings page.
Navigate to Kiosk > Location Settings and scroll to Customization. Click on the “+” sign to upload an image or select an existing image from the media gallery. We recommend that you use an image that is 1080px x 1453px. Please reach out to support@getbento.com for assistance.
Add a Logo
Navigate to Kiosk > General Settings to add a logo. This logo will be visible in the top left corner of the kiosk as diners interact with the menu.

Assign Hours & Location Settings
Navigate to the BentoBox backend > Kiosk > Location Settings. Select the location > “Add Hours” > Select [POS] Synced Menu from dropdown > add Hours > Save.

Ensure “Pickup” and “Dine-In” order types are toggled on. Once hours are saved, the kiosk will be ‘Open’ and you are ready to log-in on the physical kiosk.
Kiosk Activation Code
The activation code will be used to log in on the physical kiosk. The activation code is listed in the Kiosk > Location Settings.

Once you’ve completed the steps above, you’re ready to log in on the kiosk! If you have not completed the hardware setup, please review the Hardware Setup Guide.
Log Into the Kiosk
To log in to the Kiosk, you will need the following:
BentoBox user email address
Activation Code (found in your BentoBox account under Kiosk > Location Settings)
Clover Flex ID (can be found on the Flex device via Setup > Devices > Clover Flex 3)

Note: Please ensure that your Clover Flex device is powered on and is open to the CloudPay Display application.
Kiosk Upsell
BentoBox Kiosk offers the functionality to upsell diners as they’re checking out. Once turned on, diners will see suggestions of additional items in the cart and easily add more item(s) to cart for a more robust ordering experience.
This can help increase order size and revenue, as well as create more diner engagement and loyalty.
Turning on Upsell
In the dashboard, click on Kiosk, and select the menu you would like to offer upsell. Once toggled on, it will default to “Custom Items”

Choosing Items
Custom Items allows you to choose the exact items you wish to upsell to diners. If you have 3 or more items on your menu, you must select at least 3 custom items to offer as upsells.

Guest Experience
When upsell is enabled on a menu, all of the chosen upsell items will appear in the cart drawer in a randomized order. Items that are already in the cart will not be offered as upsells.