How to configure email notifications for forms
When a website visitor submits an inquiry online, you’ll want to make sure that it automatically routes to the appropriate staff member. Clover Hospitality by BentoBox will do this for you. You just have to tell us who to send each form type — and more granularly, even each response type within a given form — and we’ll take it from there!
First Thing’s First: Seeing Active Inquiries
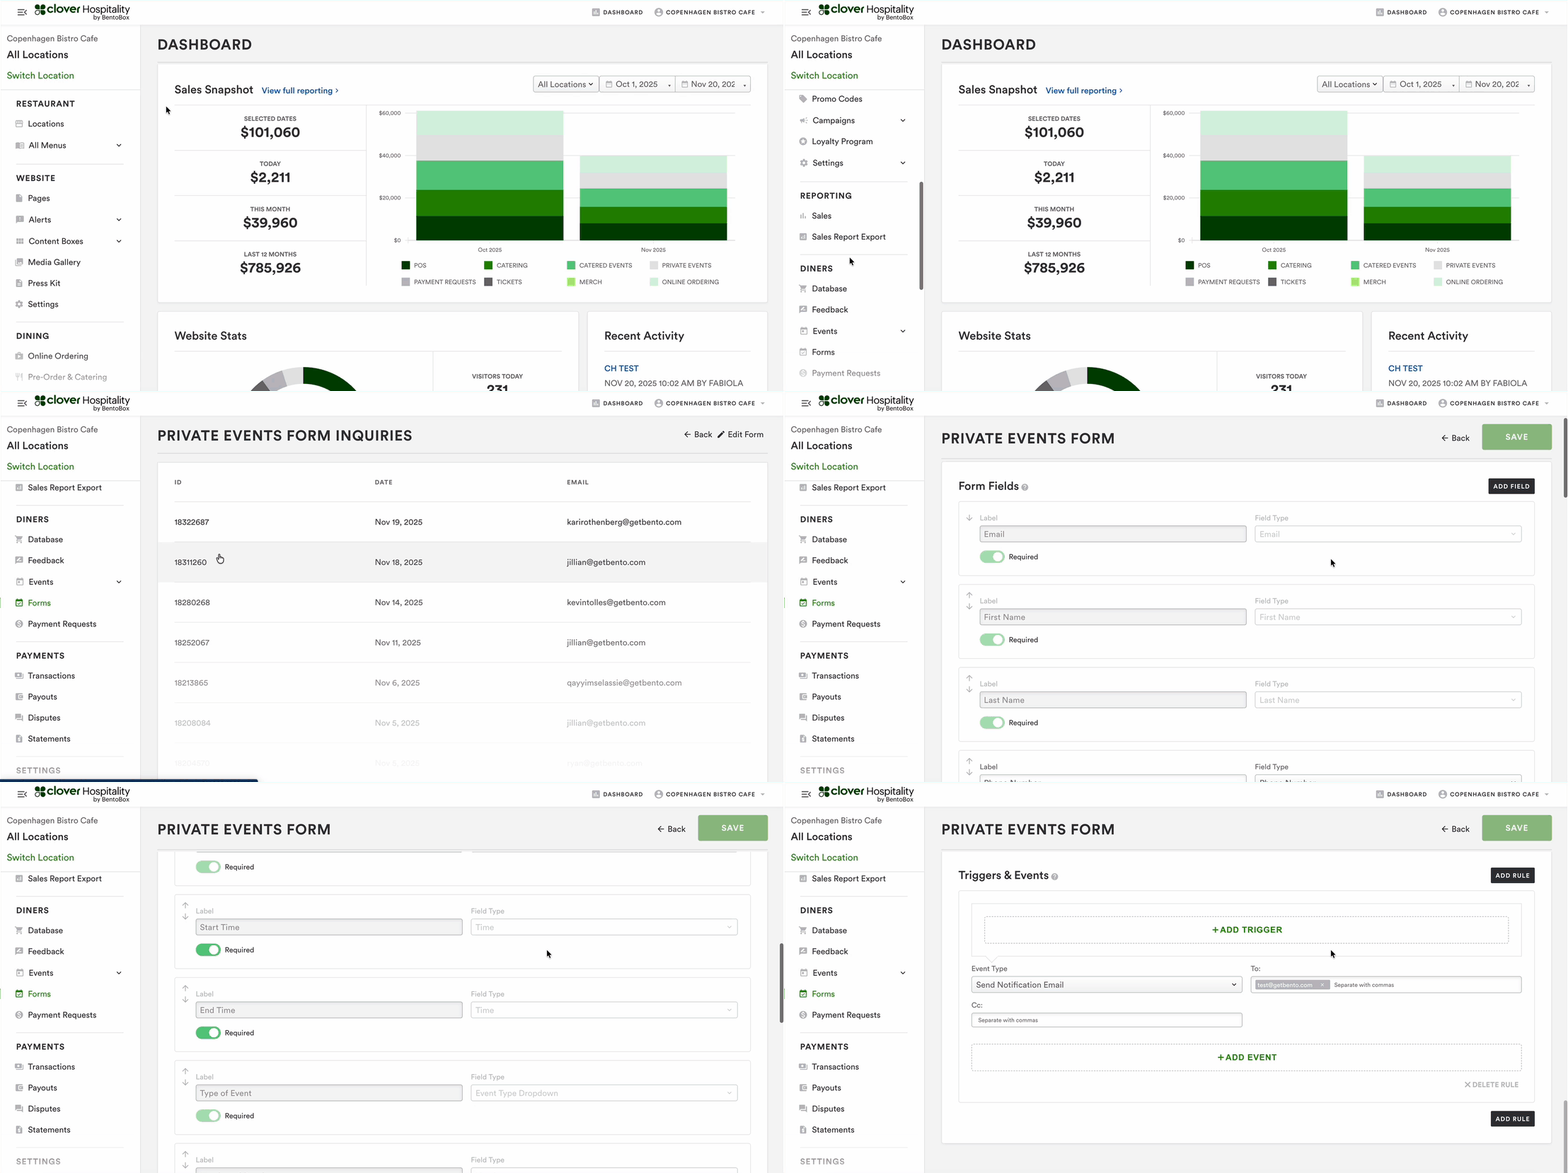
When guests fill out an inquiry form on your site, the submission will be saved in the backend under Guests > Forms. You can also use the form settings to adjust which team member’s email address those submissions are sent to. Follow the steps below to learn how form submissions are routed.
How to Update Form Routing and Other Settings
Log in to the backend and go to DINERS > Forms from your main navigation. In the list of inquiry forms that appears, click on the form you’d like to adjust email routing settings for.
Click the 'Configure Form' gear icon at the top right.
You will land on the inquiry form settings page, where you can manage the form fields and create rules that will determine who receives which emails.
Form Fields
The inquiry form can be customized by adding, editing, removing or reordering input fields. Please note that greyed out fields are mandatory in the form and can’t be removed or changed. Clover Hospitality by BentoBox suggests only to customize input fields if you’re an advanced user.
For help configuring your form settings, contact Support.
Adding input fields
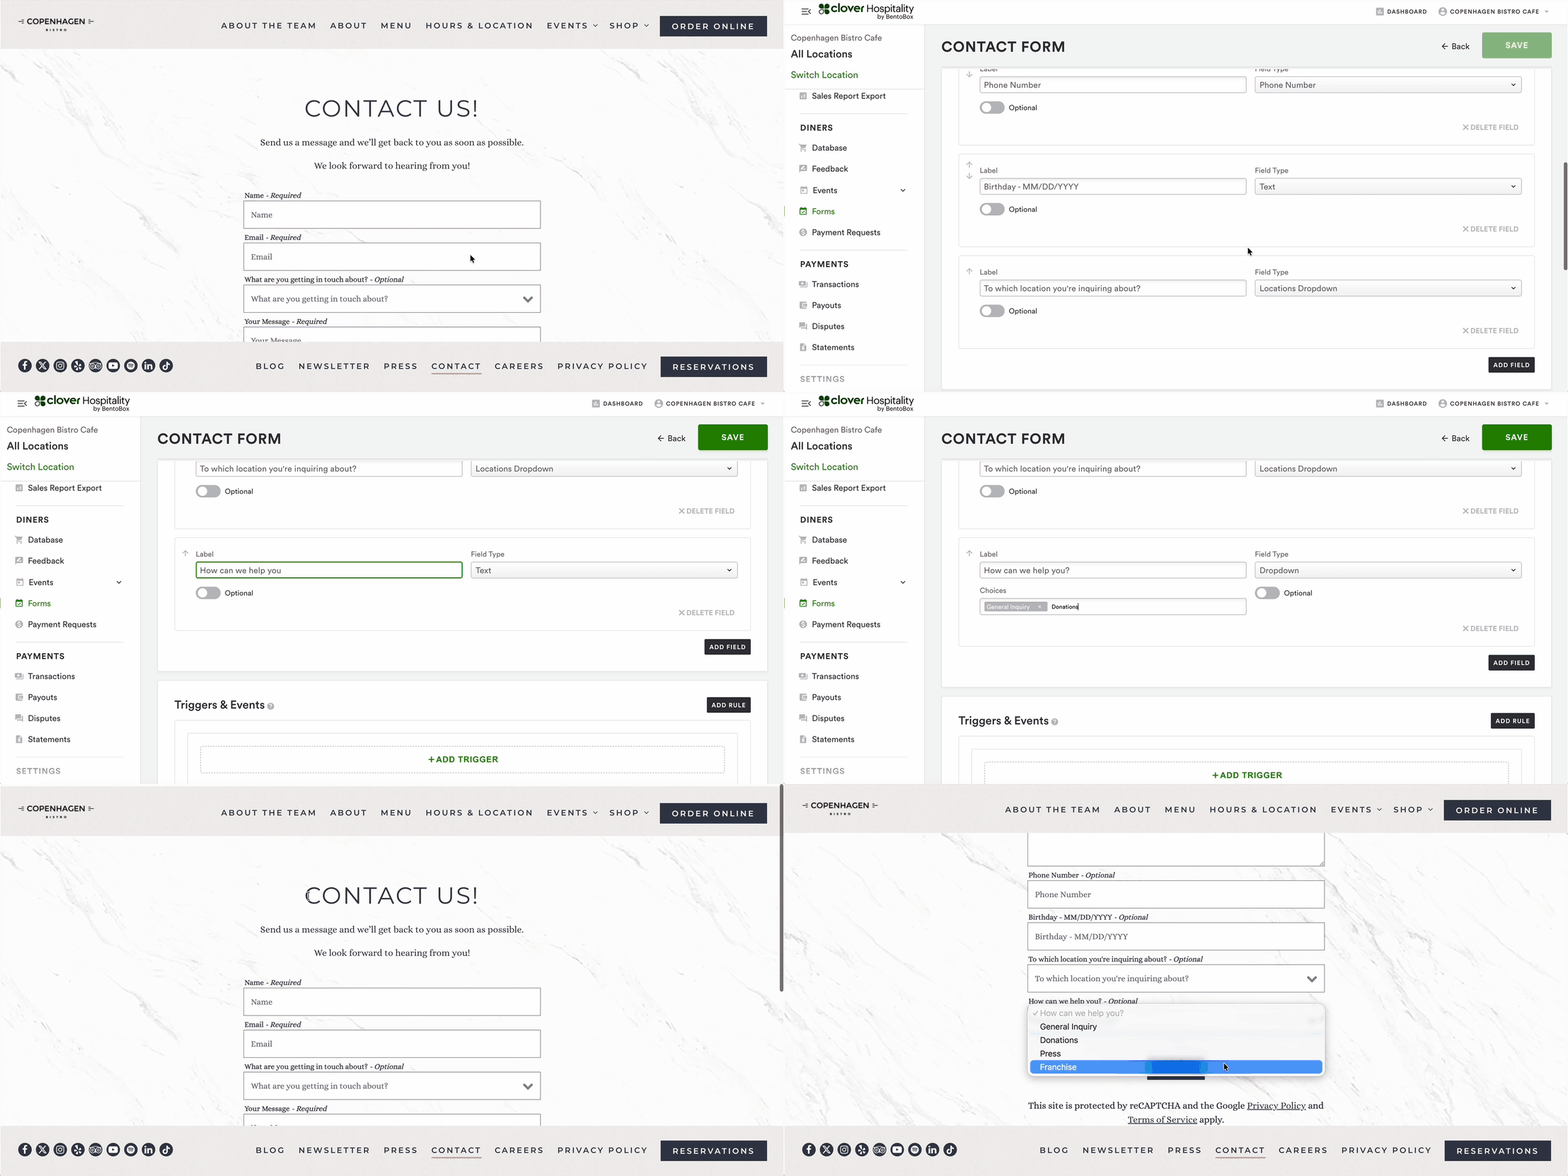
Choose the additional field type that you want to include in the form. Field Types include: Text, Name, First Name, Last Name, Email, Phone Number, Dropdown, Paragraph Text, File, Number, Locations Dropdown, Date, Time
In the example below, we’re adding another dropdown field to the default contact form:
Editing input fields
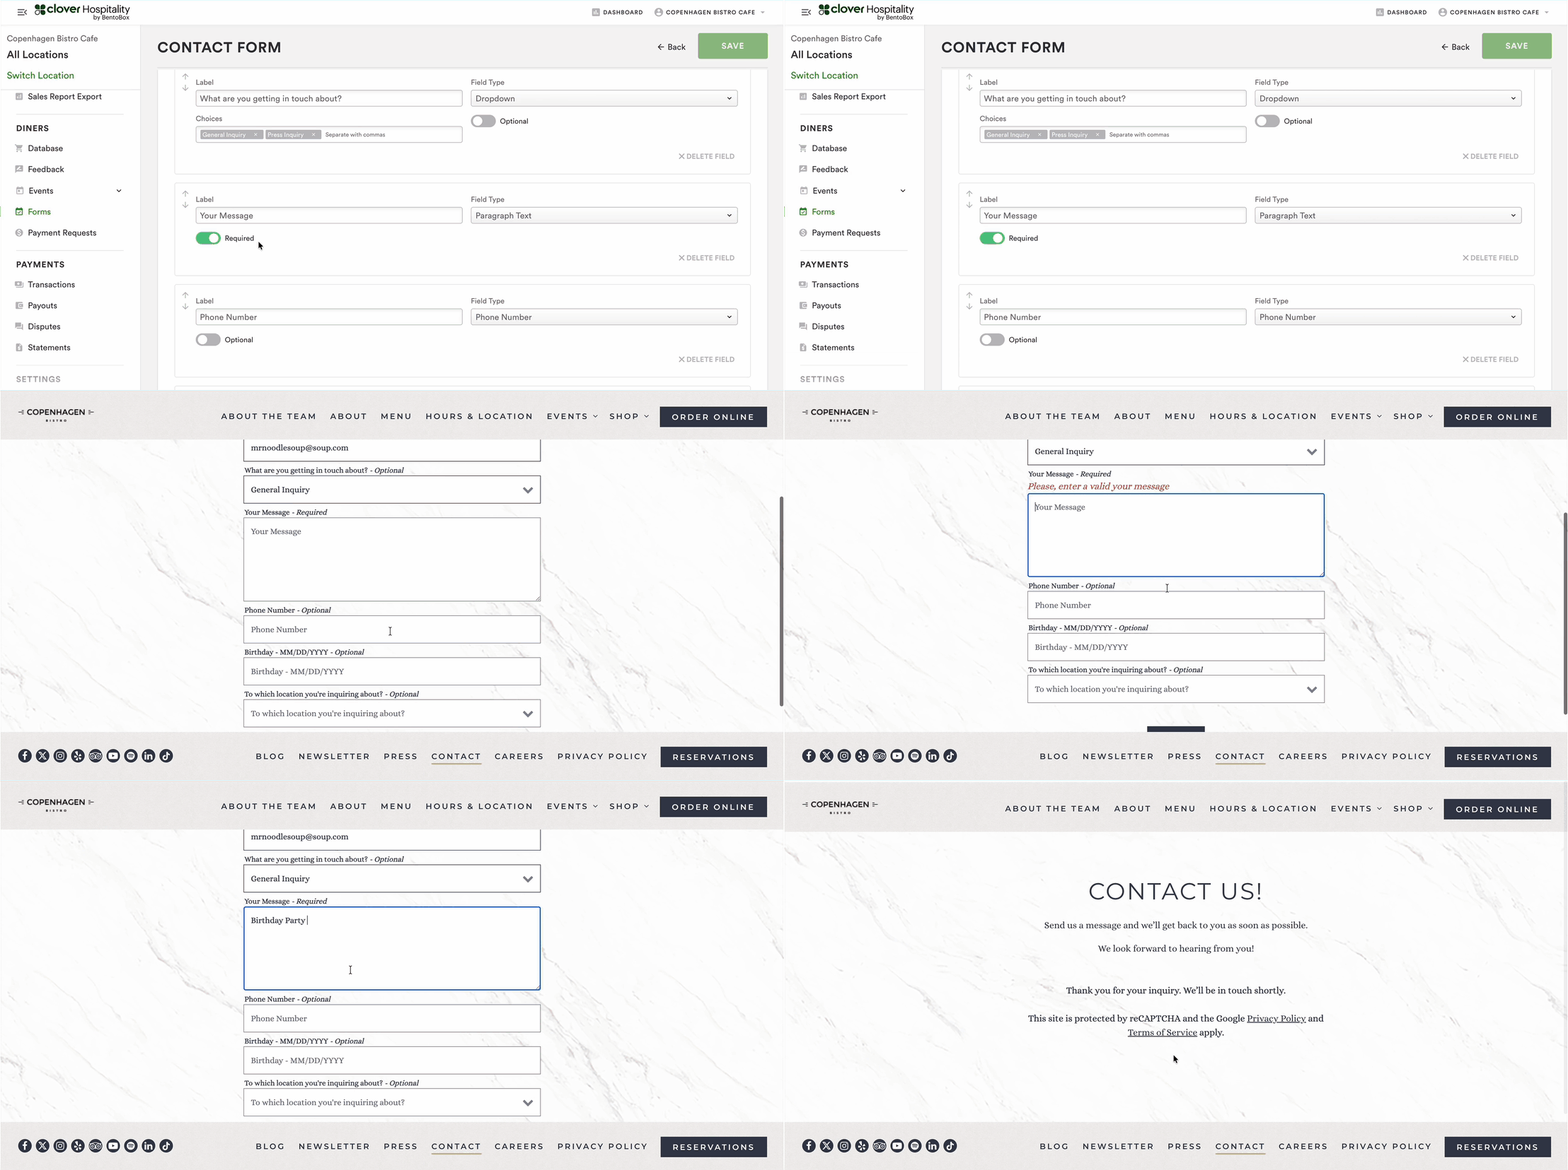
Fields can also be marked as optional or required. If required, a guest can’t submit an inquiry if a field is not selected in the form.
In our contact form example, the location dropdown is required. Here’s what the guest experience looks like:
Removing input fields
To delete a field that is not mandatory in the form, click the X DELETE FIELD
Reordering input fields
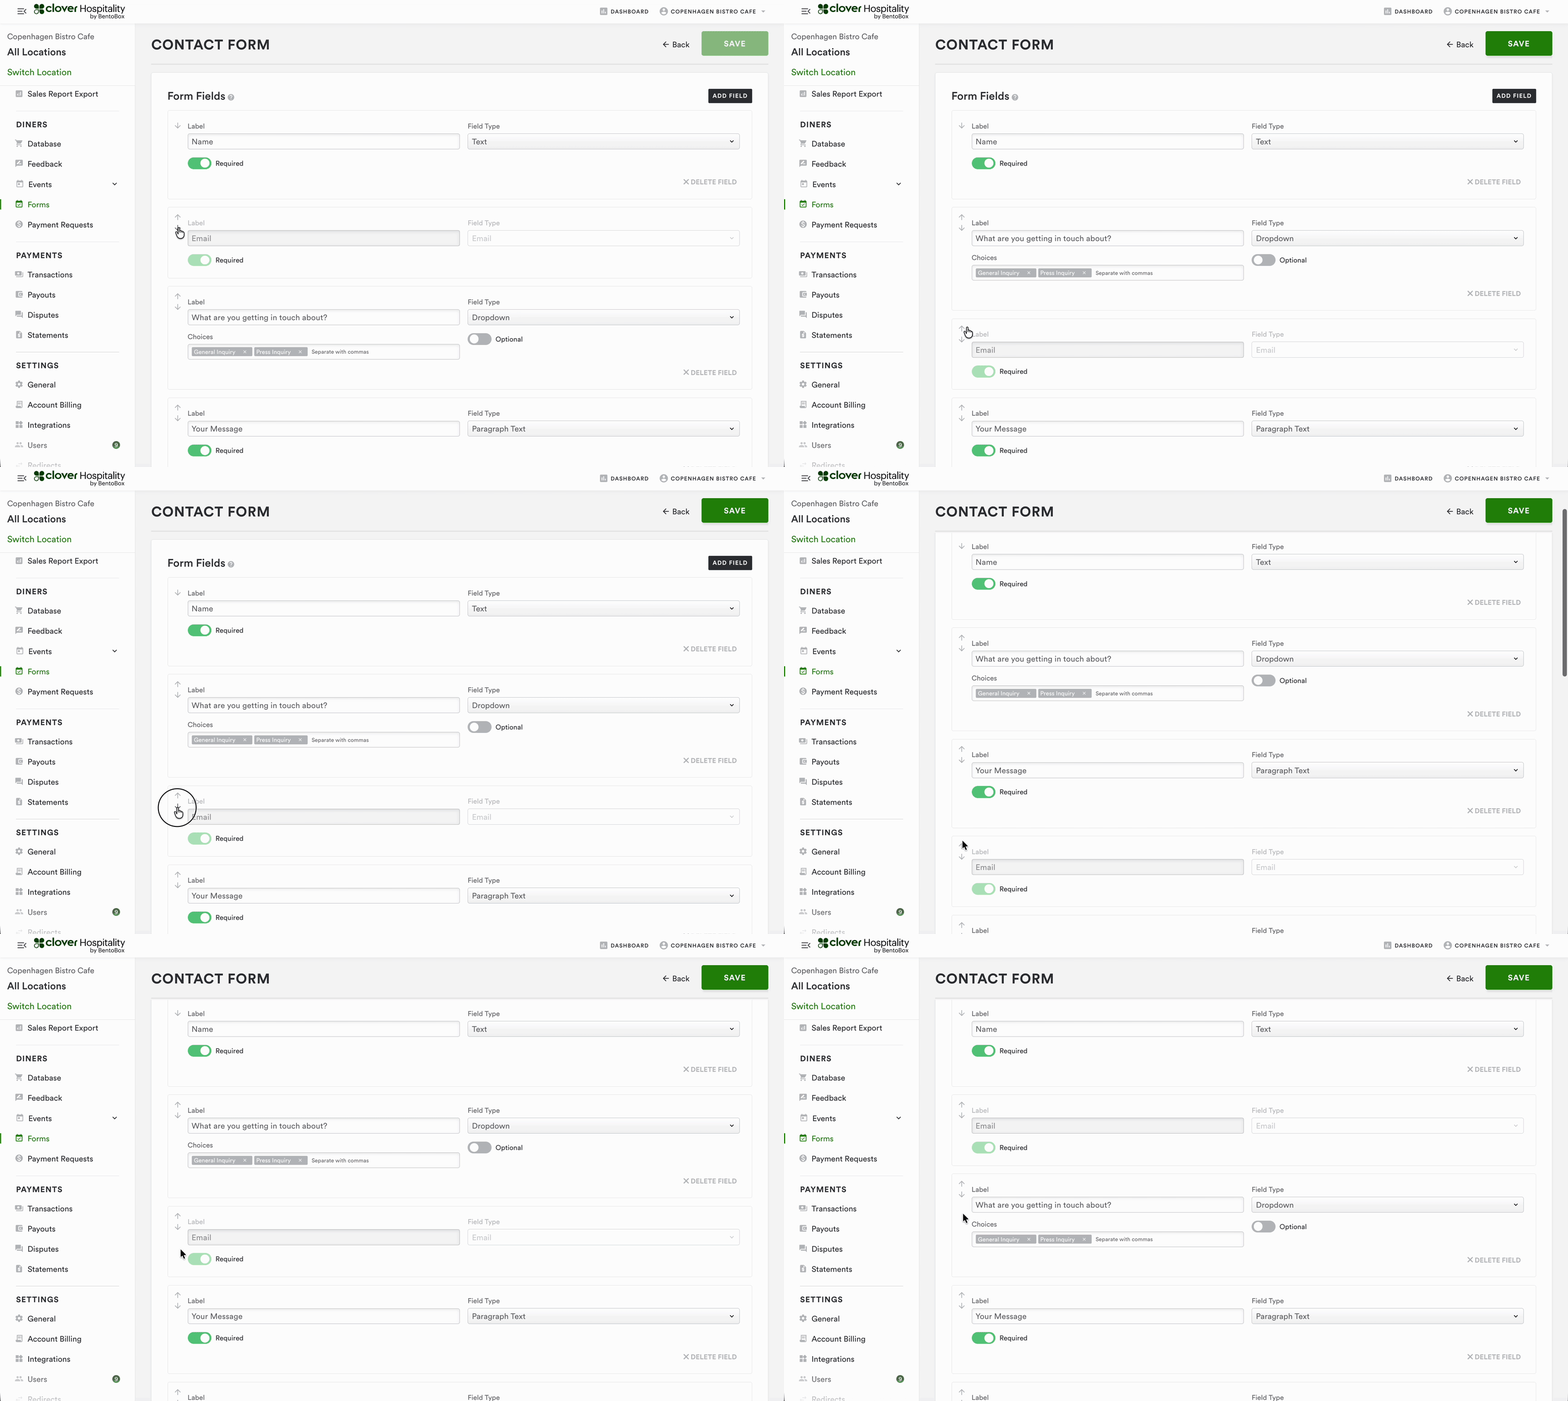
Click the up or down arrow buttons to the left of an input field to move it up or down in the list. This is useful for reordering when there are a lot of fields.
Setting Triggers & Events
Use “Event Type” to Decide How Your Team Will Get Alerted
This field will let you choose which type of event will generate an email. The options are:
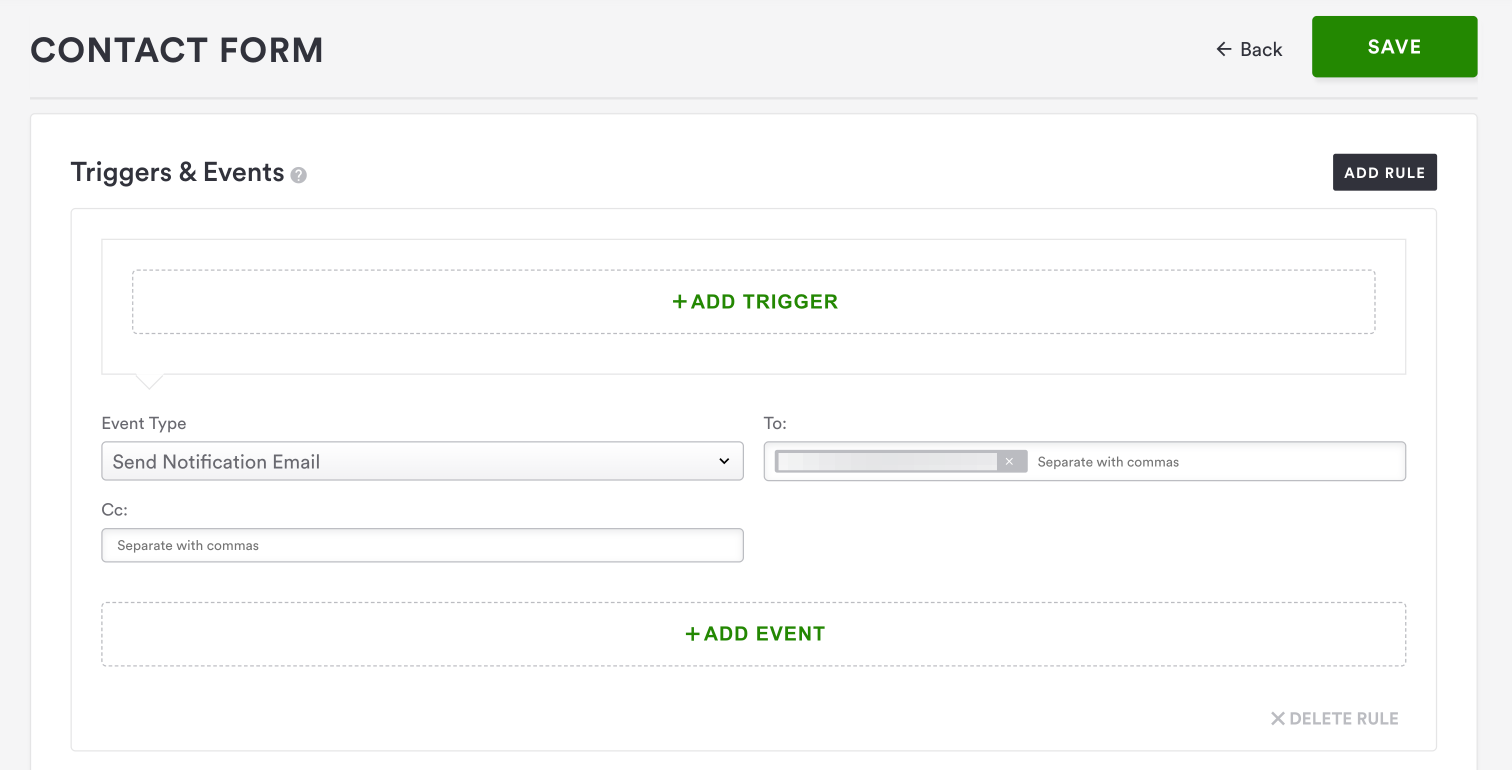
1. Send Notification Email (recommended): this will generate an email notification that a user has filled out a form. Use the To: and CC: fields to assign where the email notifications should go. You may want multiple email addresses to receive notifications, such as the general manager, events person, and/or other relevant parties.
Once you type out an email address, press Enter before adding another email address.
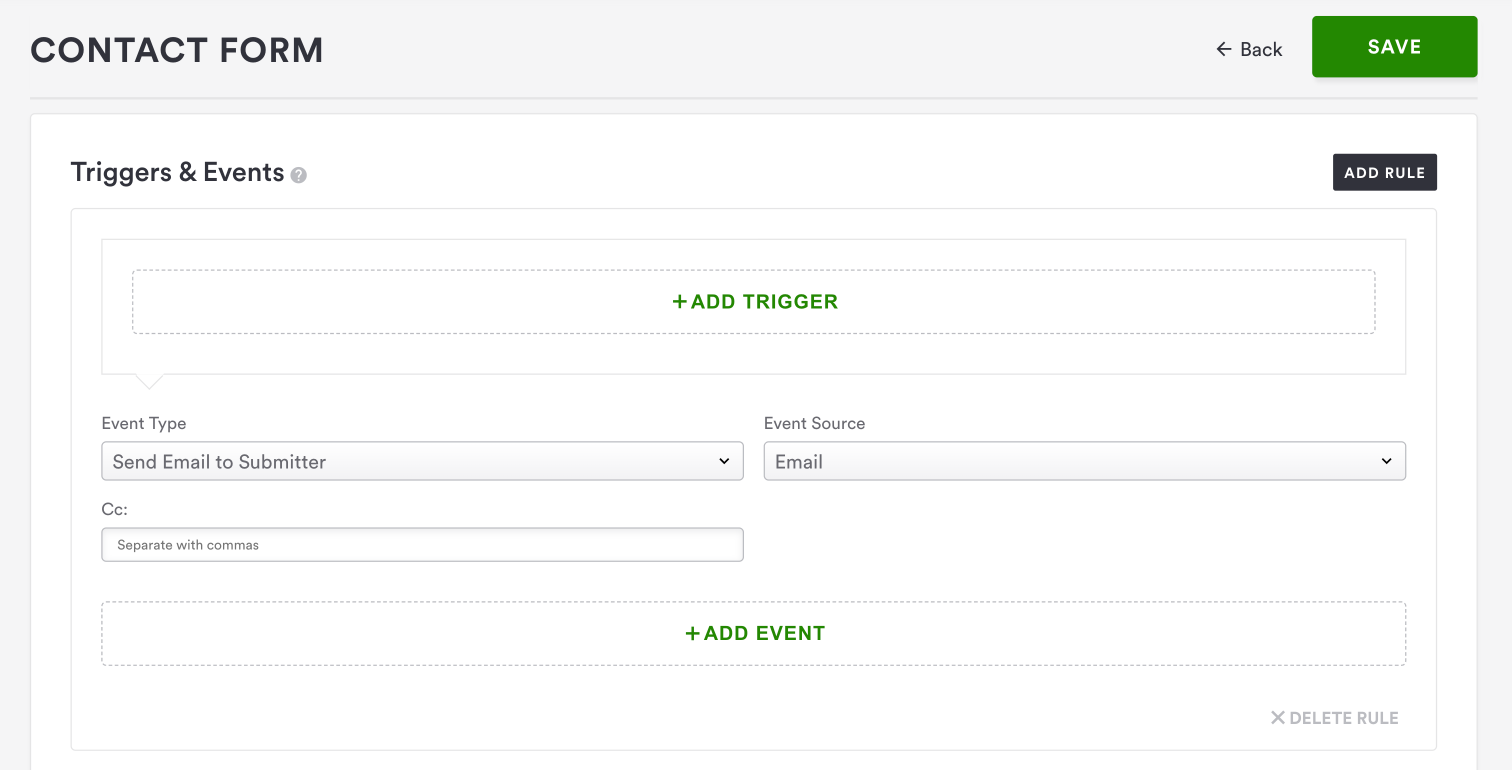
2. Send Email to Submitter: this will generate an email notification that goes to the person who filled out the form. Helpful so that they have a copy for their records.
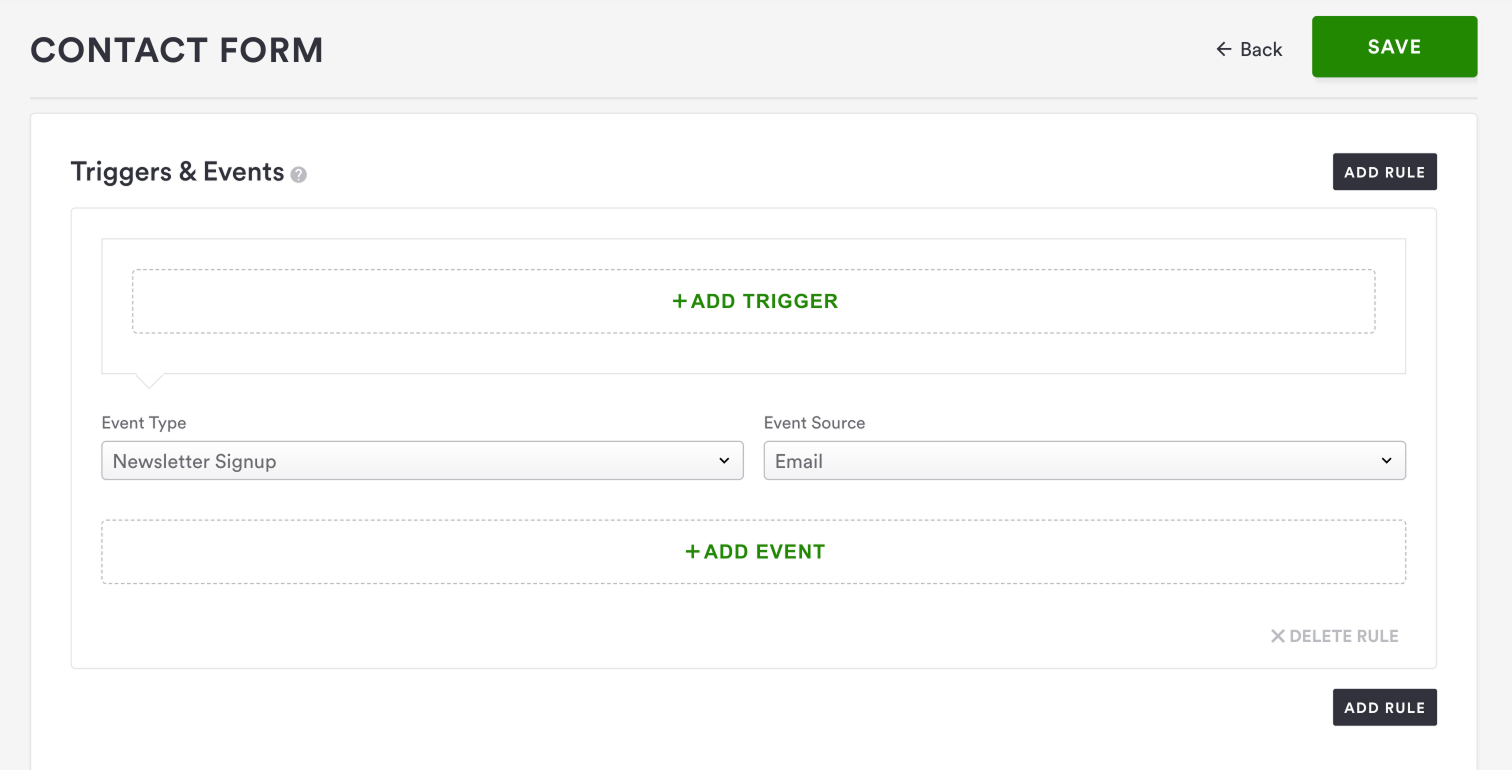
3. Newsletter Signup: this will sign up the person who filled out the form to the default email marketing list configured in Integrations.
Triggers
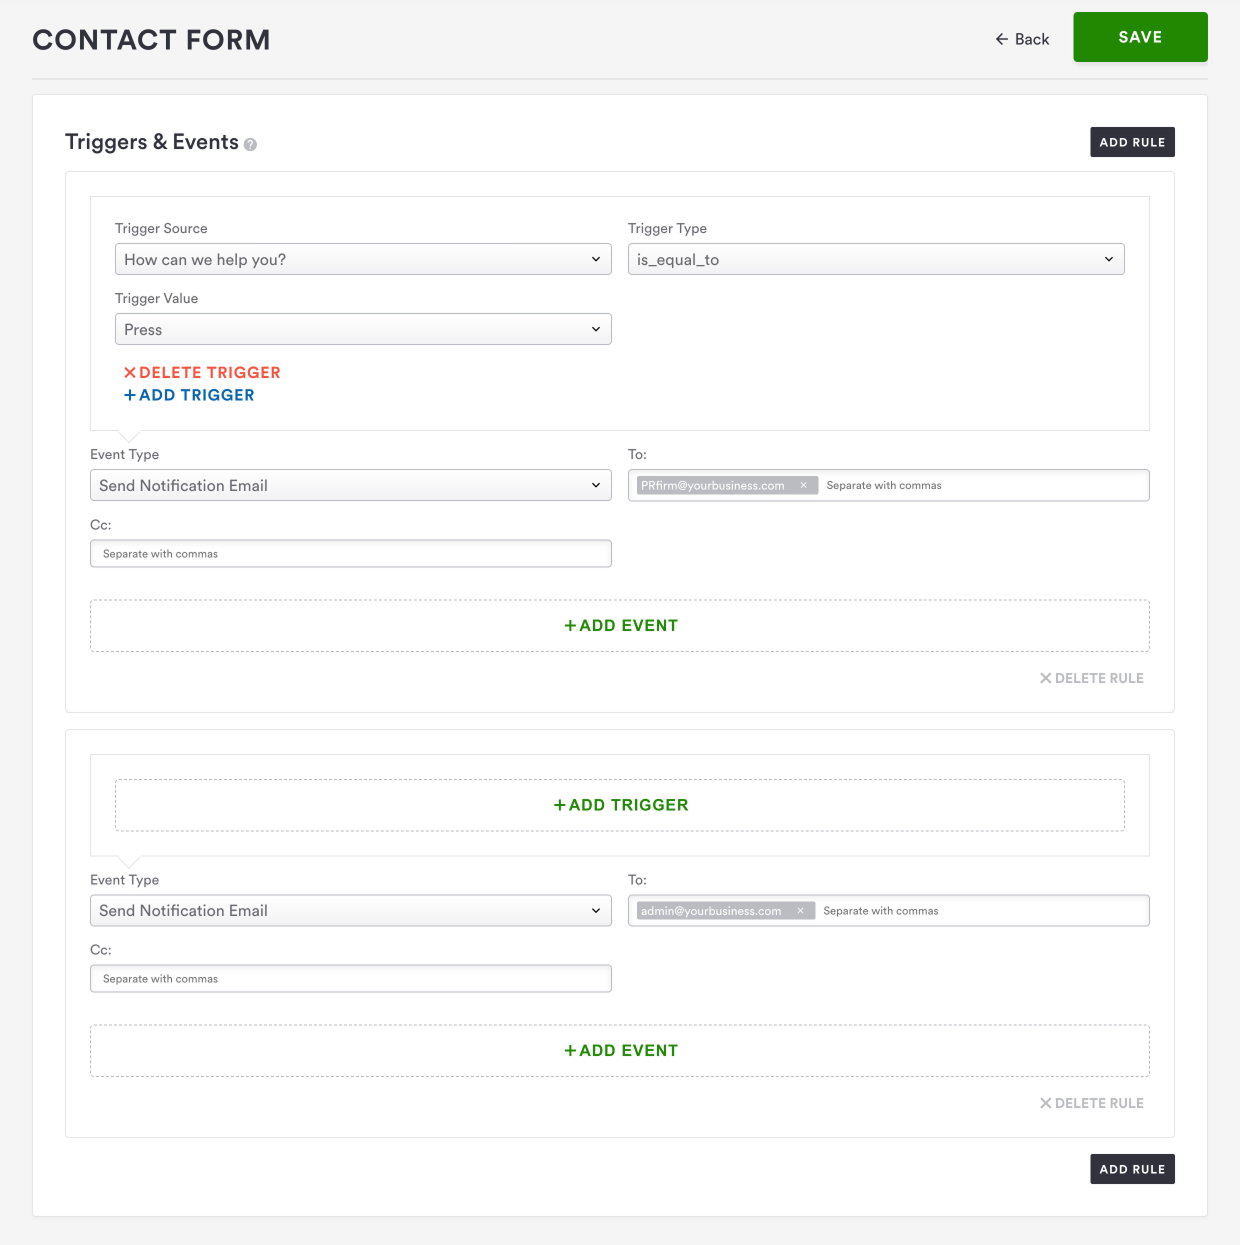
If you want to filter down only certain form submissions to go to the person or people you’ve set up above, you can optionally add a trigger to a rule. This allows more specific control of who will receive which responses.
In the example below, if a submitter chooses the contact reason “Press,” an email will be sent to your business’s PR firm. Another trigger is set up so that an email alert for all form submissions will be sent to the General Manager.
Again, triggers are optional, and if no trigger is added, the rule will apply to all submissions.
Once you have set up the desired rule(s), click the "Save" button to save your changes.
For help configuring your form settings, please contact Support.

