How to create and add Items
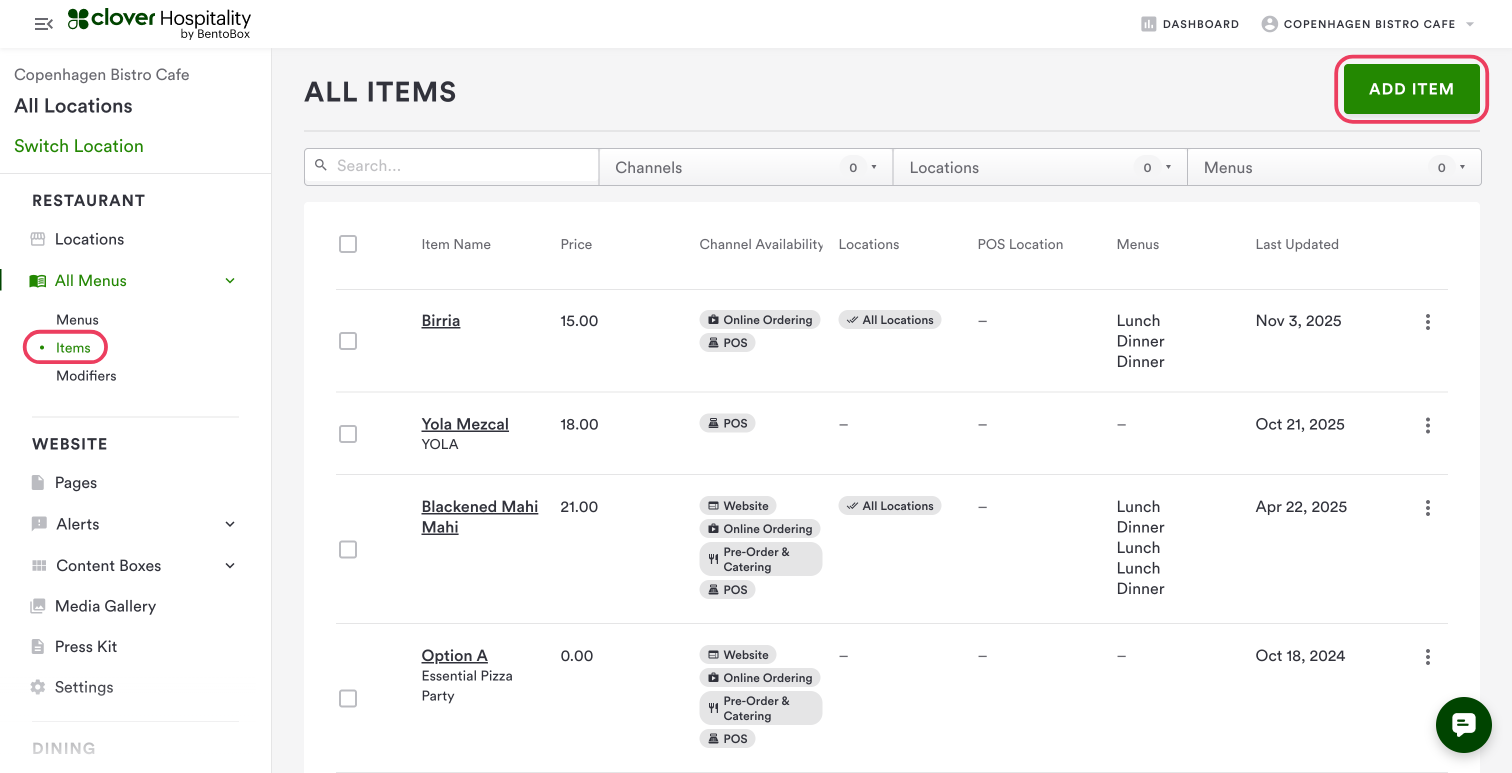
To create a new Menu item, navigate to All Menus > Items on the left-hand navigation.
This will bring you to the All Items page, where you can see all of the items you across all channels. To create a new Item, you will select Add Item in the top right corner.
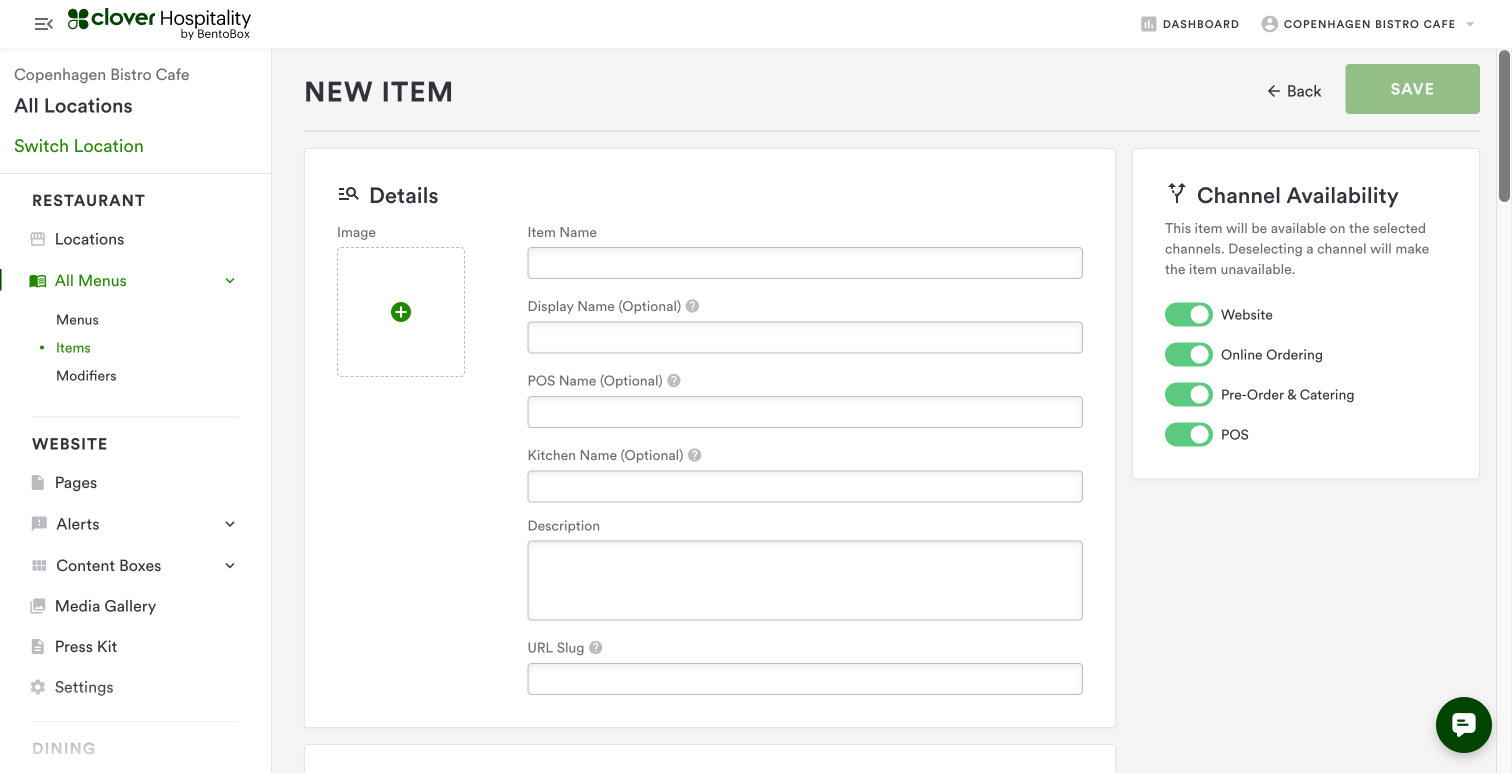
Details Section:
Item Name/Display Name: This is how the item will be displayed to your diners and your kitchen staff. If you wish to have a Kitchen specific name and a diner-specific name, you can use the Display name field to specify what your customers will see.
Description: This is where you can add a brief description of the dish for your diners.
URL Slug: This field sets the item's name at the end of a long URL. It's usually best to use all lowercase letters and dashes between words. We do not recommend changing this after the item has been saved.
Tax Category: You can change the tax category based on the type of item you're selling. This will impact the tax applied at checkout for Online Ordering and Catering orders.
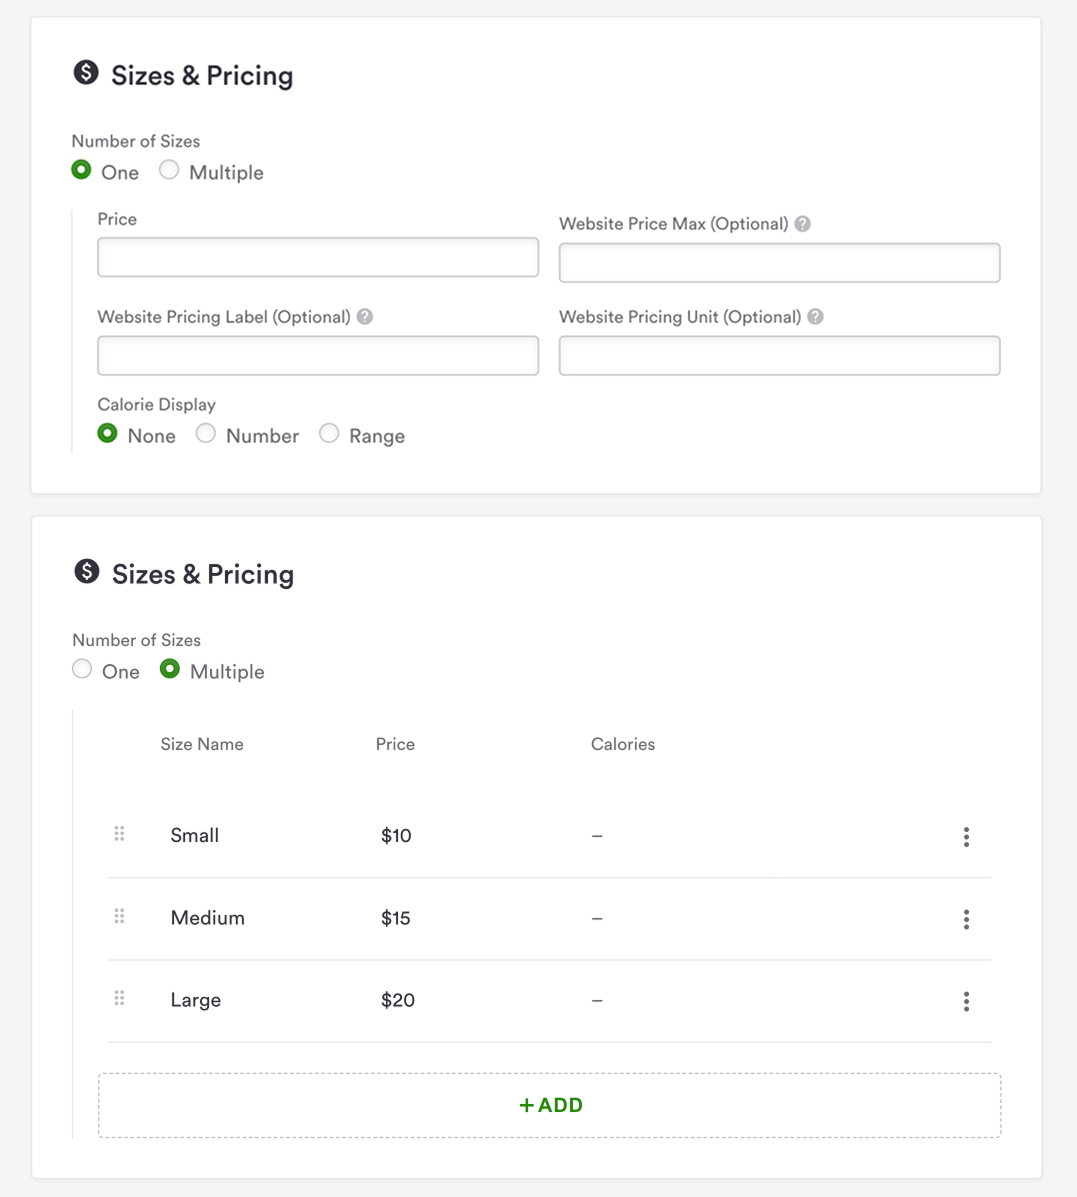
Sizing & Pricing
Here you will add your sizing and pricing options for the item. You can either add one flat price for the item, or multiple if the item comes in sizes/flavors, etc. You may also select to display a calorie count here.
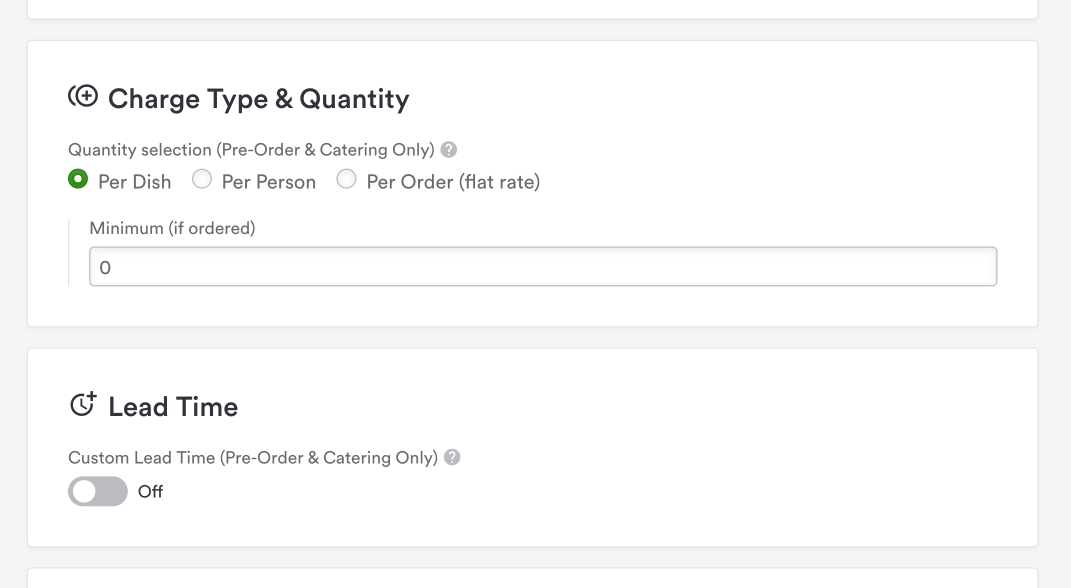
Charge Type & Quantity / Lead Time
These two fields are only available if the item is toggled on for the Catering channel
Charge type & Quantity: You can select if you would like the order to be priced per dish, per person, or at a flat rate with no quantity options.
Lead Time: This will specify how far ahead this item needs to be ordered before its available fulfillment date. If you set a 3-day lead time, the soonest the customer will be able to select for order fulfillment will be 3 days from ordering.
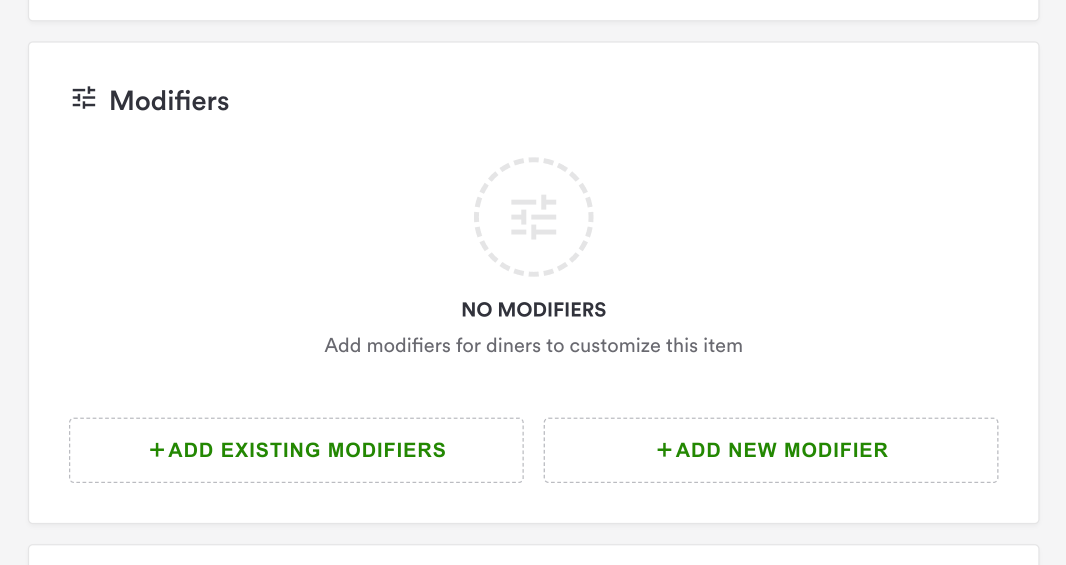
To add a modifier to an item, click Add Existing Modifiers to add an already created modifier or Add New Modifier to create a new Modifier that will be added to the item. Modifiers can also be added to items in the Modifier Detail Page
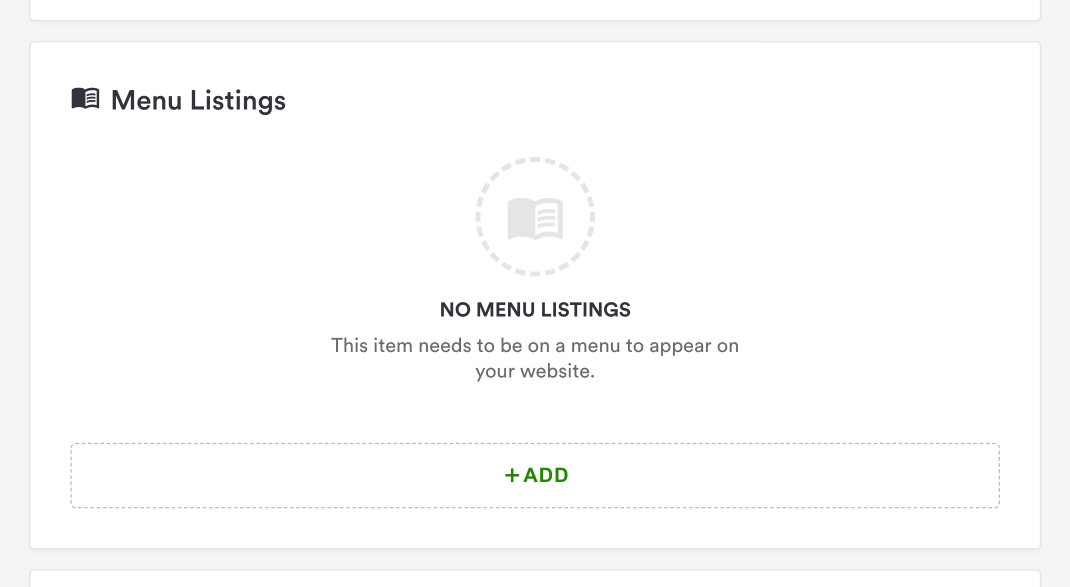
To add items to a menu go to the Menu Listings section, click Add Item, and select the Menu and menu section you want this item to be displayed in. You can also do this when editing or creating a menu in the Menu Detail Page.
You can add any dietary specifications, spicy ratings, or allergens within the checkboxes at the bottom of the page. These will display next to your items wherever they appear.
Be sure to hit Save at the top of the page and you’re ready to go!
Quick Add Item to Website Menu
We’ve made it easier for you to configure your Website Menus by adding some quick add options.
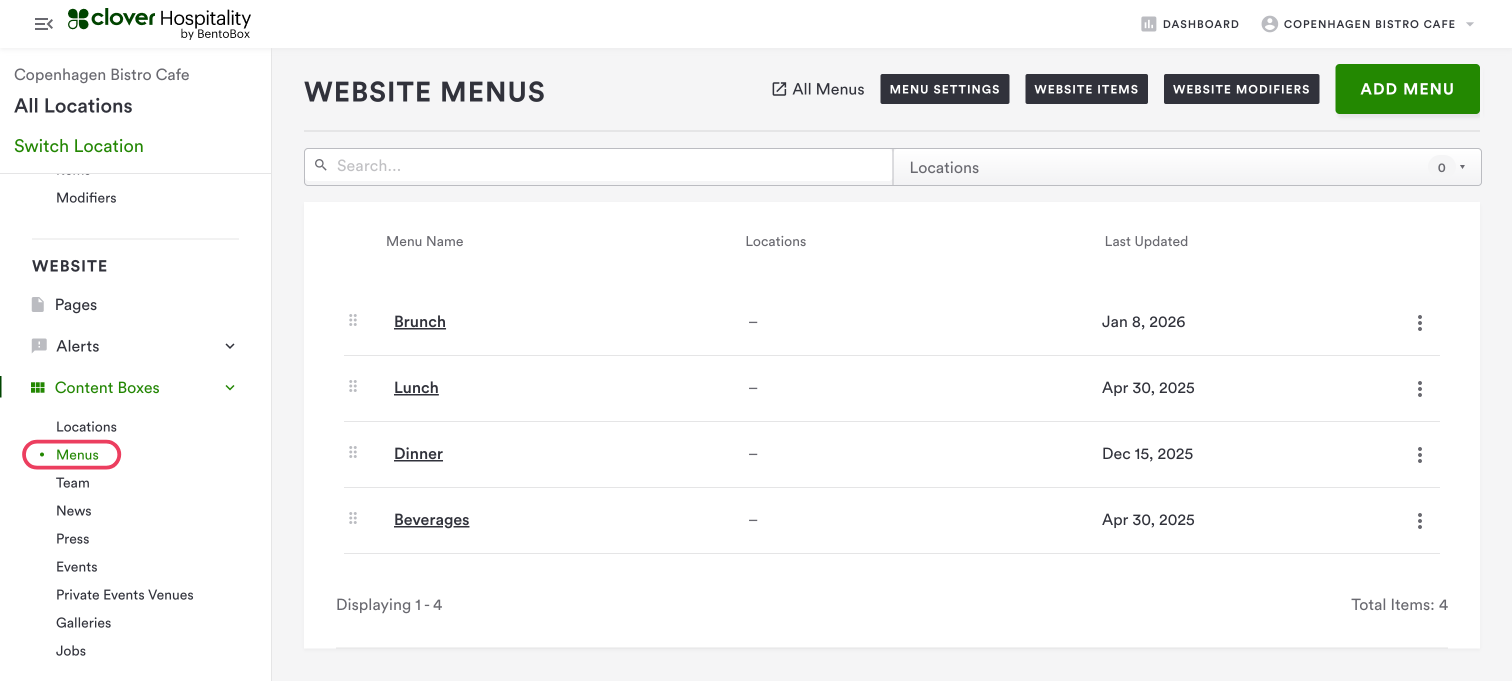
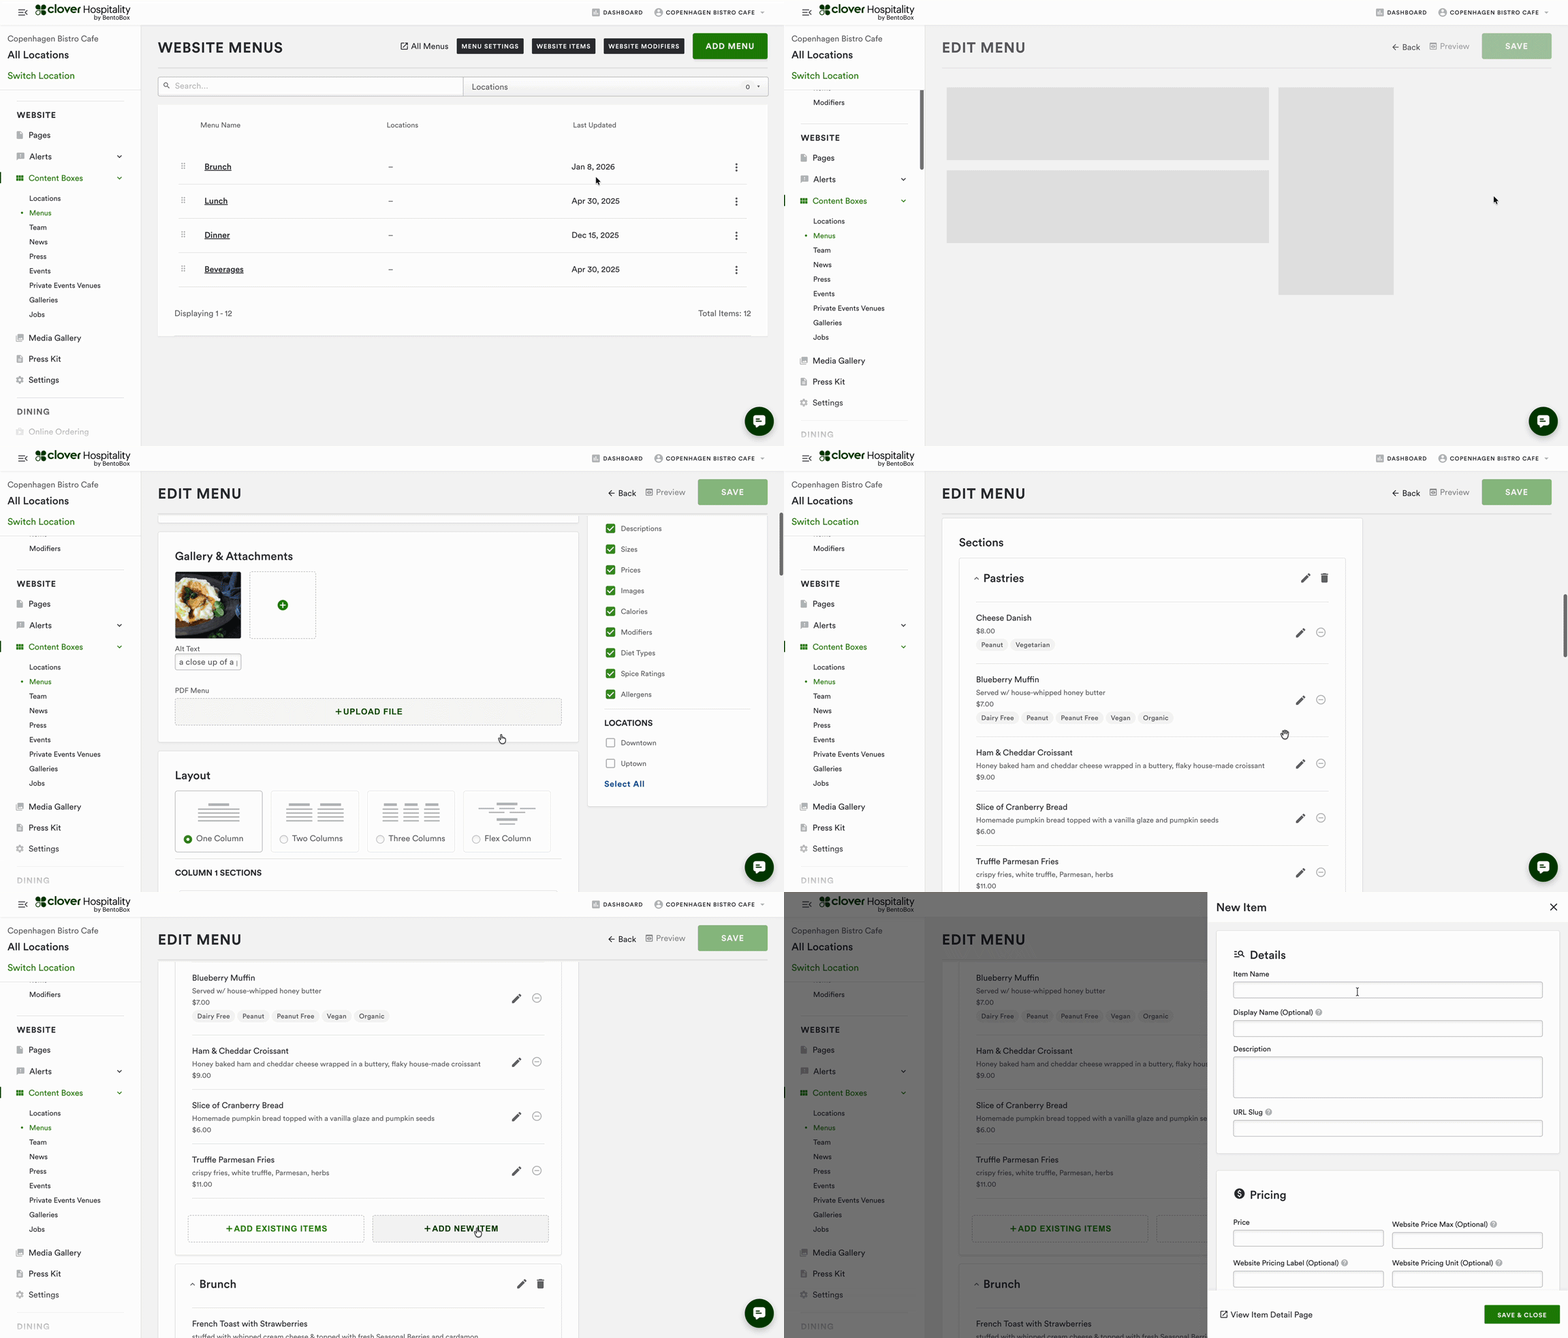
To create a new Website Menu item, navigate to Content Boxes > Menus on the left-hand navigation.
This will bring you to the Website Menus, where you can see all of the individual menu tabs that appear on the website. To create a new Item, select the menu you would live to edit, navigate to the section you would like to add the menu item to, and click ‘Add New Item’.
The Item Drawer will appear where you will input the Item Details, Pricing, Dietary Needs, Spice Rating, Allergens & Disclosures, and Channel Availability.
Channel Availability will not populate this new item on Online Ordering or Catering stores. This will allow you to access this item in the applicable dashboard to then add to your stores separately. Learn more about Channel Availability here.
Save & Close will add this item to the selected section within the Website Menu, and this item will now populate on the Website.
‘View Item Details’ will save the item to the menu, then take you to the Item Details page where you will have access to Lead Times, Online Ordering/Catering Store availability, and Modifiers.

