Managing Coursing in the POS
Coursing helps organize menu items into service stages, such as Appetizer, Entrée, and Dessert, allowing staff to control when each course is sent to the kitchen. This improves pacing, service flow, and the overall guest experience.
Using Coursing in the POS
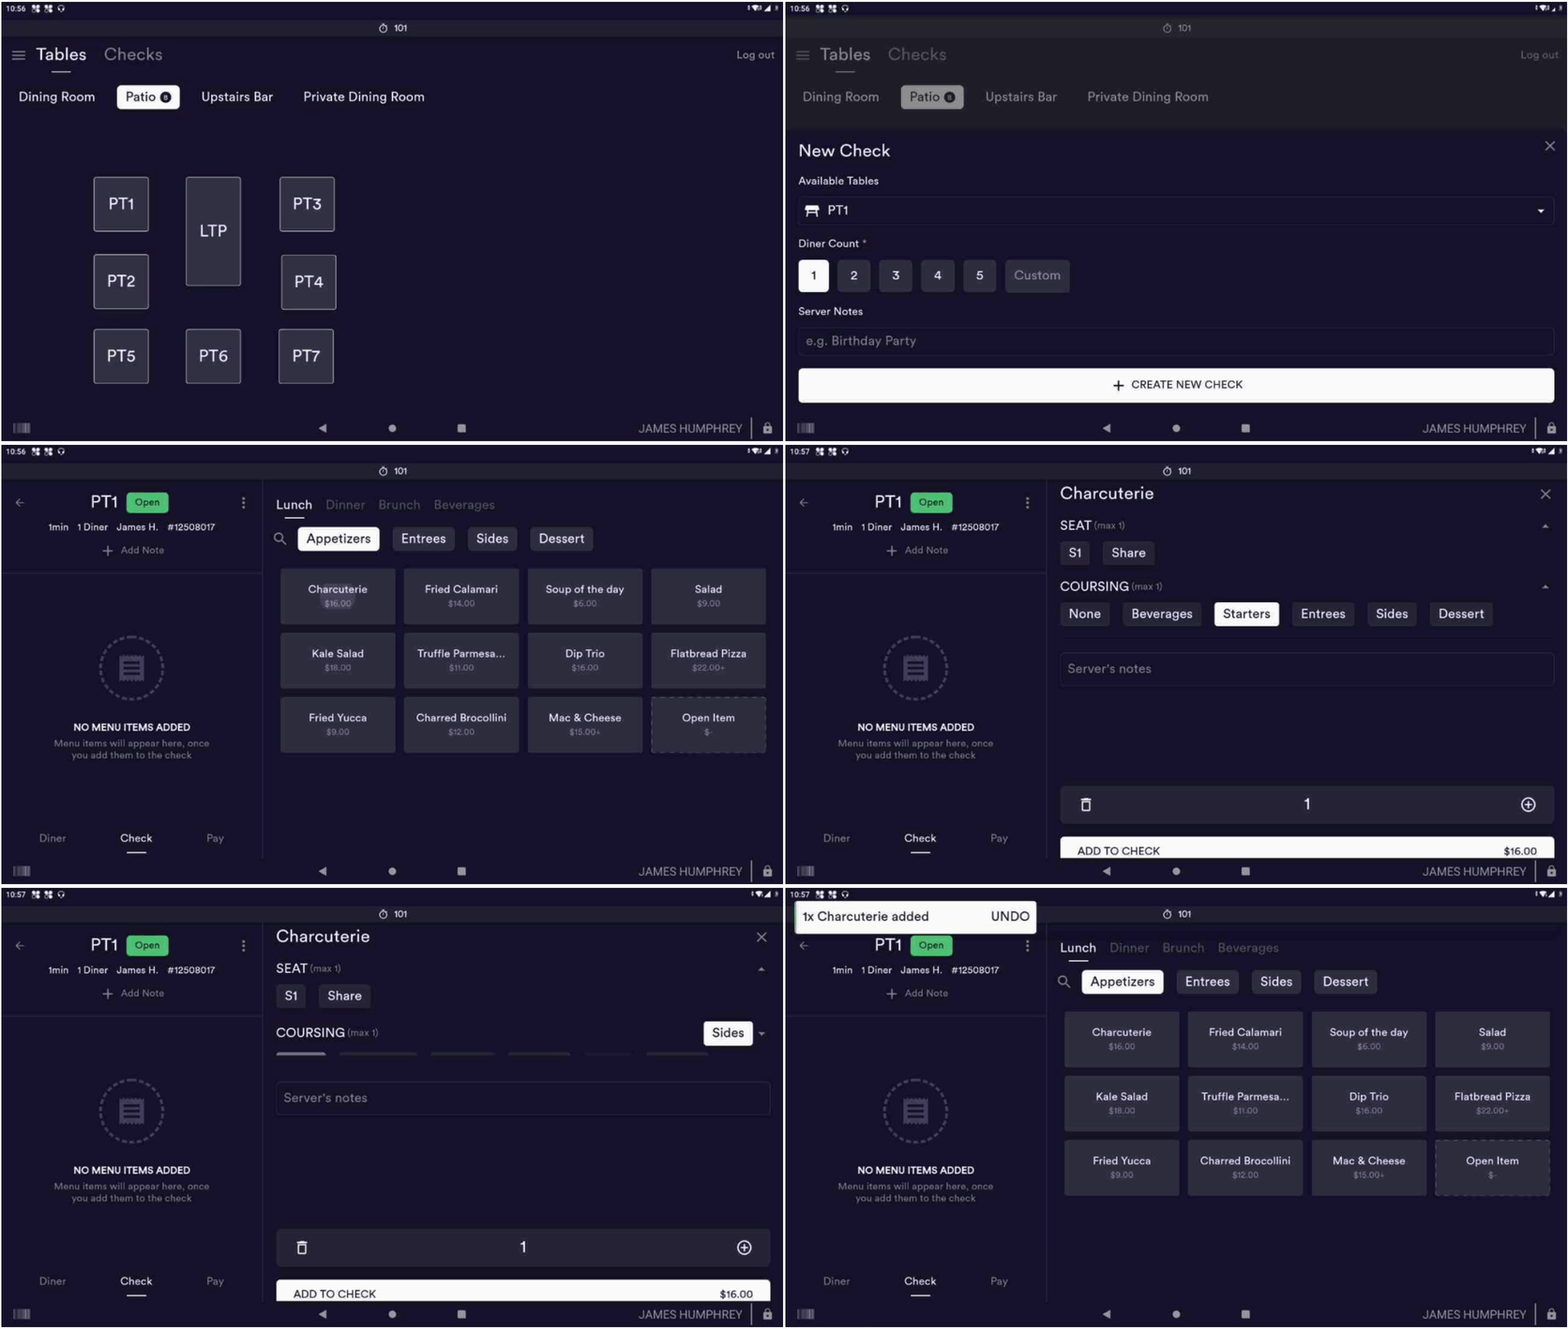
1. Assign Items to Courses
Select a menu item.
Assign or confirm the course (e.g., Appetizer, Entrée, Dessert).
Add the item to the check.
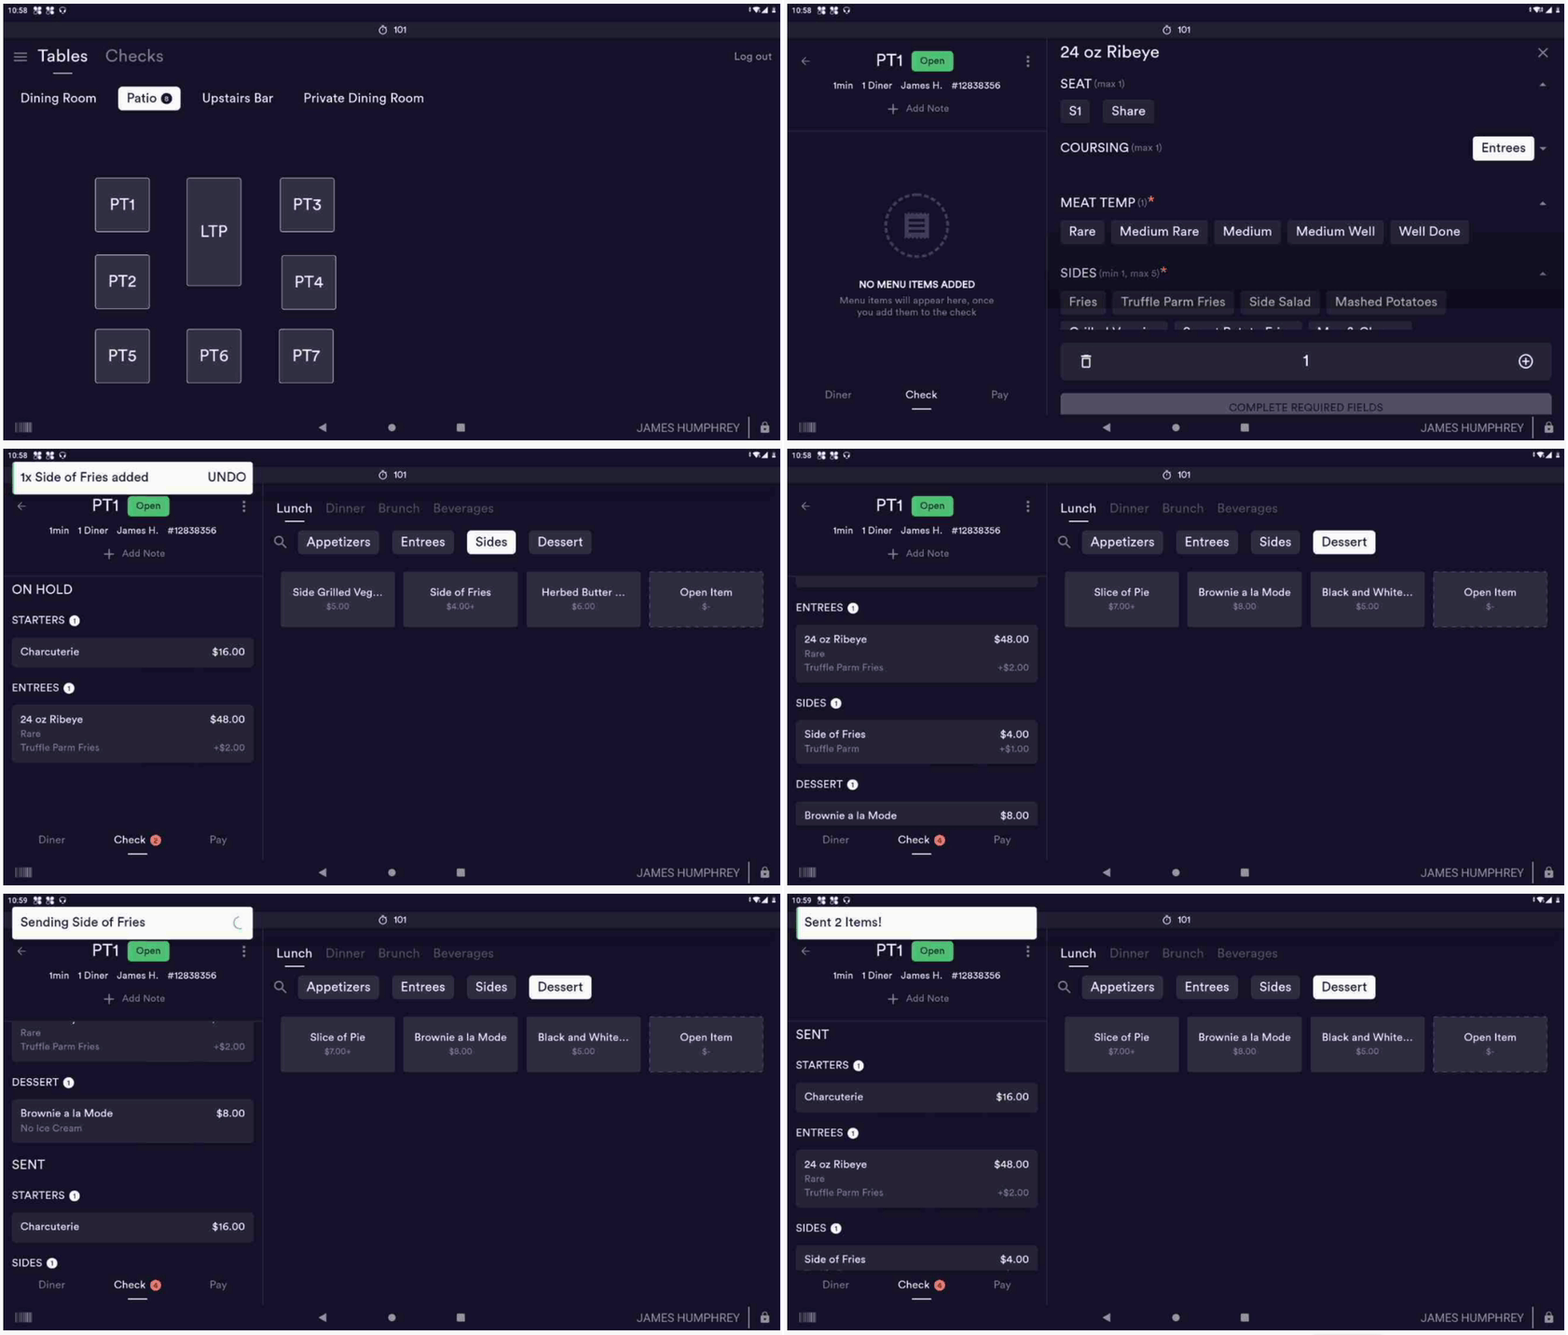
2. Fire Courses to the Kitchen
Tap individual items or use Select All to fire an entire course.
Fire courses in sequence based on service timing.
3. Monitor Fired Items
Once fired, items are sent to the kitchen.
Seat and course indicators help staff pace service and ensure accurate delivery.
Configuring Coursing in the Dashboard
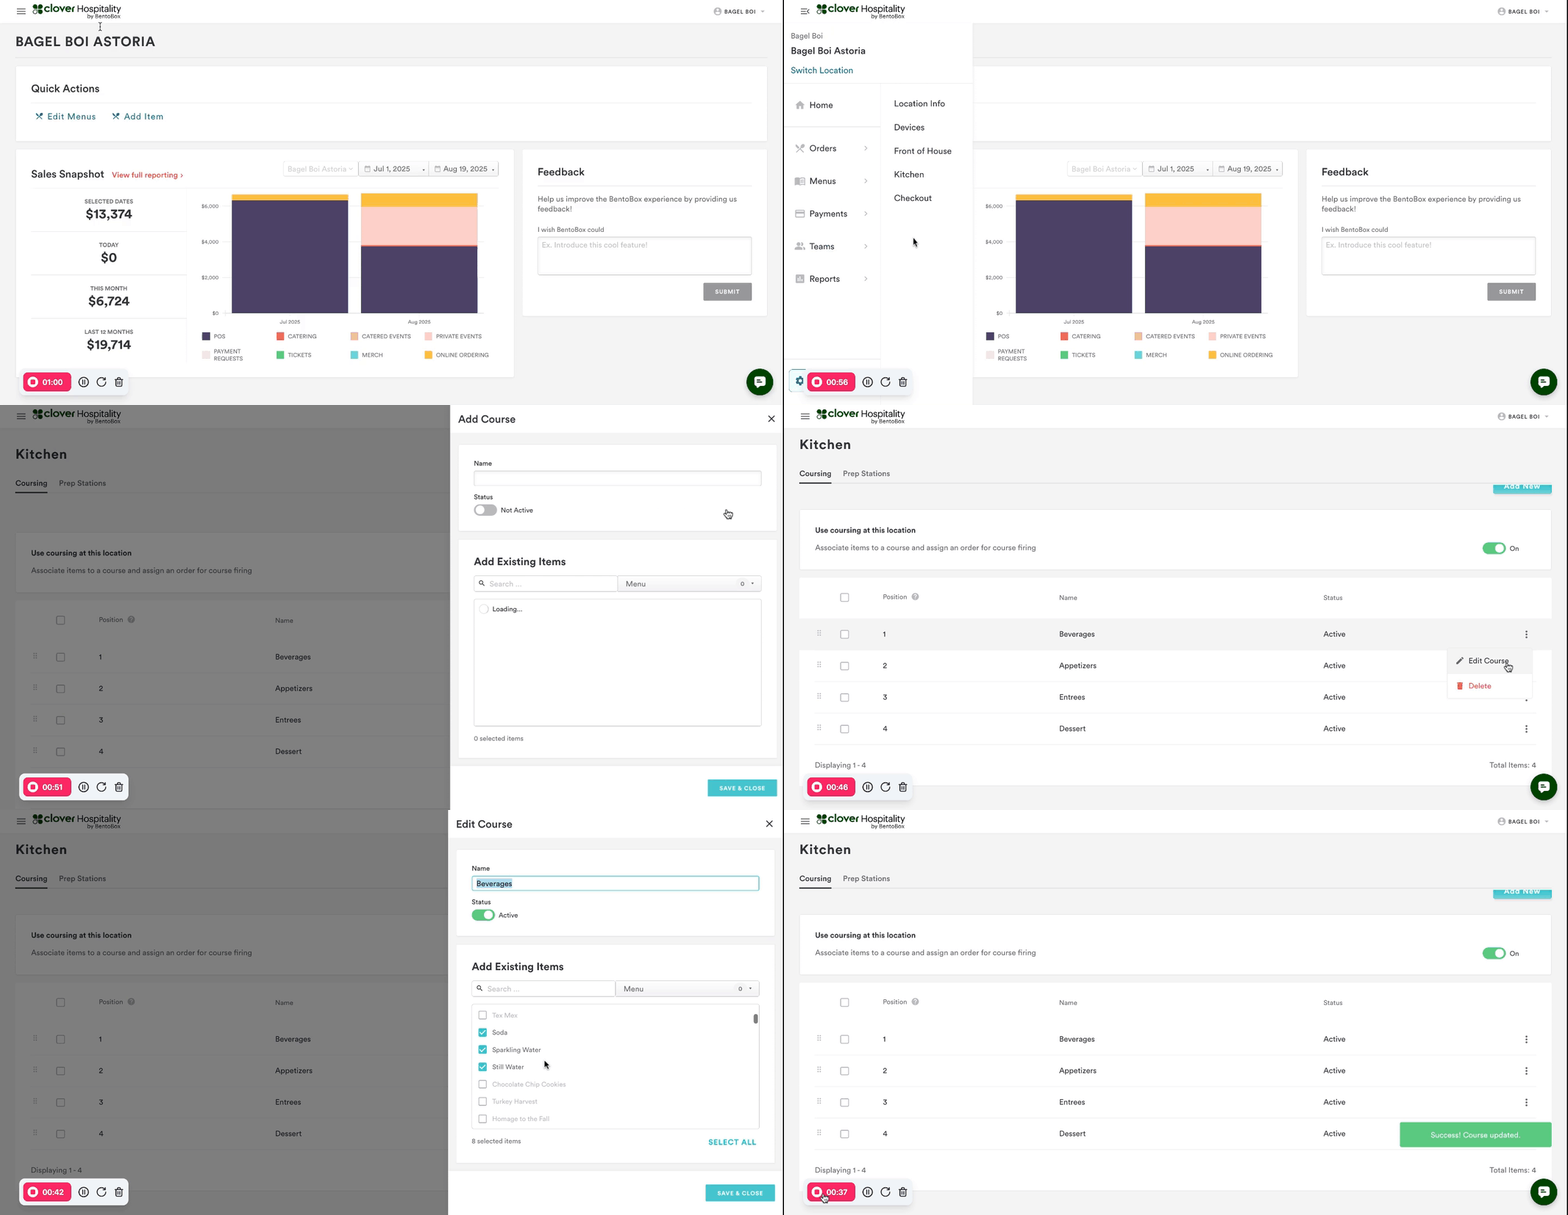
To set up or manage coursing:
Navigate to the Location Subnavigation.
Click Switch Locations and select the appropriate location.
Go to Settings → Kitchen → Coursing.
Click Add New to create courses (e.g., Beverages, Appetizers, Entrées, Desserts).
Assign items to each course.
Mark each course as Active to make it available in the POS.
FAQs – Coursing
Q: Can courses be fired out of order?
A: Yes, staff can manually fire any course at any time.
Q: What happens if an item is not assigned to a course?
A: It will default to a bucket labeled OTHER and won’t be grouped for firing. Staff must manually assign it to the correct course before sending it to the kitchen.
Q: Can a course be edited after items are added?
A: Yes, items can be reassigned to a different course before firing.
Q: Do items fire automatically once added to a course?
A: No, firing is manual and must be initiated by staff.
Q: Why isn’t a course showing up in the POS?
A: Courses must be marked as Active in the Dashboard to appear in the POS.


