Applying Discounts in the POS
Overview
Discounts in the POS can be applied to individual items or entire checks. This guide explains how to apply, configure, and manage discounts directly from the POS and Dashboard.
Applying Discounts in the POS
Item-Level Discounts
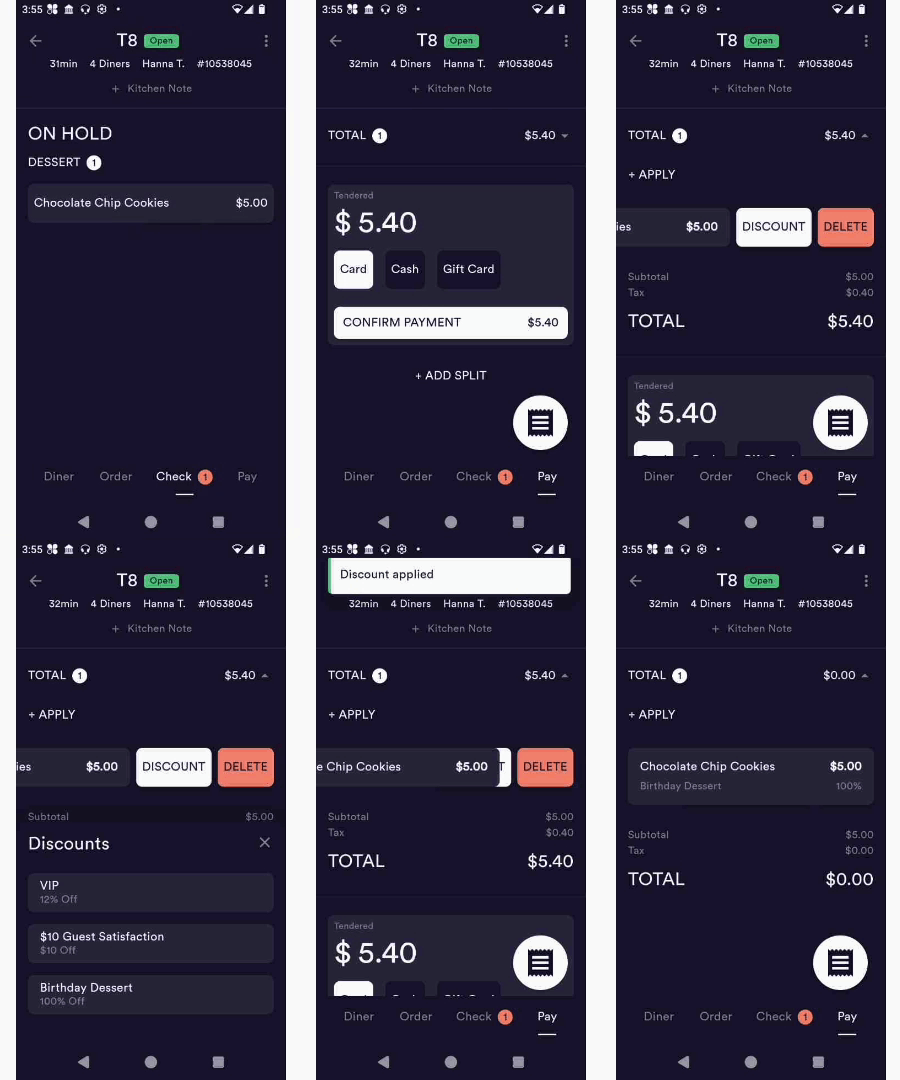
Navigate to the Pay Screen on an open check.
Tap the arrow icon to view the itemized receipt.
Swipe on an individual item to reveal discount options.
Select a discount (e.g., Birthday Discount).
The discount will apply only to that item.
Check-Level Discounts
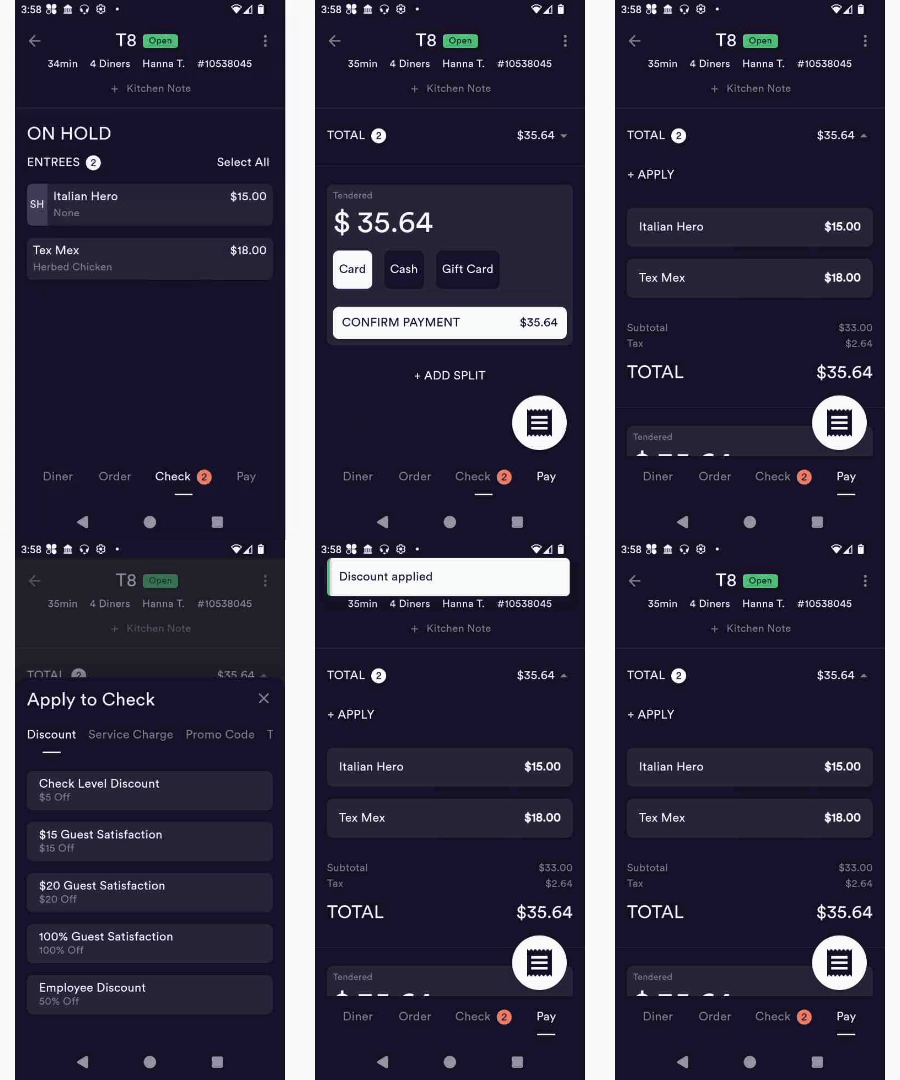
On the Pay Screen, tap the Apply button in the top left corner.
Select a discount (e.g., Employee Discount).
The discount will apply to the entire check.
A pill-style label will appear showing the discount name.
Tap the X on the pill to remove the discount if needed.
Configuring Discounts in the Dashboard
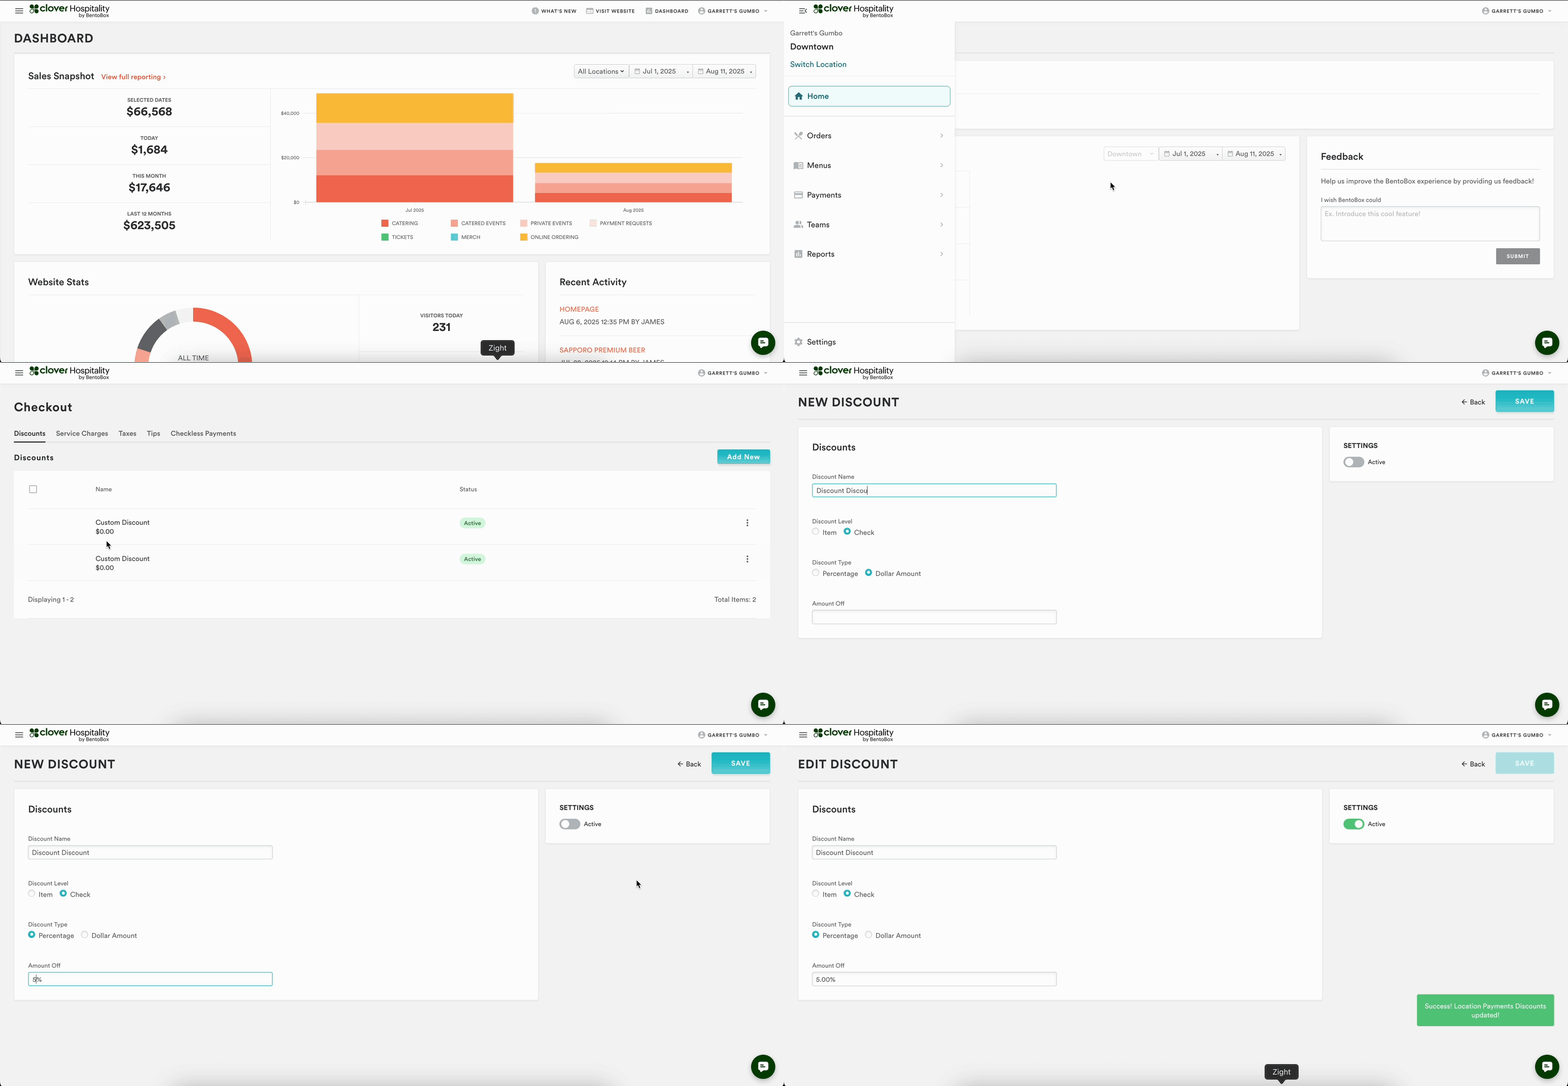
Navigate to Location Subnavigation.
Click Switch Locations and select the appropriate location.
Go to Checkout Settings → Discounts.
Click Add New to create a discount.
Enter:
Discount Name
Discount Level (Item or Check)
Discount Type (Percentage or Dollar Amount)
Amount Off
Toggle Active to make the discount available in the POS.
FAQs – Discounts
Q: Can discounts be applied to individual items?
A: Yes, item-level discounts can be applied using the swipe feature on the Pay Screen.
Q: Can a discount be applied to the entire check?
A: Yes, check-level discounts can be applied using the Apply button.
Q: Can discounts be removed after being applied?
A: Yes, tap the X next to the discount label to remove it.
Q: Why don’t I see a discount in the POS?
A: Discounts must be created and marked Active in the Dashboard to appear in the POS.


