
How to upload images and use the media gallery
Clover Hospitality by BentoBox users have access to the Media Gallery. The media gallery is a library in which users can manage their images and folders on their account. Once an image is uploaded to the Media Gallery, it is available to use in all the image fields throughout the platform.
Uploading images
There are two ways to upload an image:
1. Within the platform itself - you may upload an image anytime you see an image uploader box within your page headers or content boxes. Note that any time you upload an image to the backend in any of those sections, it will automatically be added to the Media Gallery.
2. Using the Media Gallery - uploading images with this feature will allow you to edit its focal point and settings (keep reading to learn more)
Follow the steps below to upload images directly to the Media Gallery:
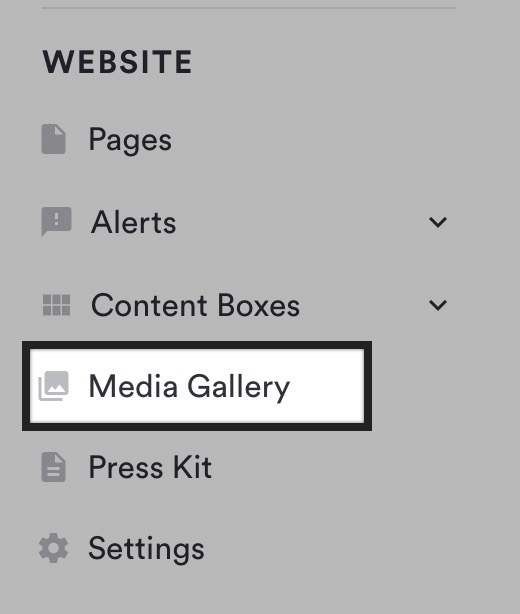
Log in to the backend and click on Media Gallery in the left-hand sidebar.

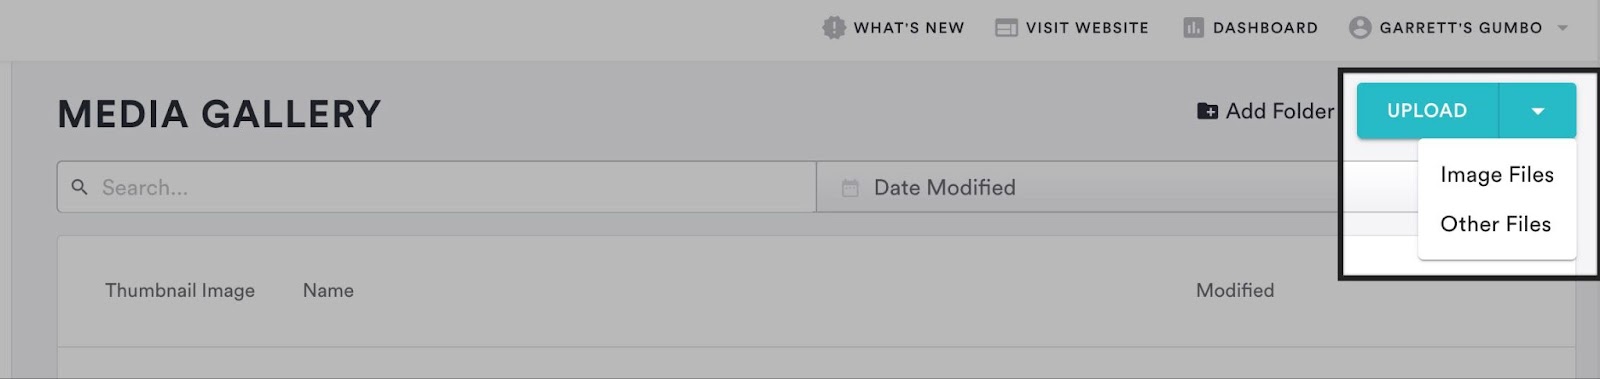
You will land on the Media Gallery, where you will see the list of folders, images, and files that are already uploaded. Click the “Upload” dropdown button in the top right and select “Image Files”.

Use the upload dialog that appears to add new images from your desktop. You can also link a Box, Dropbox, or Google Drive account to upload images stored on those services, or use a URL to add new images.
You may optionally edit the image by cropping or rotating it. Once you’ve selected your images, click the “Upload” button. Once completed, you will land back in the Media Gallery.
When you land back in the Media Gallery, you’ll see the images among the thumbnails, files, and folders. Now you’ll be able to utilize the image throughout the website wherever you see an image uploader box.
Editing images in the Media Gallery
Follow the steps below to edit images that are already uploaded to the Media Gallery.
Log in to the backend and click on Media Gallery in the left-hand sidebar.

You will land on the Media Gallery, where you will see thumbnails of images, files, and folders that are already uploaded and created.
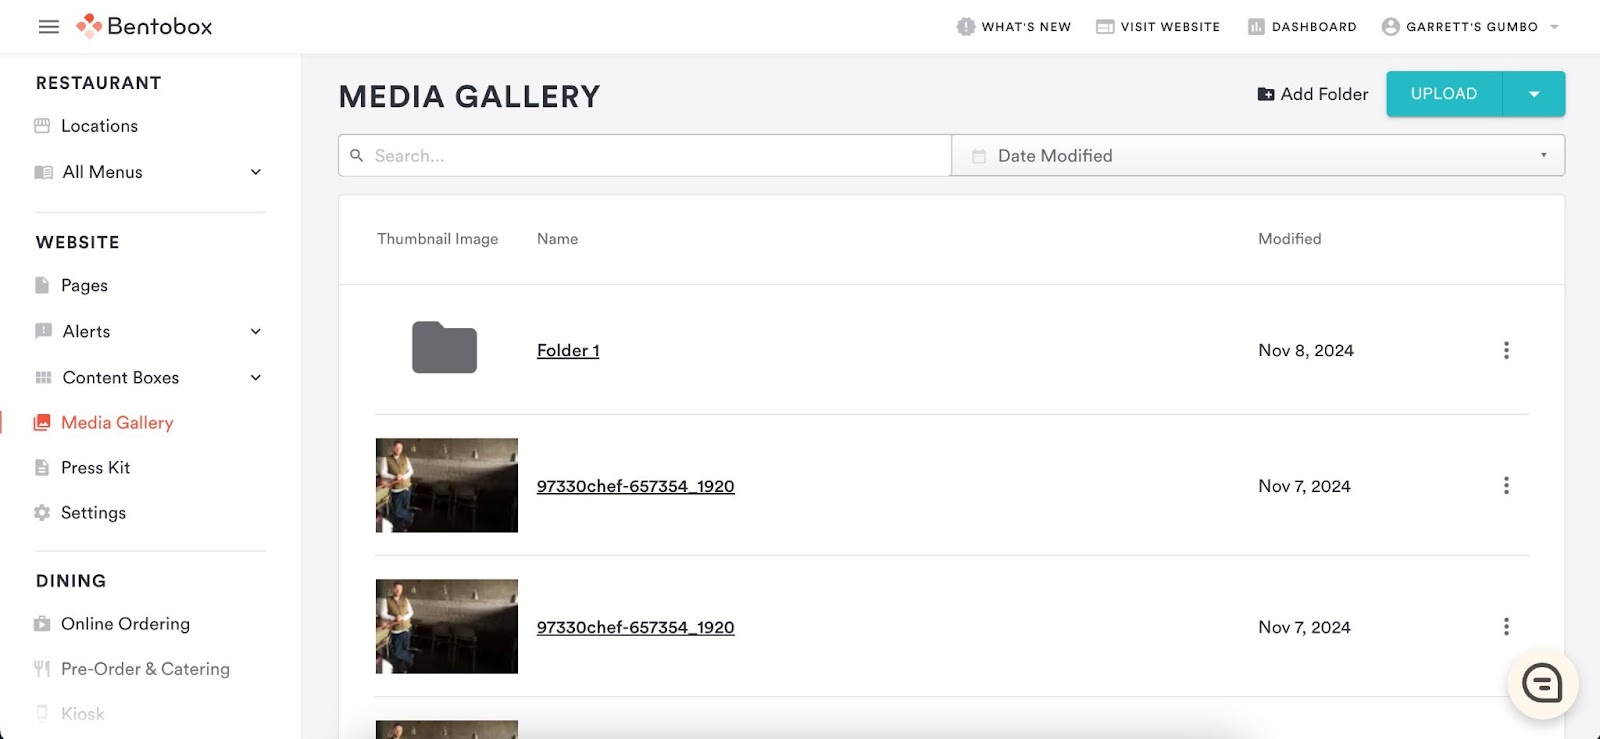
Click on the actions menu (the kebab) to the right of the image you’d like to edit and you’ll be taken to the Media File page, where you’ll see the image viewer on the left and the image details to the right.
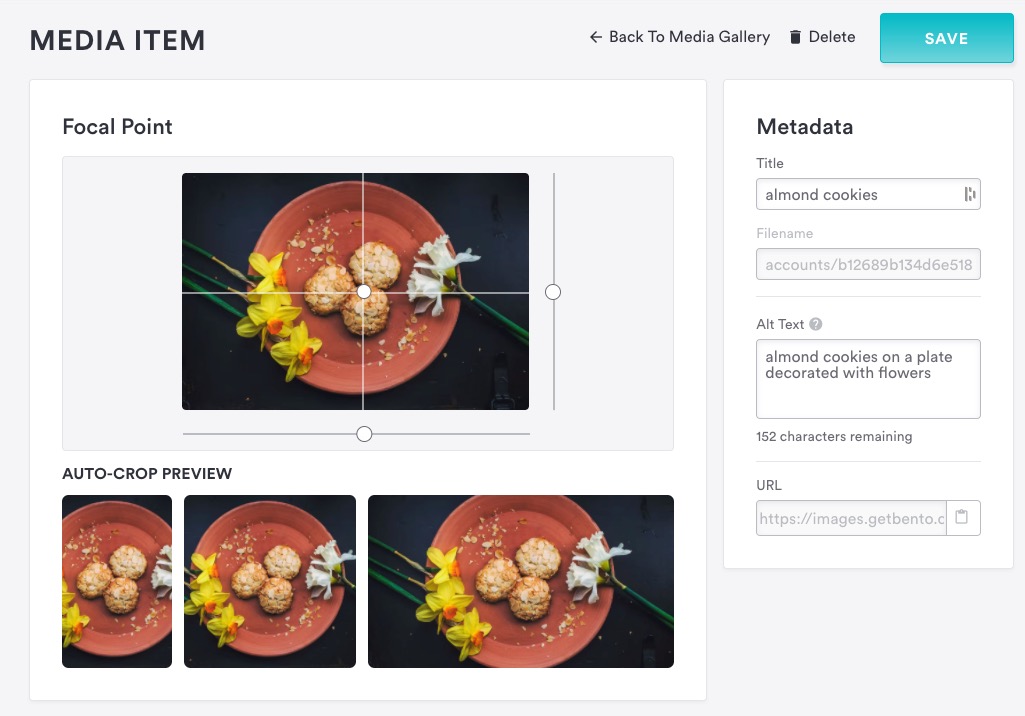
Title: enter a name for the image in this field. This is optional and for your own reference. Visitors will not see this name when you use the picture on your site.
Alt Text: Concisely describe meaningful image content for visually impaired people, search engines, and low-bandwidth devices. Images with no alt text will display an AI-generated description. Click here to learn more about digital accessibility.
URL: copy the URL in this field if you need a direct link to your image. This is good for sharing on social media or elsewhere on the web.
Delete: click this icon at the top right to delete an image. Note that this cannot be undone and will remove it from any pages and gallery where it currently appears, so delete it at your own risk.
Click the “Save” button to save any changes and return to the images section of the Media Gallery.
Editing the Image Focal Point
Image Focal Point lets you change the focus of a photo before featuring it on your website or menu. By default, the focal point will be the center of the photo; you may click and drag the image to shift the focus and preview the new focal point before publishing it.
Note that setting a focal point on one image will apply to that image's instance. This means that if you want to use the same image in multiple places on your website or menu, you'll need to upload that image multiple times and set a different focal point for each instance.
Click here to learn more about the Image Focal Point.
Uploading files to the Media Gallery
Follow the steps below to upload files other than images to the Media Gallery. This is most often used for PDFs of menus, flyers, and other marketing or promotional materials, but can also be used for video, audio, and other file types.
There are two ways to upload a file:
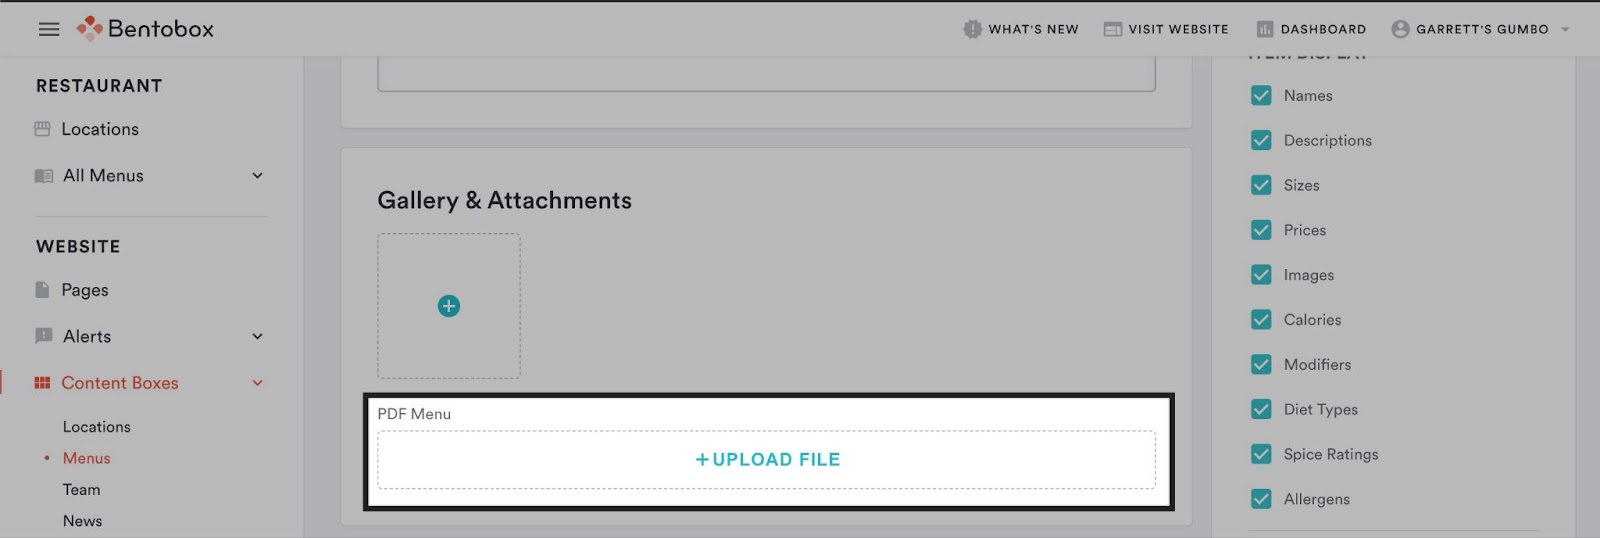
1. Within the platform itself - you may upload a file anytime you see a file uploader box, such as the menu page.
Note that any time you upload a file to the backend in any of those sections, it will automatically be added to the Media Gallery.
2. Using the Media Gallery
Follow the steps below to upload files other than images to the Media Gallery. This is most often used for PDFs of menus, flyers, and other marketing or promotional materials, but can also be used for video, audio, and other file types.
Log in to the backend and click on Media Gallery in the left-hand sidebar.
You will land on the Media Gallery, where you will see the list of folders, images, and files that are already uploaded. Click the “Upload” dropdown button in the top right and select “Other Files”.
Use the upload dialog that appears to add new images from your desktop. You can also link a Box, Dropbox, Google Drive account to upload files stored on those services, or use a URL to add files.
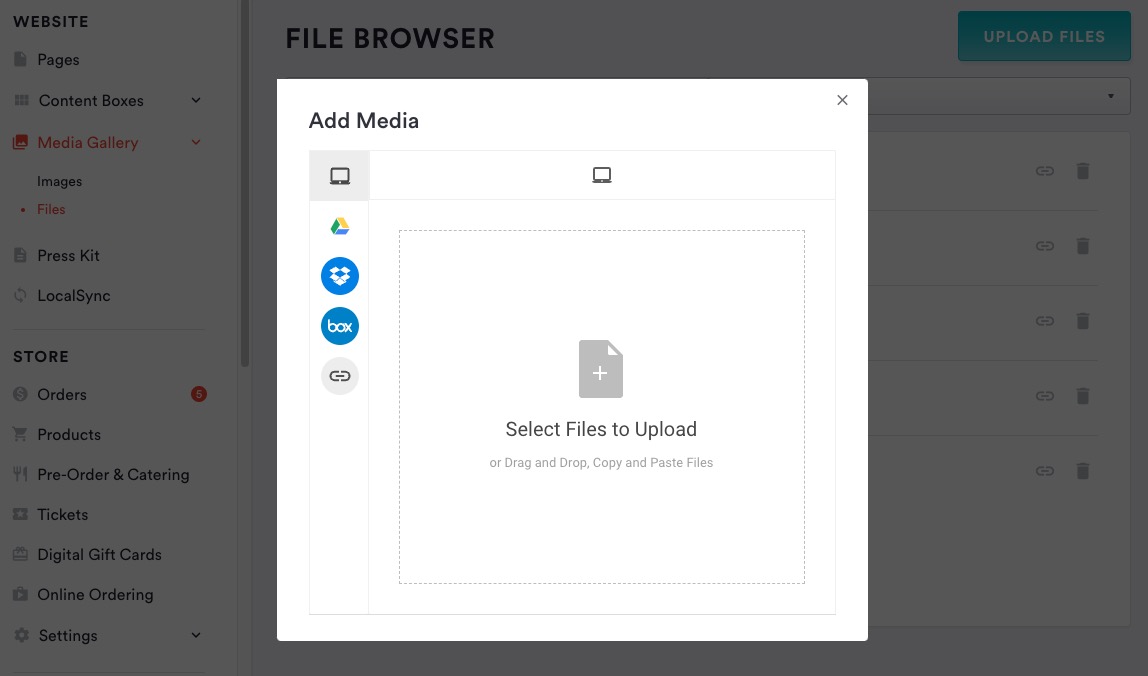
Once you’ve selected your files, click the “Upload” button. Once uploaded, you will be redirected back to the Media Gallery, and you’ll see the files among the thumbnails and folders. Now you can click the “Copy URL” button to copy a link to the file in the actions menu (the kebab) or utilize the file elsewhere on the site.
Editing Files in the Media Gallery
Follow the steps below to edit files in the media gallery:
Log in to the backend and click on Media Gallery in the left-hand sidebar.
Click on the Actions menu (the kebab), to the right of the file you’d like to edit and you’ll see the options available for Files
Rename: This will allow you to rename the file in the backend.
Copy Link: This will copy a direct URL link to your clipboard to paste.
Download: This will download the file to your computer.
Move: This will allow you to move this file into and between folders.
Delete: This will delete the file from the Media Gallery
Creating and Editing Folders in Media Gallery
Follow the steps below to create and edit folders within the media gallery.
Log in to the backend and click on Media Gallery in the left-hand sidebar.
You will land on the Media Gallery, where you will see the list of folders, images, and files that are already uploaded. Click the “Add Folder”.
Apply a unique name to this folder.
The Media Gallery will refresh, and you will see the newly created folder at the top of the list.
To access this folder, click the folder name.
Nested Folders
Within folders, you can create nested folders. Follow the steps below to create nested folders.
Open any folder within the Media Gallery by clicking on the name.
Select “Edit” dropdown in the upper right corner.
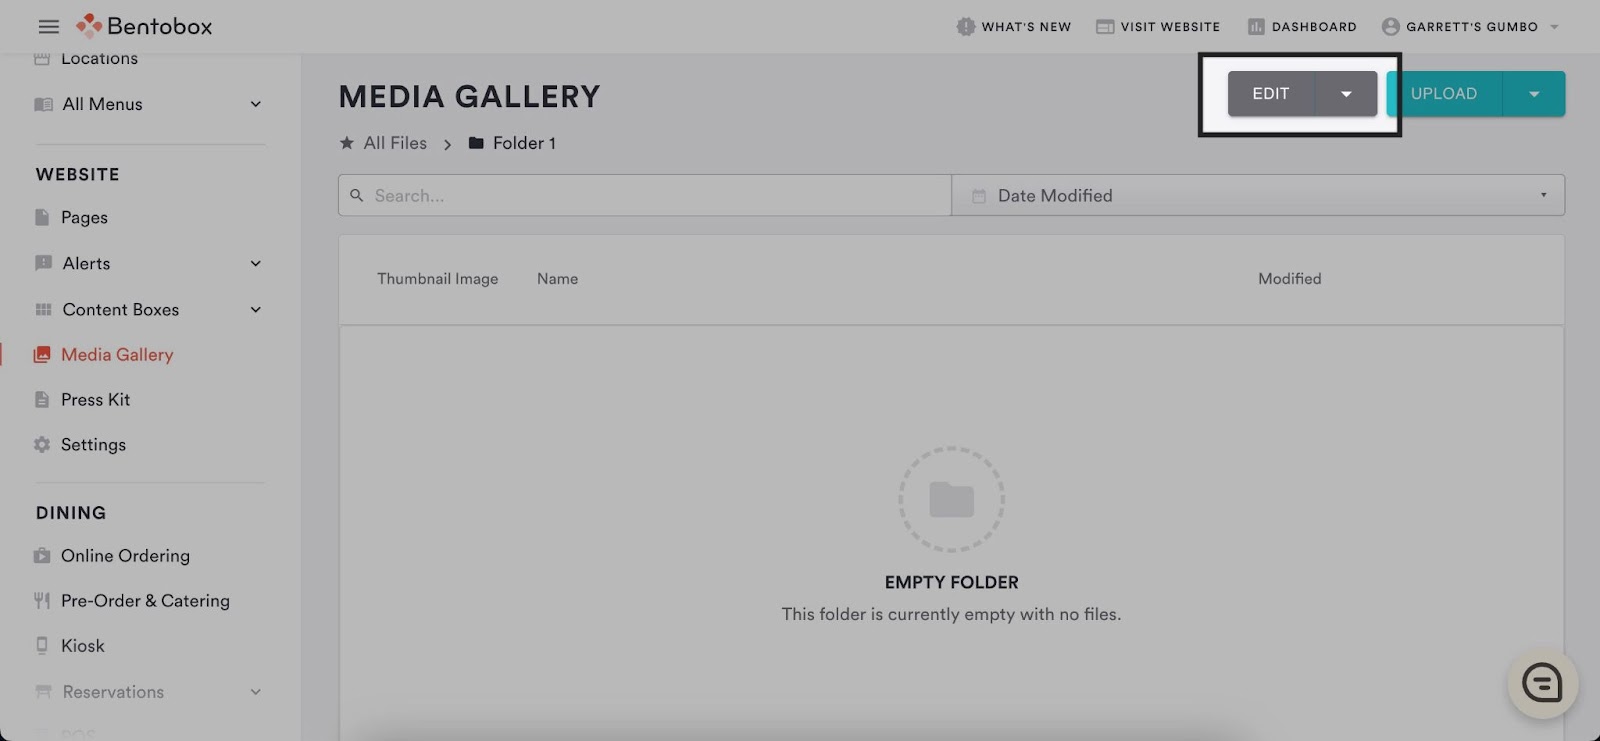
Select “Add Folder”.
Input a unique name for this new folder.
You will now see this new folder nested within the first folder. You can repeat this process up to 10 times by opening the new folders and adding new sub-folders.
You will see folder “breadcrumbs” appear above the folder so you can see which folder you are currently in.
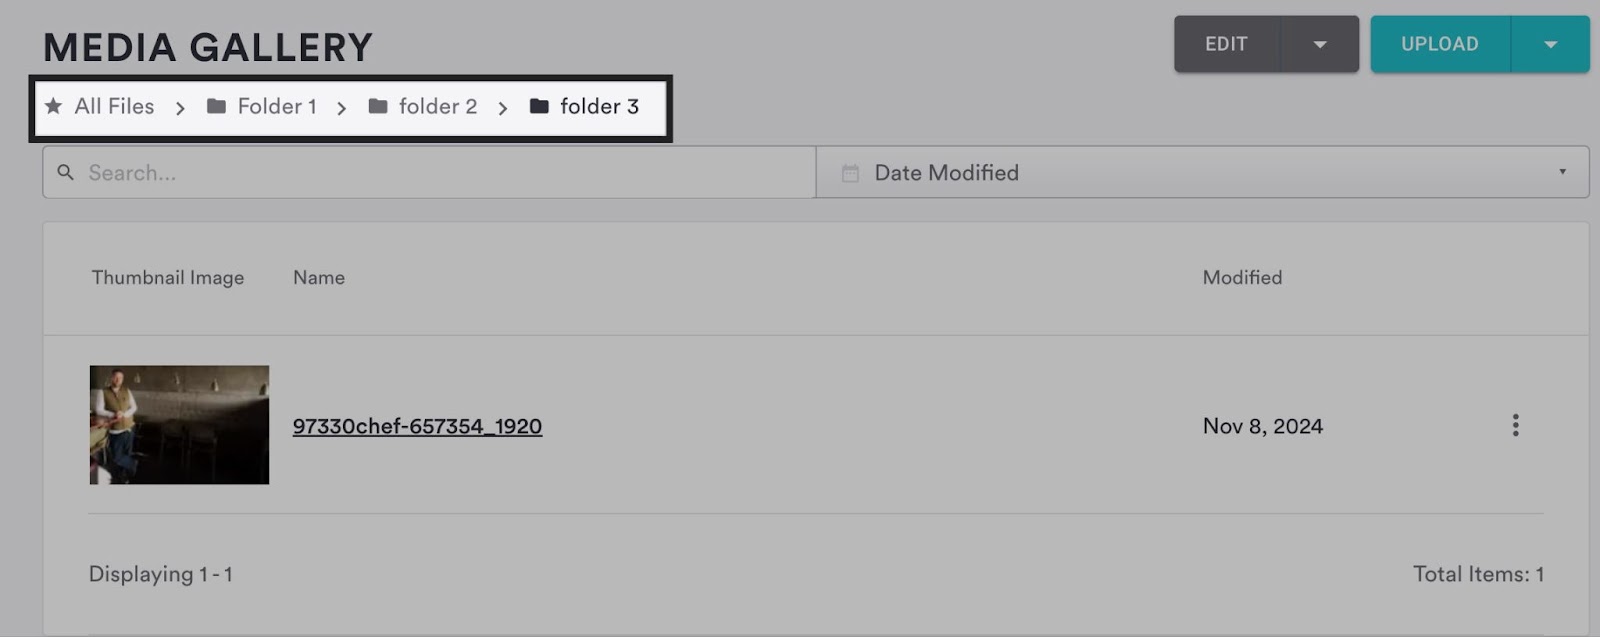
You can click between the folders within the breadcrumbs to navigate to other folders.
Folders Options
There are two ways to access folder settings. The first is through the actions menu (the kebab) in the folder row. The second is by selecting the “Edit” dropdown in the upper right corner of the folder.
Rename: This allows you to rename the folder.
Move: This allows you to move a folder to be nested within a new folder.
Add Folder (only accessible via the Edit button): This creates a new nested folder.
Delete: This deletes the selected folder.