
Epson TM-m30II-NT: Connecting Your Printer to Clover Hospitality by BentoBox
This article walks you through how to manage your Epson TM-m30II-NT printer integration settings in the backend.
Note: Before moving to the directions in this article, you should have purchased an Epson printer through Shop POS and received it on-premise. It should be placed near an ethernet connection (you can buy an ethernet cord here if you need one).
Alternatively, if you choose to manually configure an existing Epson printer, the printer still requires ethernet connection and cannot be used to print orders outside of Clover Hospitality by BentoBox. We recommend you purchase a pre-configured printer to make setup easier.
Once you're logged in to the backend (You can log into the backend here at any time), navigate to Online Ordering > SETTINGS > Printers > "Add New." Here, you'll select "Epson" and enter your serial number.
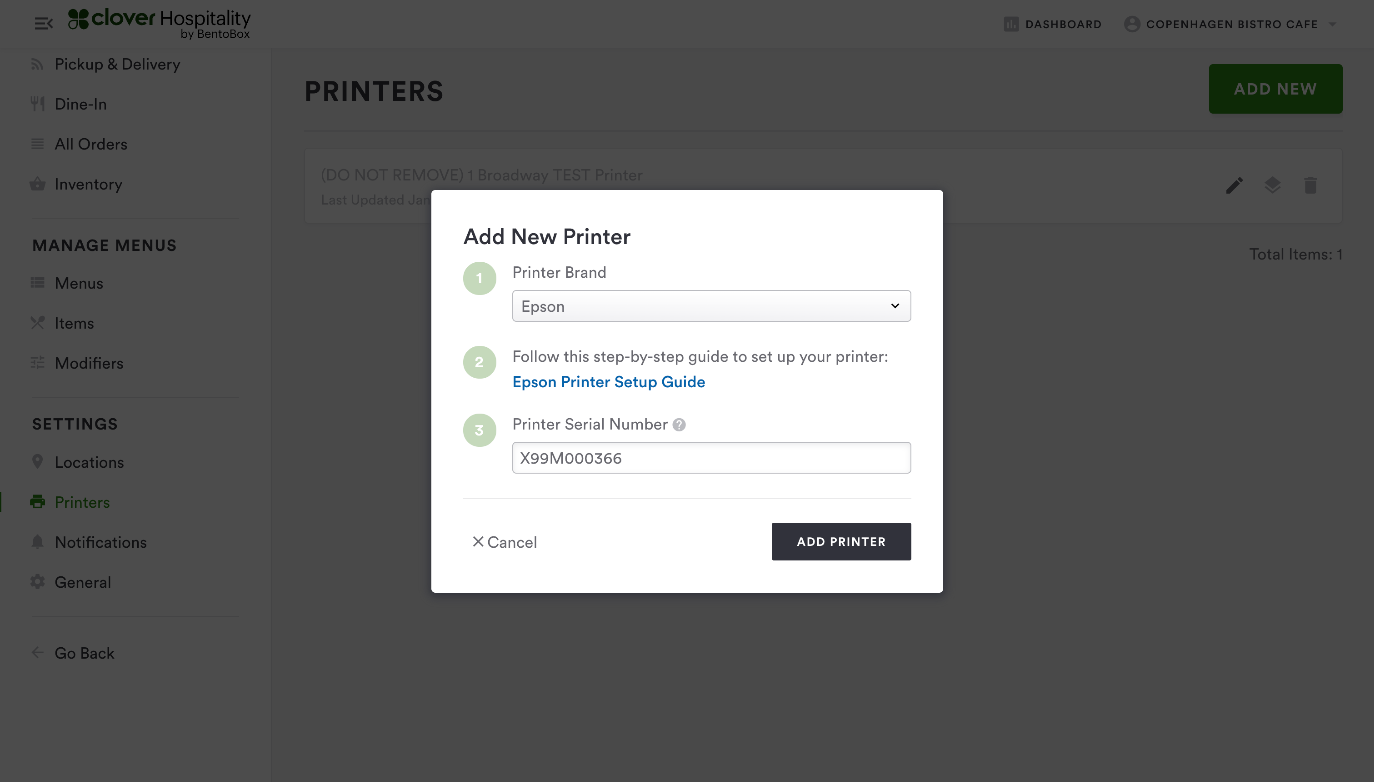
Your printer’s serial number found on your printer’s box or on the bottom/back of the printer.
Once the serial number is entered, select the “Add Printer” button. Wait for your printer to print out a “test print” and the status of the printer to turn green/online.
Updating the Printer Settings
On the printer settings page, add the name of the printer. We recommend the name of the printer be the station or the area where your printer will be placed.
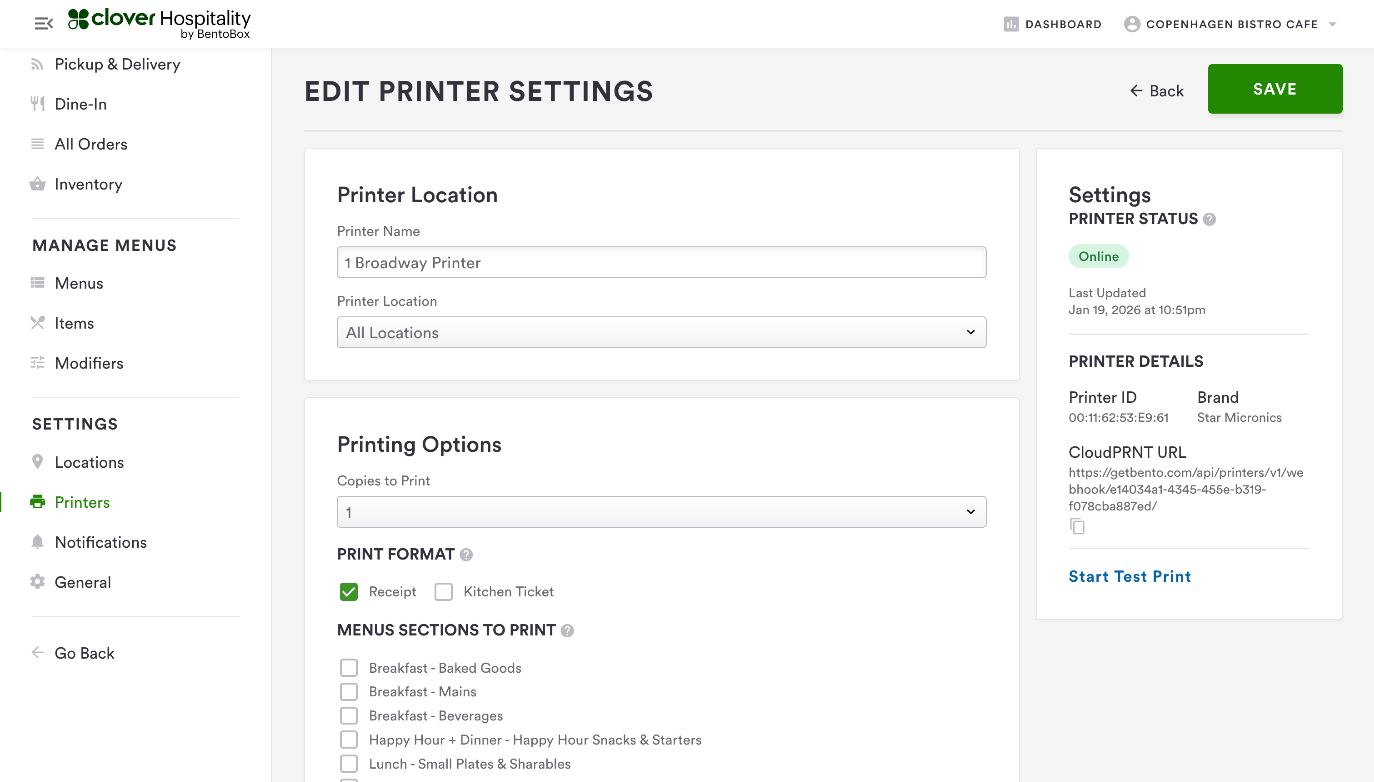
Next, add the location that this printer is associated with. This means, an order from a location not selected will not print out from this printer.
You have the option to choose the print format for your printer.
“Receipt” — this prints a ticket with the customer’s name, phone number, items purchased and their cost, and totals.
“Kitchen Ticket” — this prints a larger font size and the order items only to be used by the kitchen staff.

We recommend that you select both options to print both formats together. You’ll also need to select a quantity for how many printouts you want for each order. The typical number of copies is 1: one receipt for the front of house and one kitchen ticket for the kitchen staff.
Lastly, you can choose which menu sections will be printed out from this printer.
Once all of your updates have been made, select “save” to save your changes.
You can also manually select the “Send Test Print” button to test the printer connection again. If there is a connection between the store and the printer, a test message should print.
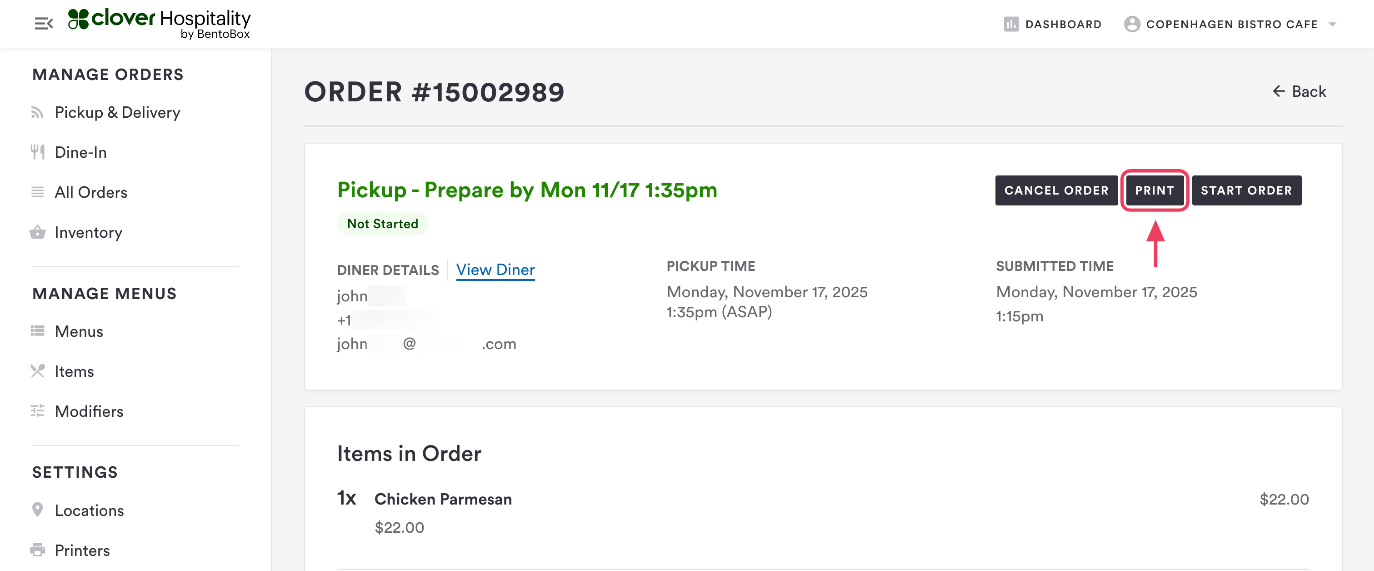
Manually printing an order
You can manually print an order out by navigating to the orders details page and selecting the "print" button. The order will print to your new thermal printer.
More Information: Printer Integration FAQs