
Configuring a menu on a location
Once you have created a menu, and assigned it to a location, you’re ready to set it up on that location.
Configuring a menu will let you determine when the menu should be shown to guests, what the lead times for the menu are, how far in advance the menu can be ordered from, and more.
To get started, go to the Location page, located in Pre-Order & Catering > MANAGE MENUS > Locations.
Once you’re in the location, choose the tab corresponding to the fulfillment type (pickup or delivery) that you would like to configure a menu for. A single menu (e.g. Thanksgiving menu) shares most settings across pickup and delivery, but can have different fulfillment times for each.
Adding Pickup or Delivery hours & settings
Click ‘Add Pickup Hours’ or ‘Add Delivery Hours’ to add a new menu. In this example we will look at creating a Pickup menu, but the process is the same for Delivery. Delivery zones are configured separately.

You’ll see the first step of the menu creation popup appear.
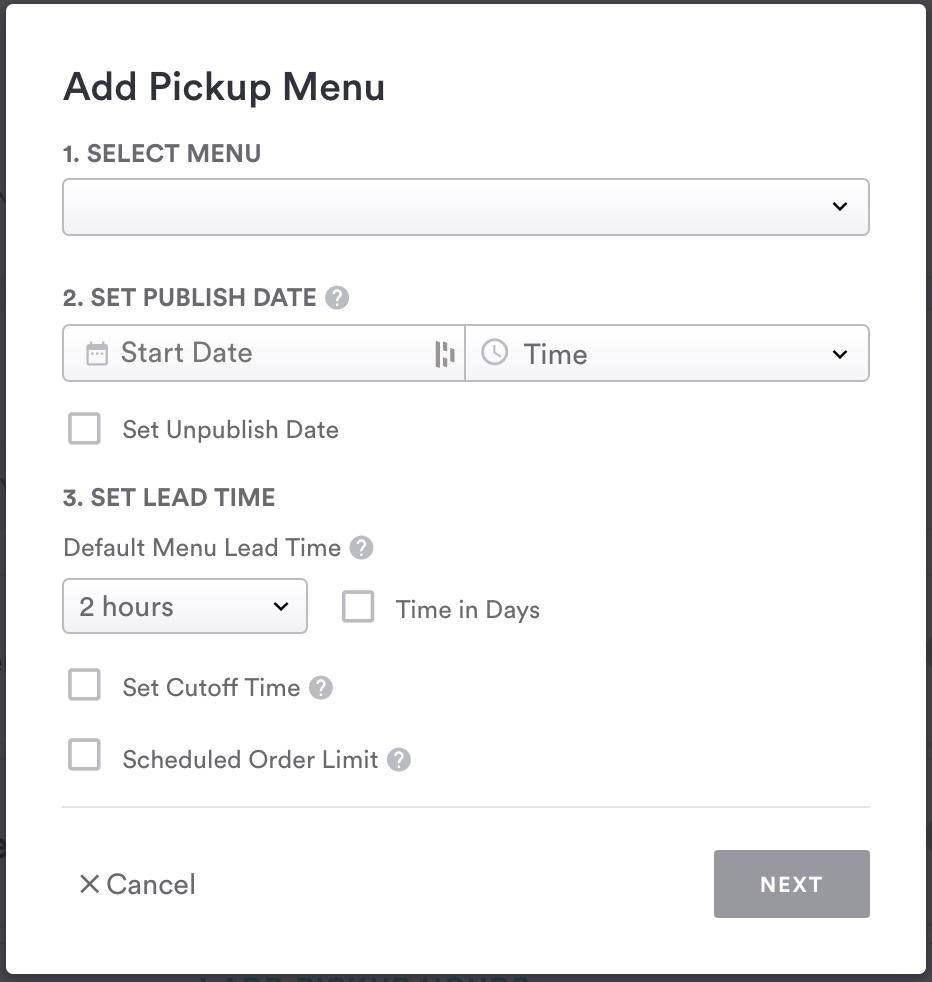
Select Menu: Choose from menus that are associated with this particular location. If the menu you want hasn’t been assigned to the location, you’ll need to go to the menu page to do that (learn more about assigning a menu to a location).
Set Publish Date: This determines when guests will first be able to see a menu. It does not need to be the same as the fulfillment dates or times that food from this menu can actually be prepared by your business. For example, you might want a Thanksgiving menu to be published in September, but for items on that menu to only be available for guests the week of Thanksgiving.
You can also set an optional unpublish date here, if you’d like.
Lead Time, Cutoff Time & Scheduled Order Limit
Set Lead Time: This sets the shortest possible lead time for the menu. Pre-Order & Catering lets you set a lead times for your guests. A guest can only order food if they choose a fulfillment time further in the future than the longest applicable lead time. The shortest available lead time is 1 hour. You can choose lead times in hours (up to 23 hours), or in days (up to 30 days).
Set Cutoff Time: Setting a cutoff time prevents orders that come in after the cutoff from being placed for the same day - or, for longer lead times, adds a day to the earliest fulfillment date if orders are placed after the cutoff.
For example, you could have a lead time of 2 hours, and be fulfilling orders through 10pm, but you want to cut off new orders at 4pm to avoid juggling new orders once you’ve started fulfilling orders for the current day.
If a lead time is in hours, and a guest is after the cutoff, the next available fulfillment time will be calculated from midnight of the next day. For example, if your lead time is 8 hours, and a guest attempts to order at 5pm, after your cutoff, the next available time will be at 8am the next day.
If lead time is in days, and a guest is after the cutoff, we’ll add one to the date of the earliest available fulfillment time. For example, if your lead time is 1 days, and a guest attempts to order at 5pm, after your cutoff, the next available fulfillment date will be two days from now.
Scheduled Order Limit: Avoid receiving orders too far in advance by setting a limit to how far out a diner can schedule an order. For example, setting a limit of 30 days would mean no orders could be scheduled further out than 30 days from now.
Once you have configured these settings, click ‘Next’ to continue to the next step, or ‘Cancel’ to return to the Location settings page.
Editing Pickup/Delivery Hours & Setting Time Controls
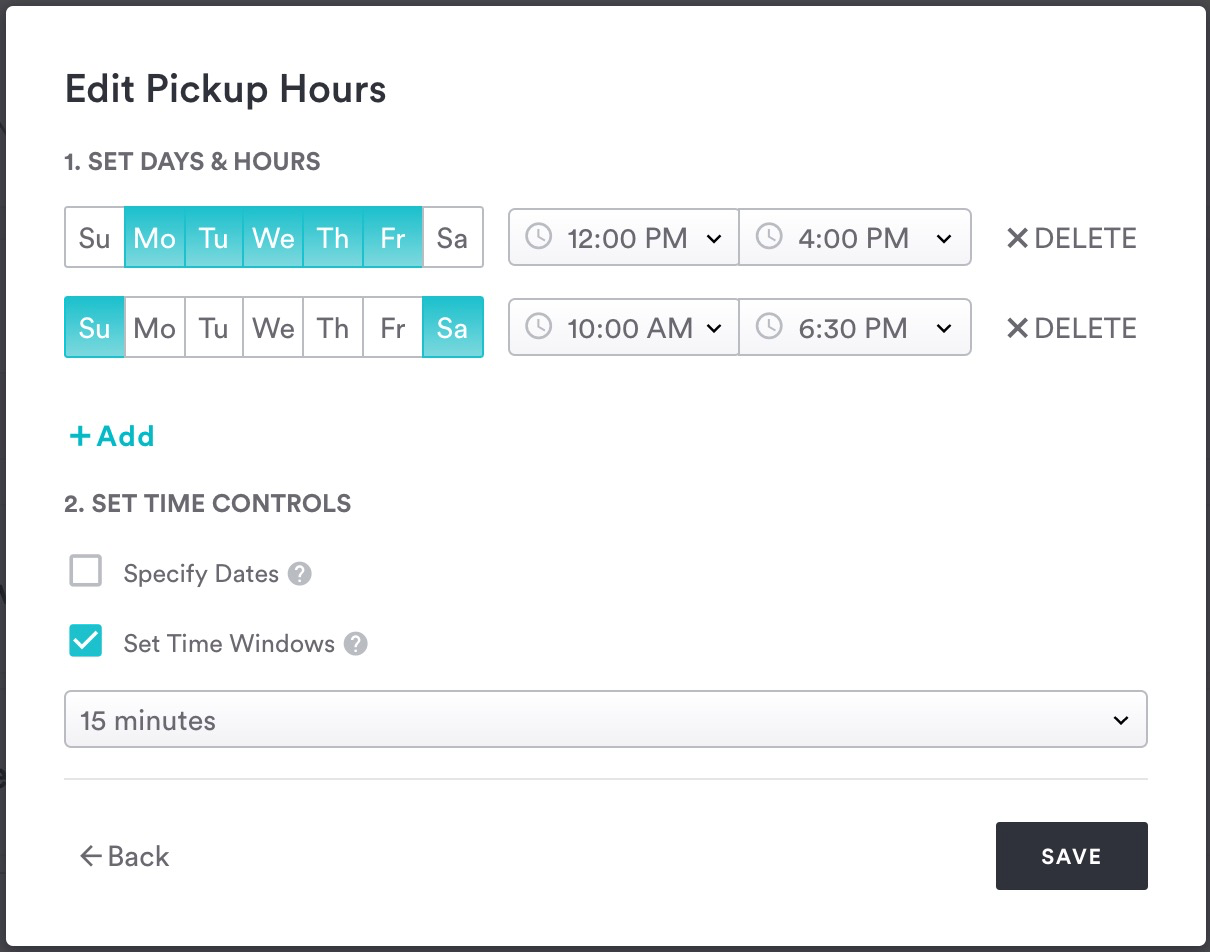
Set Days & Hours: Choose the days and times you’d like the menu to be available to guests. At least one day and time combination must be selected. If you’d like to add another, click the + Add button. To delete a combination of days and times, click ‘X DELETE’
Specify Dates: If you’d like your menu to be only available for fulfillment on specific dates, check ‘Specify Dates’, and choose the start and end dates when the menu will be available for fulfillment. This is separate from when the menu is published and visible - this determines the actual times that guests can choose to have food from this menu for pickup or delivery.
Set Time Windows: Instead of committing to fulfillment at a single specific time (e.g. 6:00pm) you can set a time range to better manage expectations. For example, setting a 1-hour time window would let a diner know that fulfillment will happen sometime during that hour window (e.g. 6:00pm-7:00pm). This will be shown to guests throughout the entire ordering and checkout experience, and also to your team in the Bento backend.
When you’re done configuring your menu, click ‘Save’ to finish and save your changes.
Choosing menu priority
If you have more than one menu, and you configure one of the menus to be available for fulfillment at a time that overlaps with another menu, when you save we will ask you which menu should be shown to guests during the overlap time. This allows you more flexibility when creating menus, and also keeps the guest experience simple.
Since only one menu is available at any given point in time, the menu(s) you select as taking Overlap Priority will be shown to customers during the periods of overlap, while the unselected menu(s) will be hidden during that time. Setting this priority will apply to overlaps for both pickup & delivery hours for a given menu.
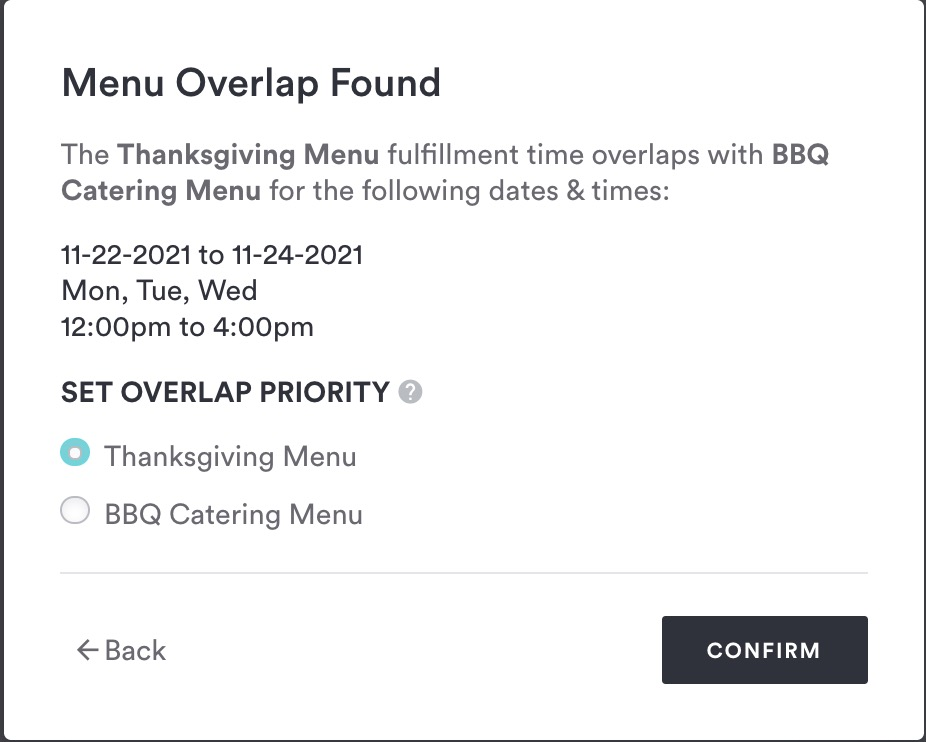
In the example above, let’s say you have a menu that is available Monday-Friday from 12pm-4pm, and then you create a special Thanksgiving menu that is available Monday-Wednesday on the week of Thanksgiving from 12pm-4pm. When we detect the overlap, we’ll ask you which menu should be shown to guests on the Monday-Wednesday of the week of Thanksgiving (in this case, you’d want your special Thanksgiving menu to have priority and be shown to your guests).
Go Back: Creating & editing menus