
How to Edit Navigation Buttons
Navigation Settings gives you the ability to create call-to-action buttons (or CTAs) on your website’s navigation. Creating compelling CTA’s on your website can draw attention and direct website visitors to sign up for your newsletter, place an online order, purchase a gift card, and more!
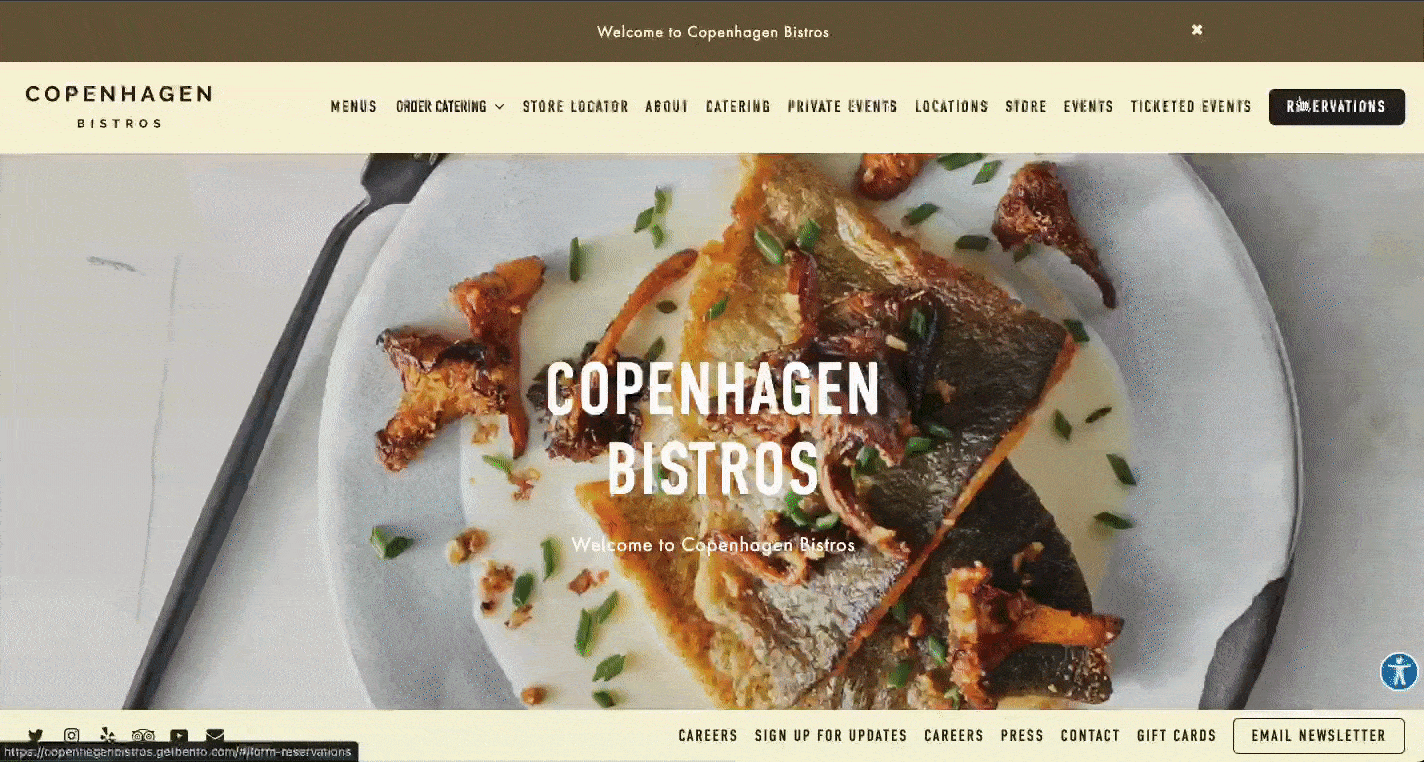
See the example below where ‘Reservations’ is a button in the main navigation and ‘Email Newsletter’ is a button in the footer navigation.
You can create a button that leads to a form, different web page, store, file, or external link. To create or edit a button go to Website > Pages > Navigation Settings:
You will have the option to create two buttons– primary and secondary. Primary buttons appear in the main navigation and secondary buttons appear in the footer. The settings are the same for each:
Toggle: this publishes or un-publishes the button
Label: this is the text that will appear on your button
Destination: this is a dropdown list where you decide where you want your button to direct visitors
NOTE: BentoBox integrates with third-party services to create a bridge between these platforms and your BentoBox website. Click here to learn more about the supported integrations. To use the Reservation destination, you must configure a reservations integration in the integrations section of BentoBox.
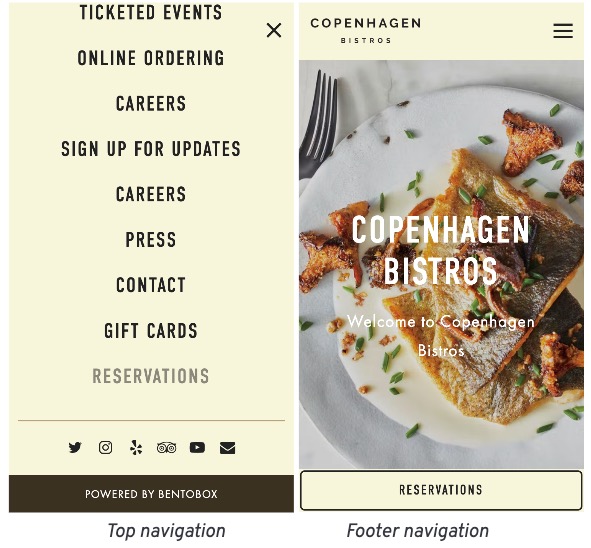
Show on Mobile: you can select whether you want the button to appear in the top navigation, in the bottom footer, or both on mobile. See examples below:
Questions? Click here to contact Support.