
Settings & Notifications for Events Management
This article walks through settings for Events Management, an add-on solution for our website customers to manage private dining and off-premise catered events that involve proposals.
Video Tutorial
This is where you can control staff notification routing for inquiries, proposal updates, as well as guest-facing language in emails and proposals, blackout dates, tax and tip defaults, and more.
To update your Events Management settings, log in to the backend, and go to Events > Settings.
Event Settings Page
Here, you can set location specific settings for your Private Event or Catered Event proposals. These settings can also be adjusted manually on each individual proposal as well.
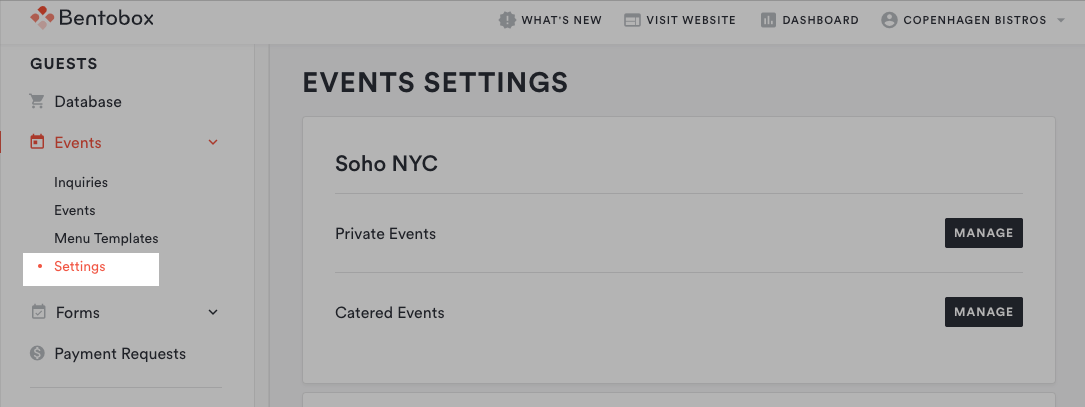
Managing Private Events and/or Catering Settings
Click on the “Manage” button to configure your settings.
Note: The settings for Catered Events and Private Events are similar in their configuration and purpose. When you configure the settings for either one, these become the default settings for any new event of that type that you create.
Inquiry Settings

Default Event Duration: This affects the Inquiry Form that your guests see on your website. For example, if you set 2 hours as the default event duration, when a guest chooses a 6p.m. start time on your inquiry form, the form will automatically populate "8p.m." as the end time. If you’re using this for Catered Events, it will apply to all locations.
Automatically Block Event Conflicts: If this field is on, this will prevent guests from selecting dates and times on the Inquiry Form that conflict with your booked events.
Blackout Dates: If you will not be able to host any events on a specific date, add those dates and times here to prevent guests from submitting inquiries at those times.
Payment Settings
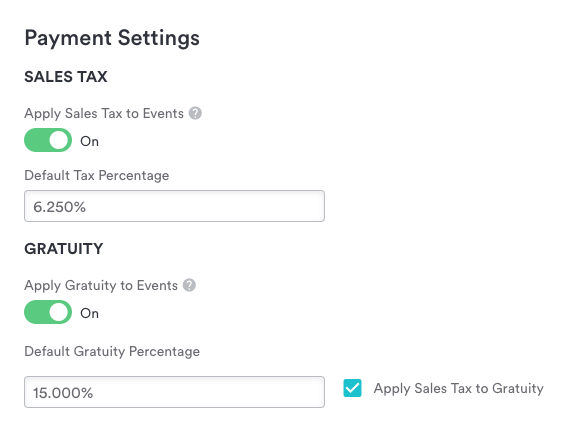
Sales Tax & Gratuity: Choose your default tax and gratuity preferences for all event proposals. Tax rules vary based on business operations, location, and other factors; if you have questions on the best way to set these up, we recommend talking with your tax or other business advisors.
Convenience Fee Settings
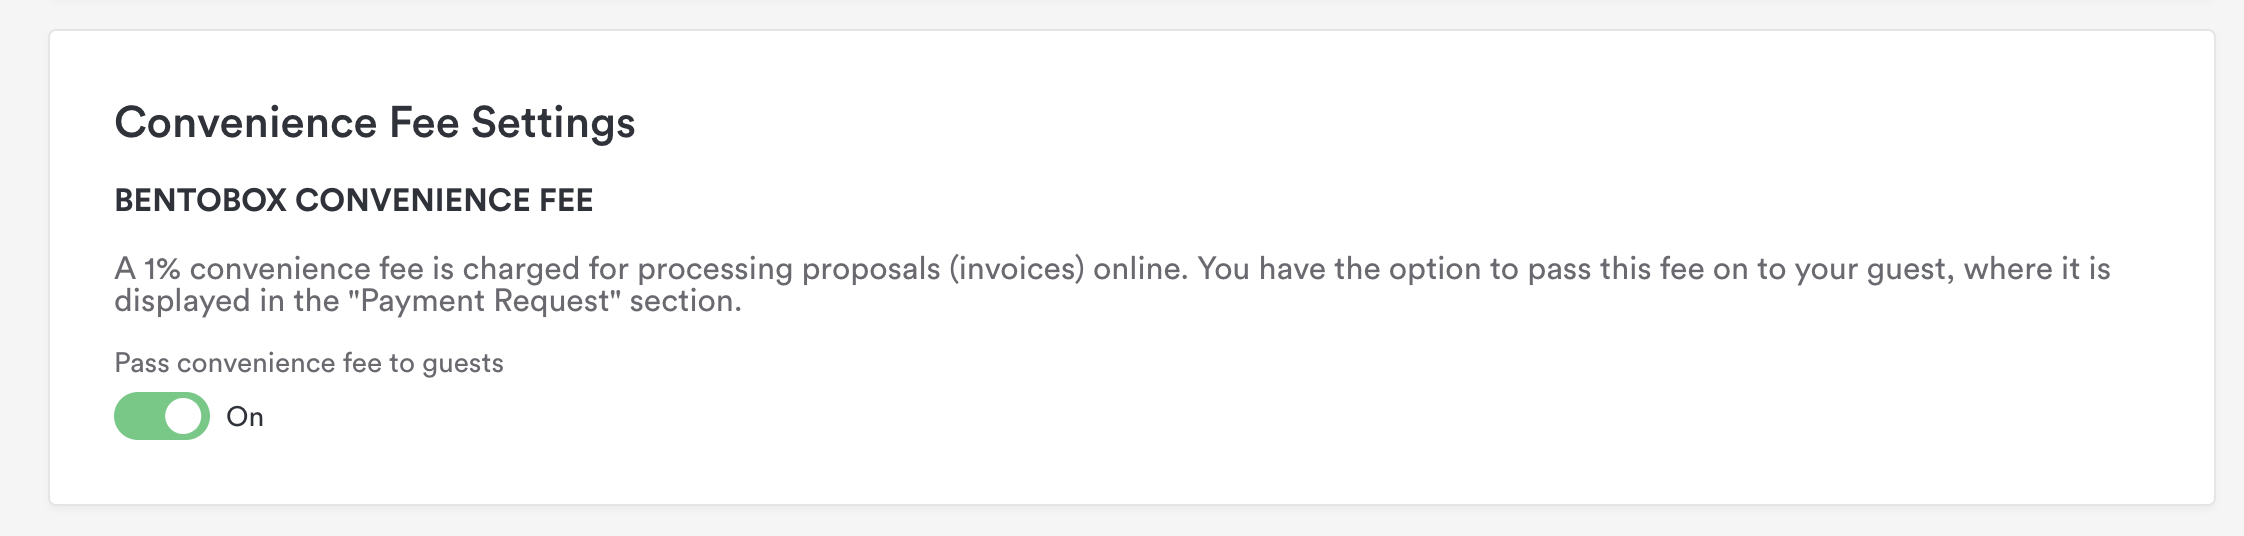
There is a 1% convenience fee* that is added to all Events processed through Events Management. Here you are able to select whether this fee is paid by your guest, or if you elect to pay this.
This fee is not taxes.
Proposal Settings
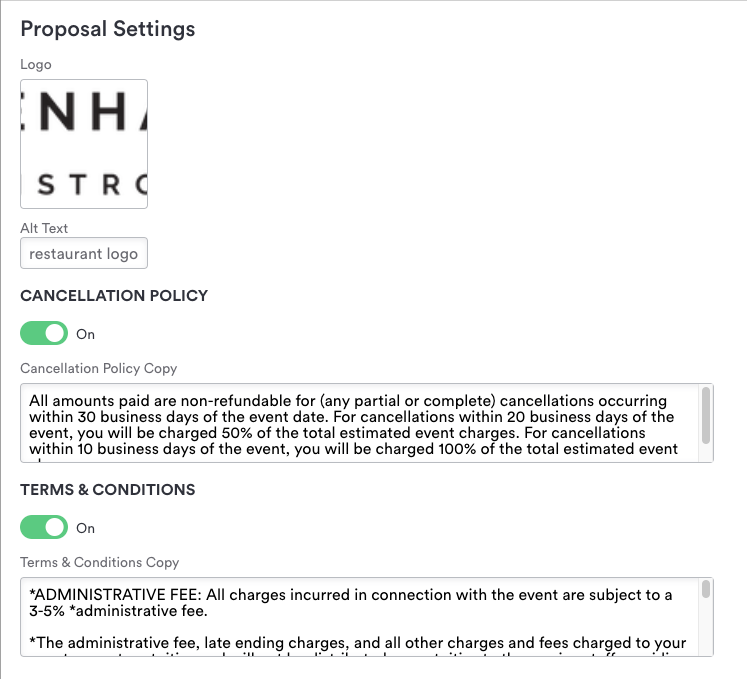
Here, you can control your logo and customize the language that gets inserted into each proposal you send.
Logo: This is the logo that will appear on your event proposal.
Cancellation Policy: Easily add your cancellation policy to proposals so you don’t have to manually attach it every time.
Terms & Conditions: This language will get inserted into each of your new proposals.
Guest Emails & Admin Notification Groups for Events & Proposals
In this section you can set email notifications for your staff and guest-facing language for emails that send automatically throughout the event lifecycle.
Guest Emails

From Name: This is the name that a guest will see when they receive an email, for example, the name of your restaurant or your events manager.
Reply to Name: When a guest replies to an email, this is the email address that will receive their replies.
Select Emails to Send to Guests: You can choose for guests to get email notifications when a proposal is accepted, with an event reminder before their event, and/or a Thank You email after the event.
Click on the preview link next to any of the email notification types to see what each one will look like.
Notification Groups
Notification groups are emails that send automatically to staff members based on what the update is (i.e. new inquiry, proposal accepted, event reminder, etc.). If you want an events manager to receive every type of notification, but a chef to receive only a proposal-accepted notification, you would create two notification groups, one for each person.
Note: If you choose 'Inquiry Submitted' email notifications for catered events, the notifications will be sent for every location that gets catering inquiries.
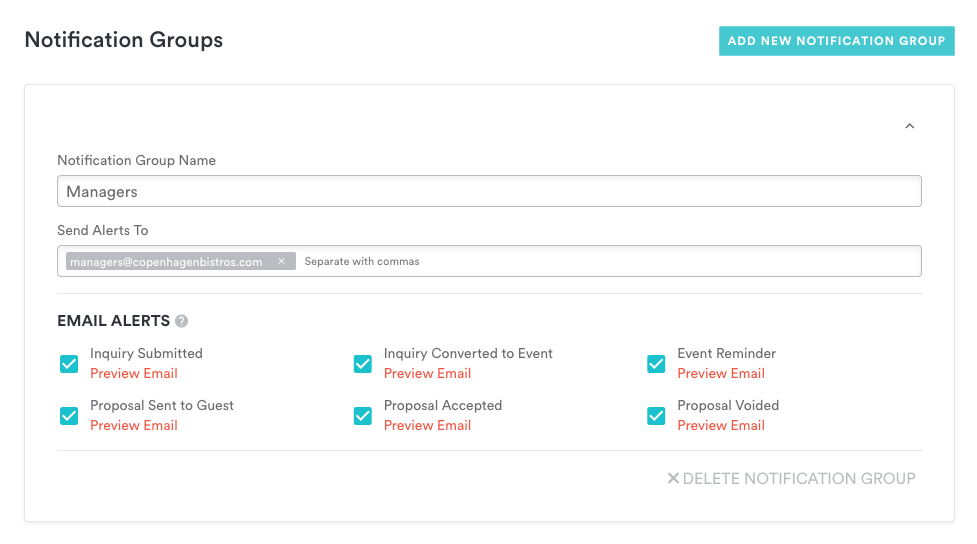
Notification Group Name: You can create as many notification groups as you like - perhaps by team, person, or notification type.
Send Alerts To: Add the email address(es) of the people you'd like to receive notifications in this field. For every email address, press “Enter” before typing out the next one.
Email Alerts: Choose and preview the alerts your groups will receive via email.
Click on the preview link below any of the emails to see what each one will look like.
When you are done editing the settings, click the "Save" button at the top of the screen to save your changes and return to the Event Settings section of the backend.
Don’t use Events Management but want to automate your proposals, BEOs, and payment? Email us at upgrades@getbento.com.
Want a refresher? Jump to...
*Subject to state laws
For further assistance with this, or anything else website related, please reach out to our Support team by email at support@getbento.com or by phone at 1-833-889-4455.