Understanding Events
Events Management helps you streamline your events operations from receiving an inquiry on your website through hosting an event. Inquiries that get qualified as opportunities get converted to Events. From the Events Page, you can move forward with sending a proposal to a guest, or further prepare for the event.
In this article, we’ll walk you through how to view and manage your events:
Don’t use Events Management yet, but want to capture and qualify inquiries automatically? Email us at upgrades@getbento.com. Our tool includes fast proposals, BEOs, and payment.
Video Tutorial
Viewing & Filtering Events
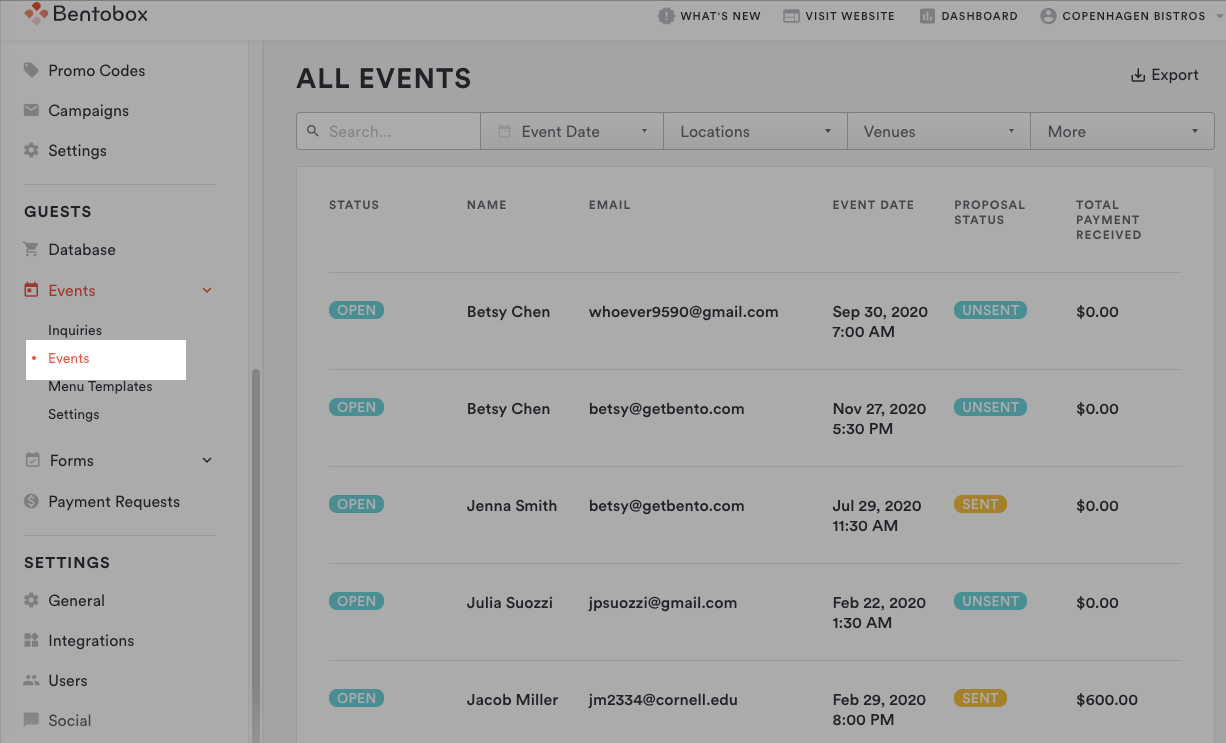
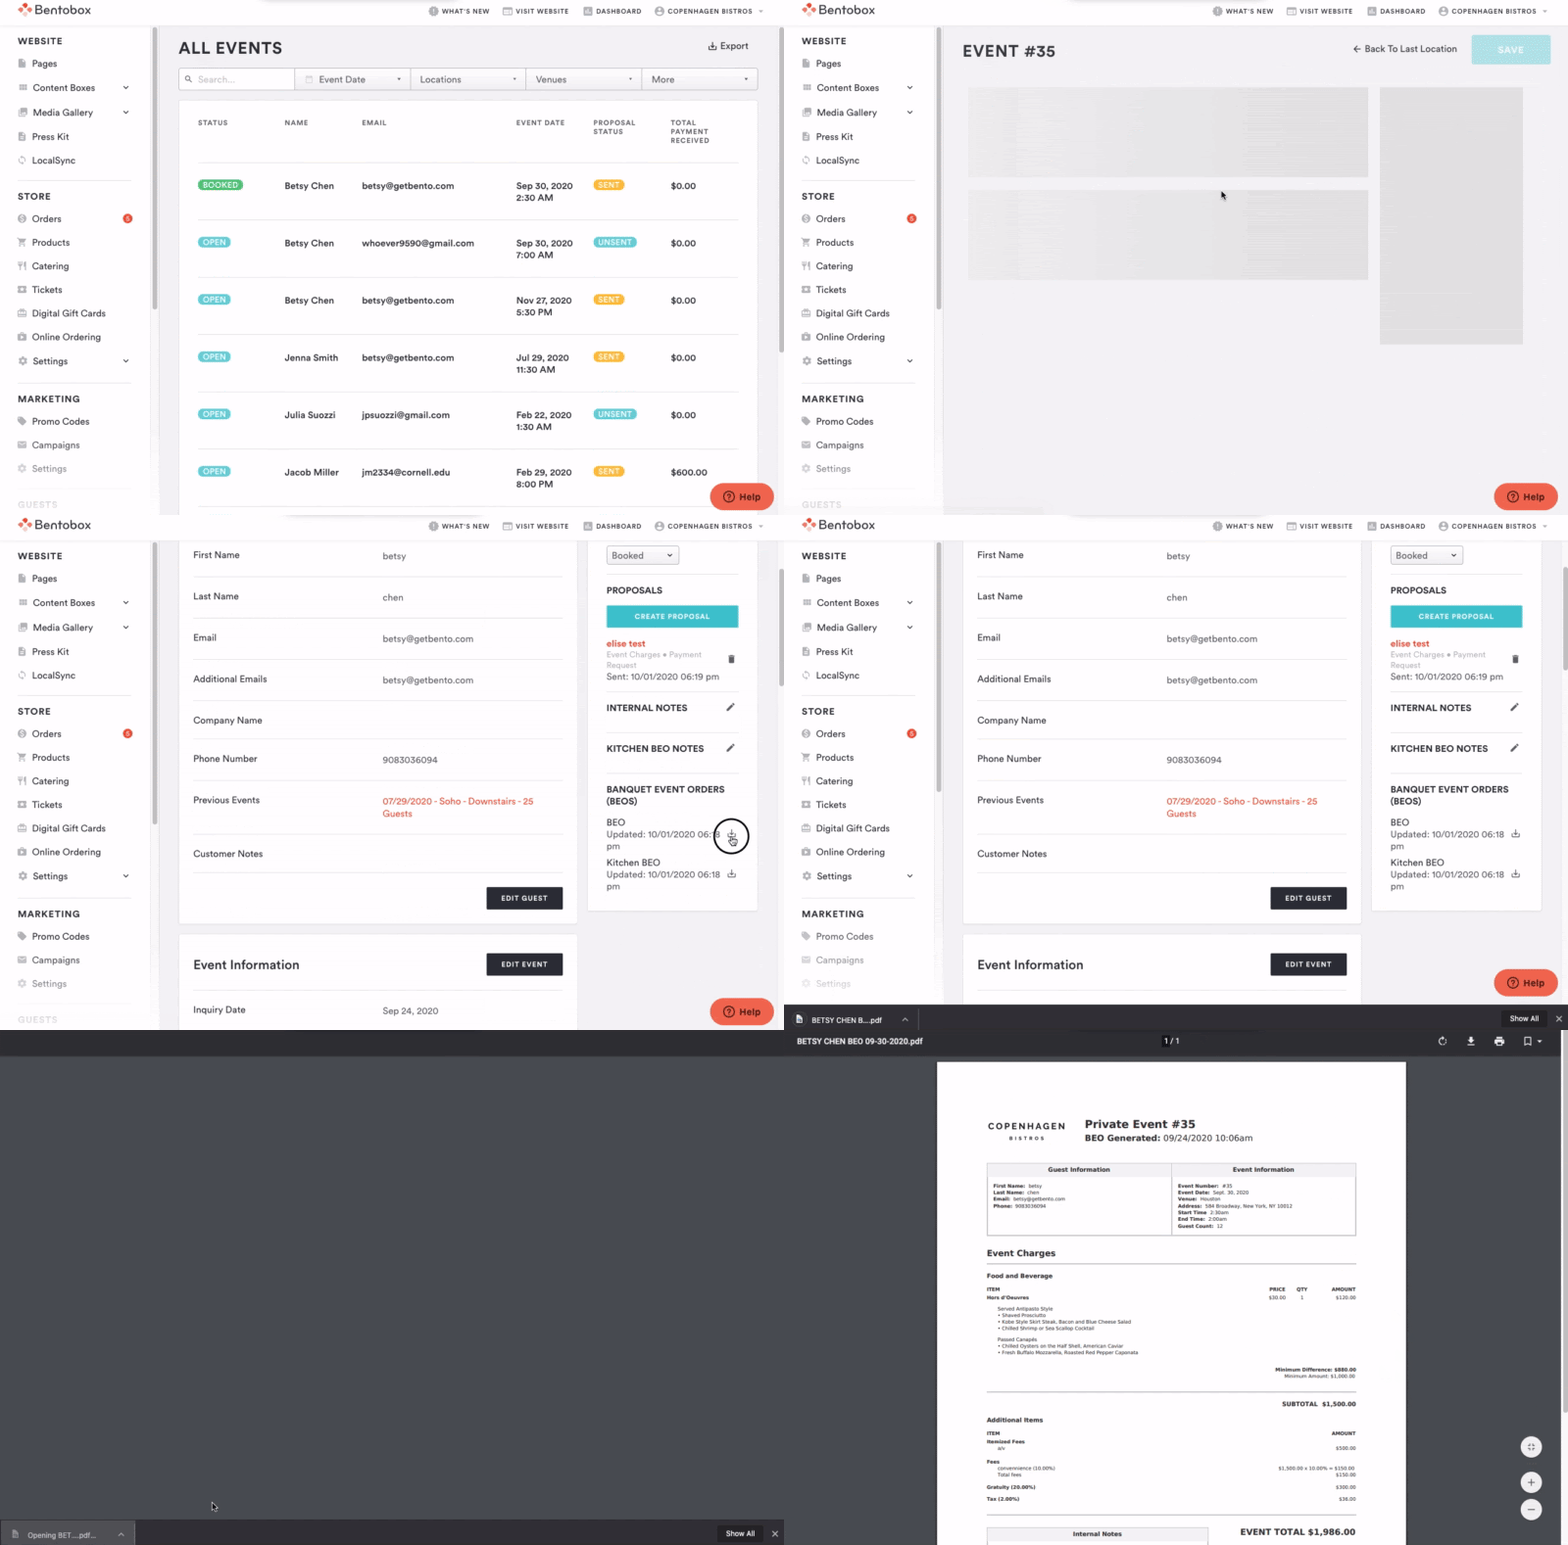
Log in to the backend to view, filter and export all your Events in the backend. Click the Events dropdown and choose “Events”.
Here you can filter the events based on the criteria you’re interested in, using the dropdown options at the top of the screen. You'll see Event Status, Proposal Status, Total Payment Received, and more.
Understanding Events
Once an inquiry is converted to an Event, you can start building a proposal for the event. Proposals can be created throughout the lifecycle of an event; it's very common that charges, last minute additions, or shifting the guest count occurs in the life cycle of booking an event. So, you can send multiple updates proposals or payment requests for a single event. Keep in mind: You can only have one active proposal at a time. This keeps your guests from getting confused about which is the latest.
How to read an Event
Main Section
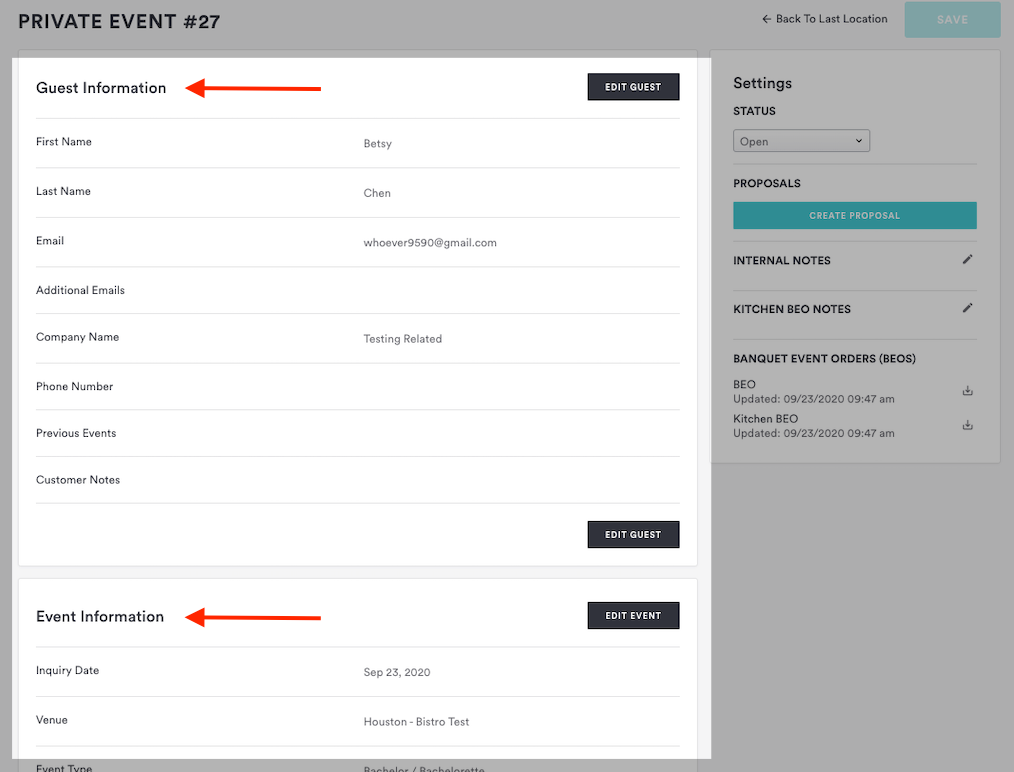
Guest information: These details are taken from the inquiry used to create the event.
Event Information: The Event Details vary based on whether it's a Private or Catered Event
Event Charges
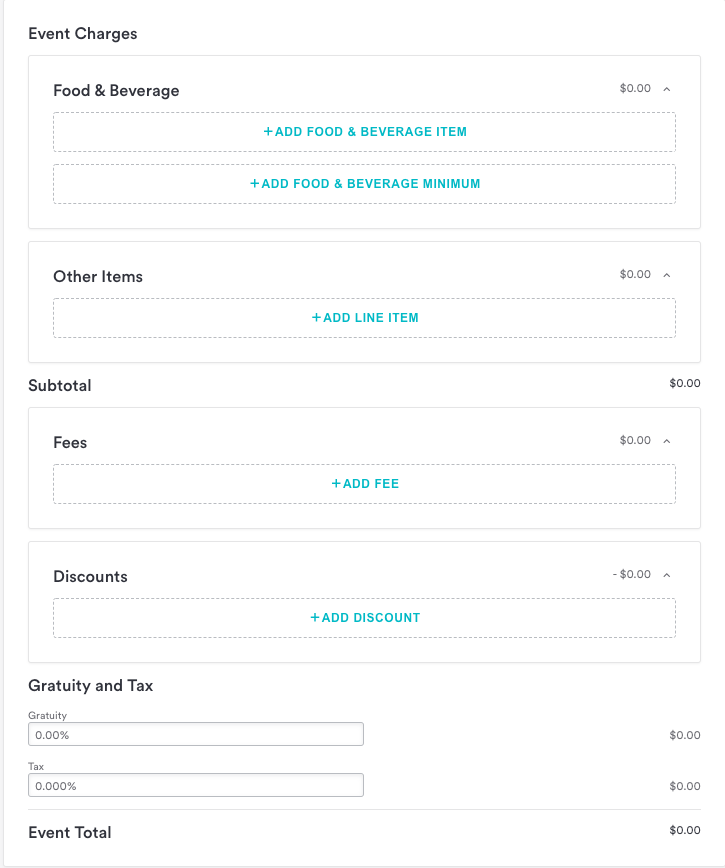
This is where you can set up the food & beverage, administrative fees*, tips, & other charges that you'd like to populate proposals for this event.
Note: Some of these fields will be pre-populated if you’ve completed your settings.
Food & Beverage: Clicking on this will show pre-existing event menu items for easy access
(Click here to learn how to add food & beverage details to an event page)Other Items: Include other charges that apply, like A/V fees or rentals
Subtotal: Add any supplemental fees and discounts if applicable
Gratuity and Tax: Rules for this vary based on your business operations, location, and other factors. We recommend that you consult with your tax or other business advisors if you have questions about how to configure these. If you pre-set your Event Settings, these fields will populate automatically.
Additional Attachments: At the bottom of the event, you can add any attachments you’d like to include, such as a floor plan, an agreed-upon menu, a rider, or other pertinent documents.
Event Settings
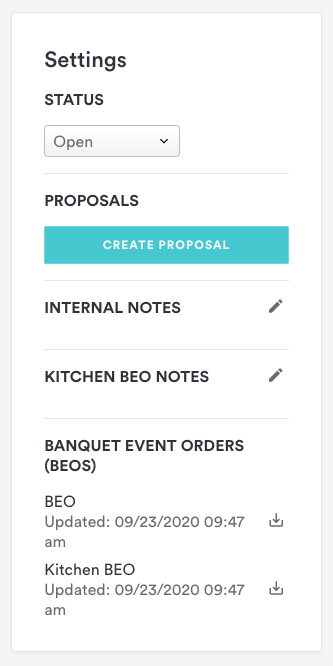
Once you’ve finalized details of an event with your guest and are ready to create a proposal, review these settings on the right hand side of the event.
Status: The event status does not update automatically. When an event moves to the next stage, you'll need to update the status.
Open
Booked
Completed
Cancelled
Create Proposal: Clicking this button will prompt you to fill out the details needed to send a new proposal (click here to learn more about proposals).
Internal Notes + BEO
Add notes to your BEO or Kitchen BEO so that your team can execute the event flawlessly. Once you’ve added everything, you can download the BEOs as one-sheets.
Click the icon at the left of the BEO or Kitchen BEO to download a PDF copy for your team.
Click here for a BEO example
Click here for a Kitchen BEO example
Jump to:
*Subject to state laws
For further assistance with this, or anything else website related, please reach out to our Support team by email at support@getbento.com or by phone at 1-833-889-4455.

