
Online Ordering: How to Use The Otter Integration
When using our Otter integration for Online Ordering, the items from the menu(s) you choose from Otter will sync with Clover Hospitality by BentoBox, the online order will print to your Otter or POS system (depending on how your Otter account is configured), either immediately or when prep is required. With order data in your Otter system, reporting is centralized and your team does not need to actively manage orders in the platform; they can be all managed from your Otter or POS system (depending on how your Otter account is configured).
Note: When setting up this integration, we recommend to turn off your store temporarily or going through these steps outside of your operating hours. Once you connect Otter any Online Ordering menus previously set on the backend will disappear and your Otter menus will sync with the platform and the synced items from Otter and you will need to take a look through your newly synced menu imported from your Otter system to be sure it all looks as it should.
Getting Started with the Otter Integration
If you are interested in integrating your Online Ordering platform with Otter, visit https://www.tryotter.com/referral/bentobox. If you need help, check out Otter’s help center or reach out to hello@tryotter.com for assistance. Be sure to include:
Your name, email, and phone number
Restaurant Name and address
Do you currently have an account with Otter?
Which POS are you currently using?
Once we receive this information from you we can begin the process of provisioning your account for the integration.
Configuring the Otter integration for your account
Once your account has been provisioned for the Otter integration, a Clover Hospitality by BentoBox team member will be in touch to confirm you are ready to complete the setup.
Creating Fees and Items in Otter
IMPORTANT: If you are integrating a POS through Otter, in order for Fees to integrate with the Otter system, those active fees (service fee, custom fees, and COVID fees) should be created as items within your Otter menu. You may not be using all of the available fees within the backend, but any active fees must be recreated in Otter. This Integration cannot support percentage based fees. Only Flat Fees are supported.
Create a category within the Otter menu named Fees.
Sign in at manager.tryotter.com/
Choose the desired menu
Select the Categories tab
Add Category and name it Fees
Create any active fees as items using the specific naming conventions within the grid below. NOTE: You only need to create corresponding items in Otter for the following fees you are using within the backend: Service Fee, COVID Fee, Custom Fees. Any delivery fees can be created and managed only within the backend.
Item Name | Offered On | Item Price | Pricing Options |
COVID Fee | Only toggle On | $1.99 | Price Set for all |
Service Fee | Only toggle On | $0.99 | Price Set for all |
Custom Fee - Name of your Custom Fee | Only toggle On | Varies, by location. Can be any $ amount | Price Set for all |
Connecting and Activating the Integration in the backend
Log in to your account
After logging in to the account, navigate to SETTINGS > Integrations > Online Ordering > Otter, and press Connect
From here, in the pop-up screen, use the dropdown menu to select the correct location that you wish to integrate with your Otter POS system
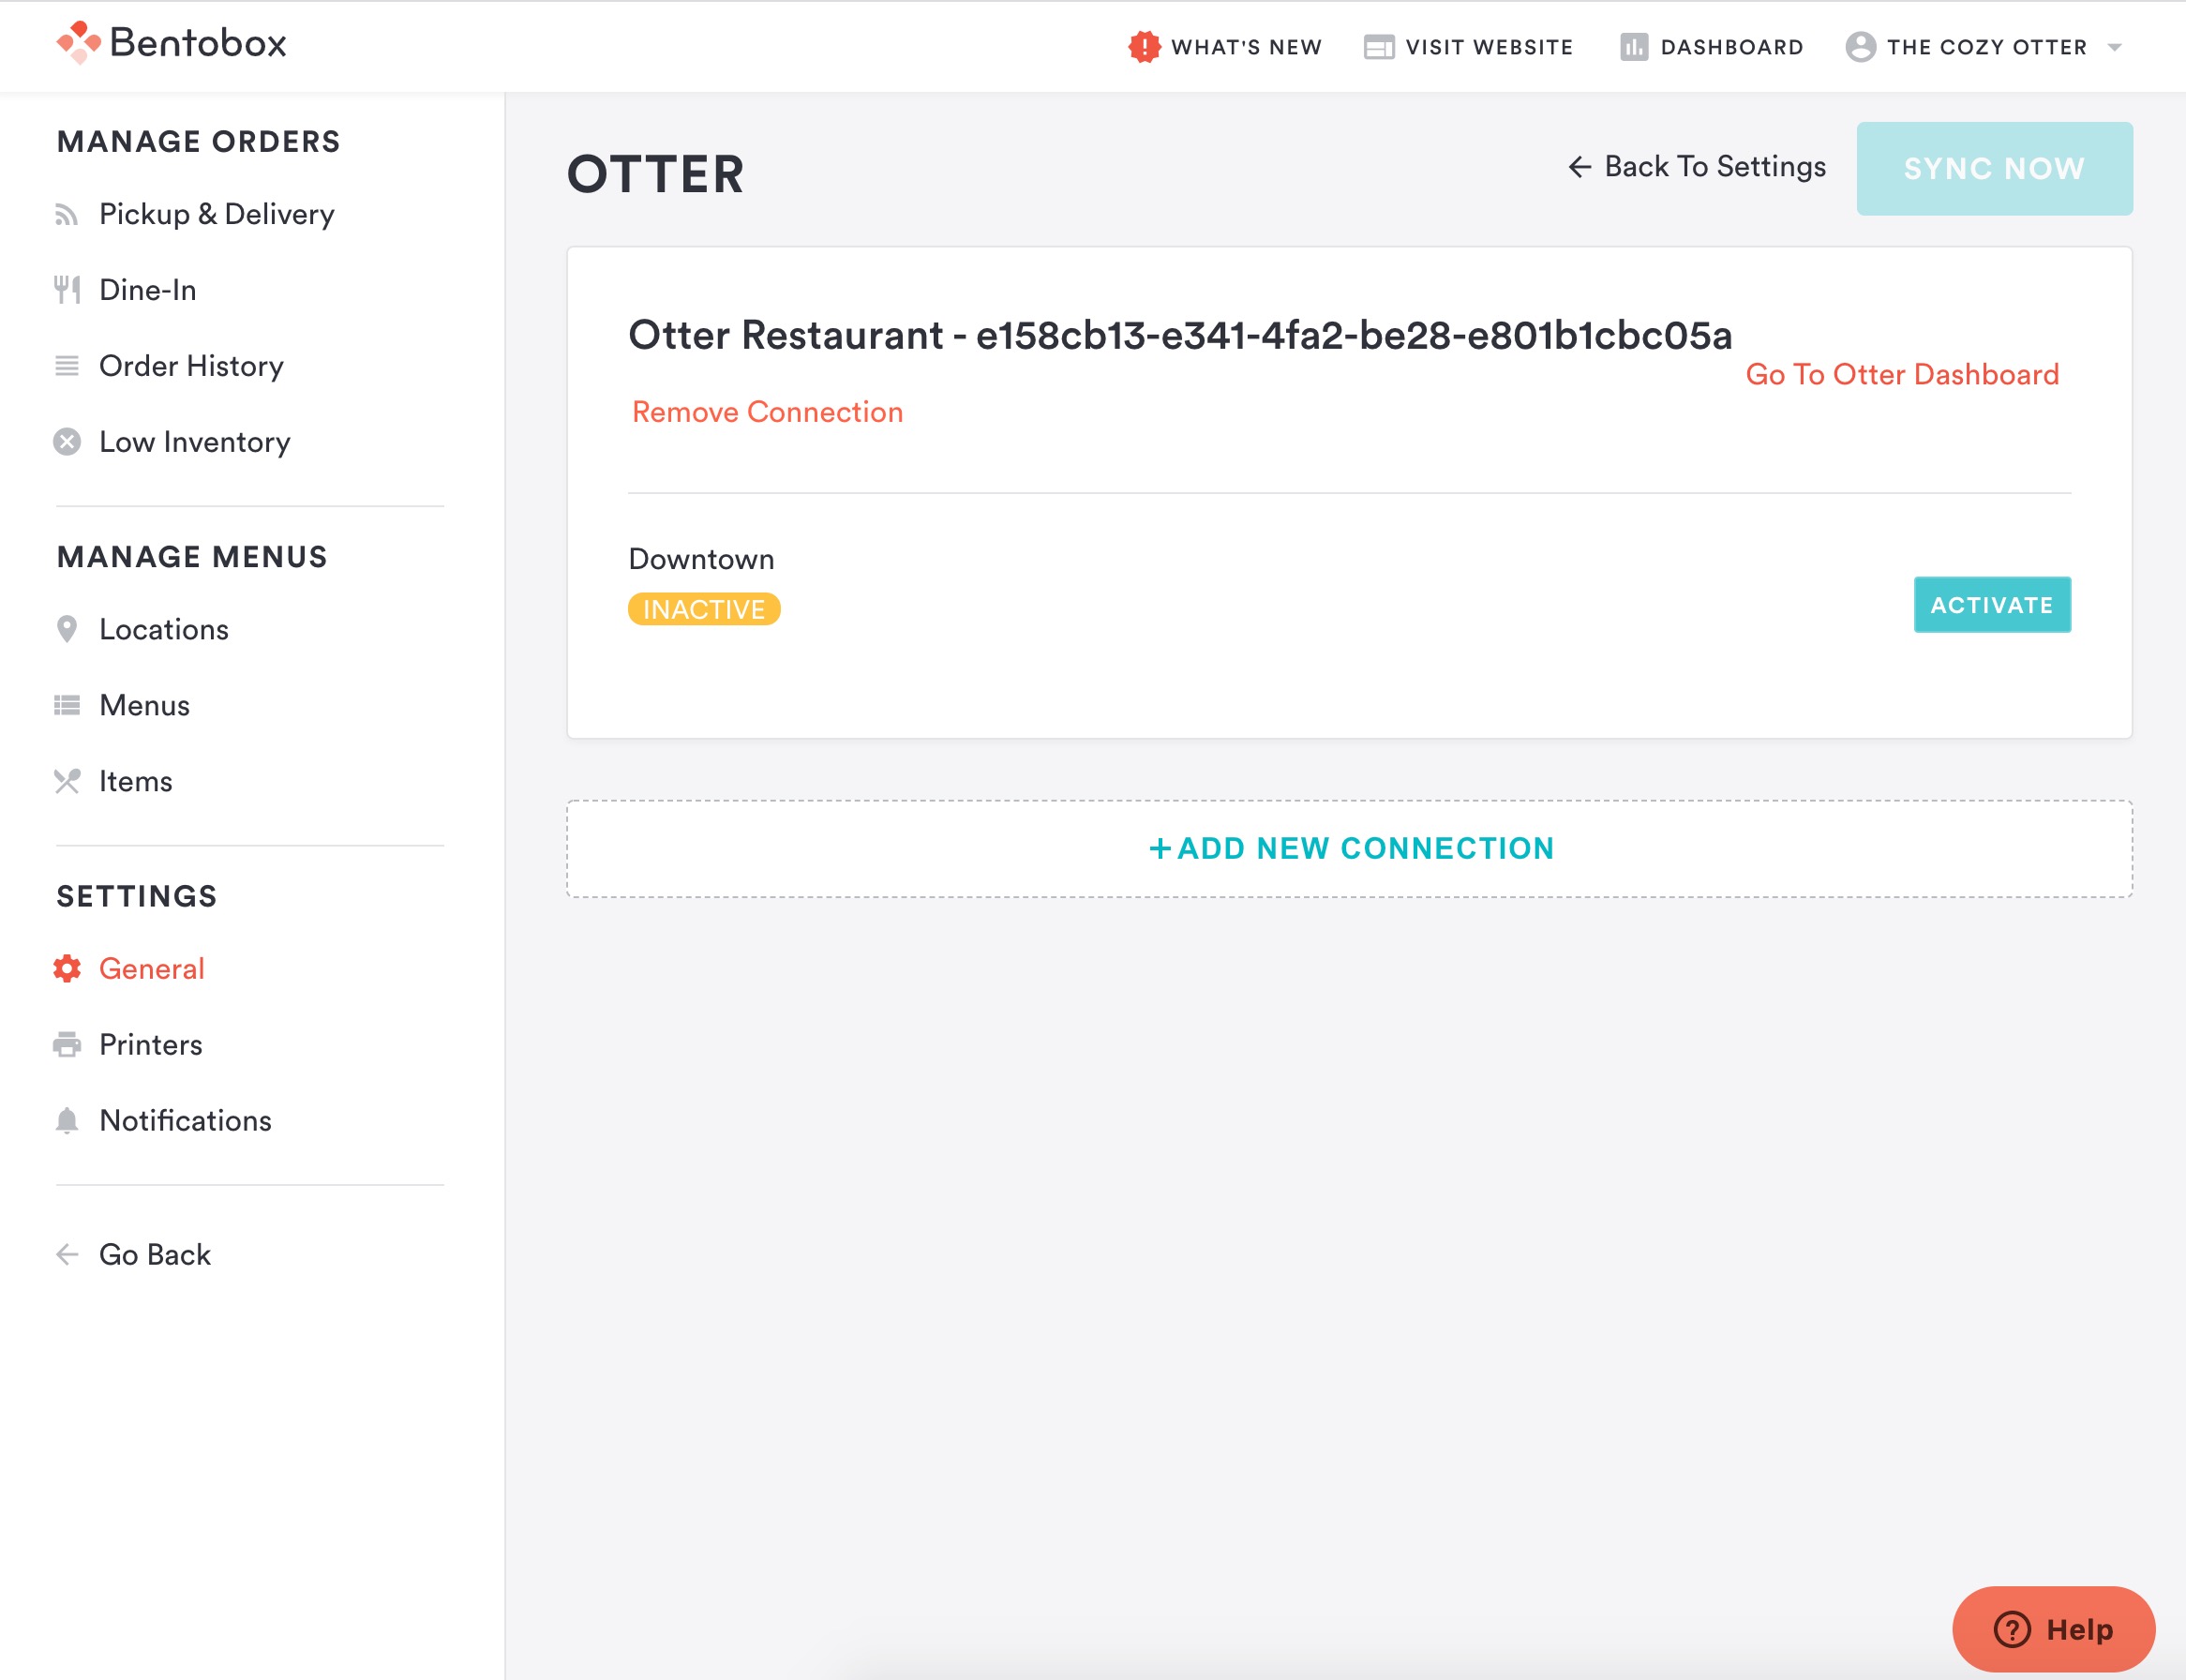
Otter ID added being activated
Active Order Integration
Confirming your menu in the backend and setting hours at the location level
After you have activated the Otter Integration within the backend, you will need to take a look through your newly synced menu imported from your Otter system to be sure it all looks as it should.
Adding your Menu to your Location Settings and Turning on Online Ordering
Once your menus are set up using your Otter items, you must now navigate to your location settings and create hours for your various Online Ordering options.
Here is another help article that shows you how to set up your location with the settings you need to get your Online Ordering store back up and running. Follow this link for location settings and this link for menu hour settings; let us know if you have any questions.
Deactivate or Remove Connection to your Otter POS System
In the event you need to Deactivate or Remove Connection to your Otter Integration, you can do so in the platform. This does not affect your settings in Otter, and if you wish to remove Clover Hospitality by BentoBox as a partner in Otter, you must do so from your Otter system.
How to Deactivate the connection to your Otter System
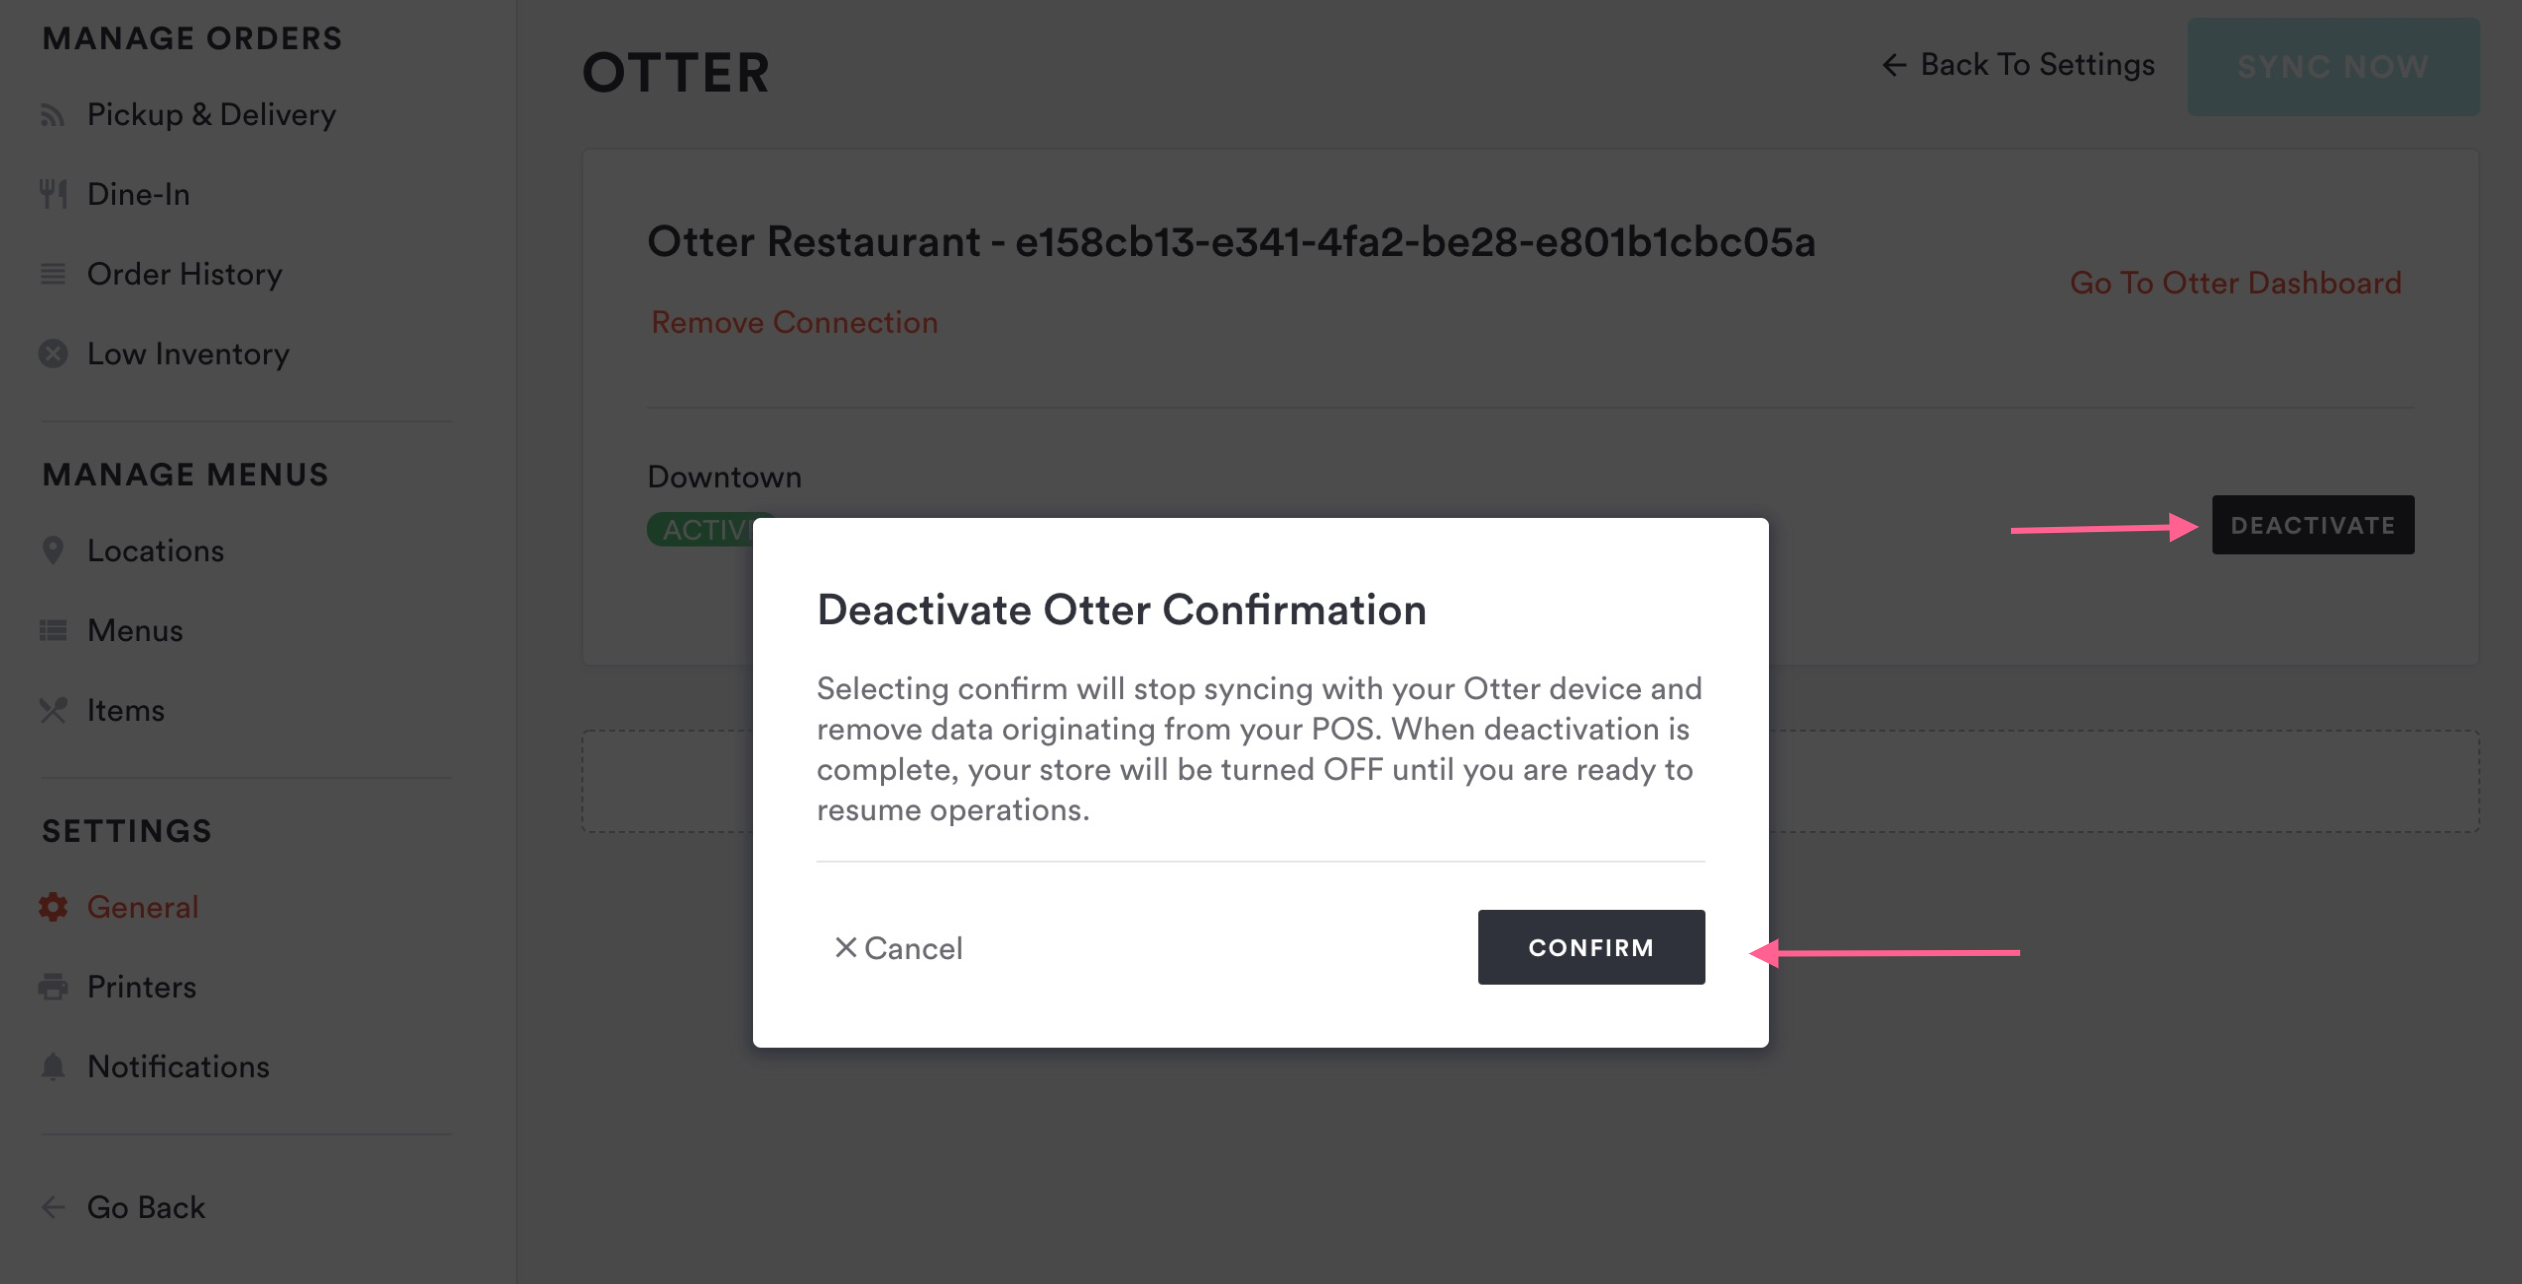
By performing the Deactivate function, you will turn off the active connection between Clover Hospitality by BentoBox and Otter, but will maintain your Otter menu items, your Otter ID, and associated details, however you will no longer be able to see them or use them. Allowing this action, you can reactivate and enable the integration at a later time and Clover Hospitality by BentoBox will hide your non-integrated details and display your integrated details.
Log in to your account
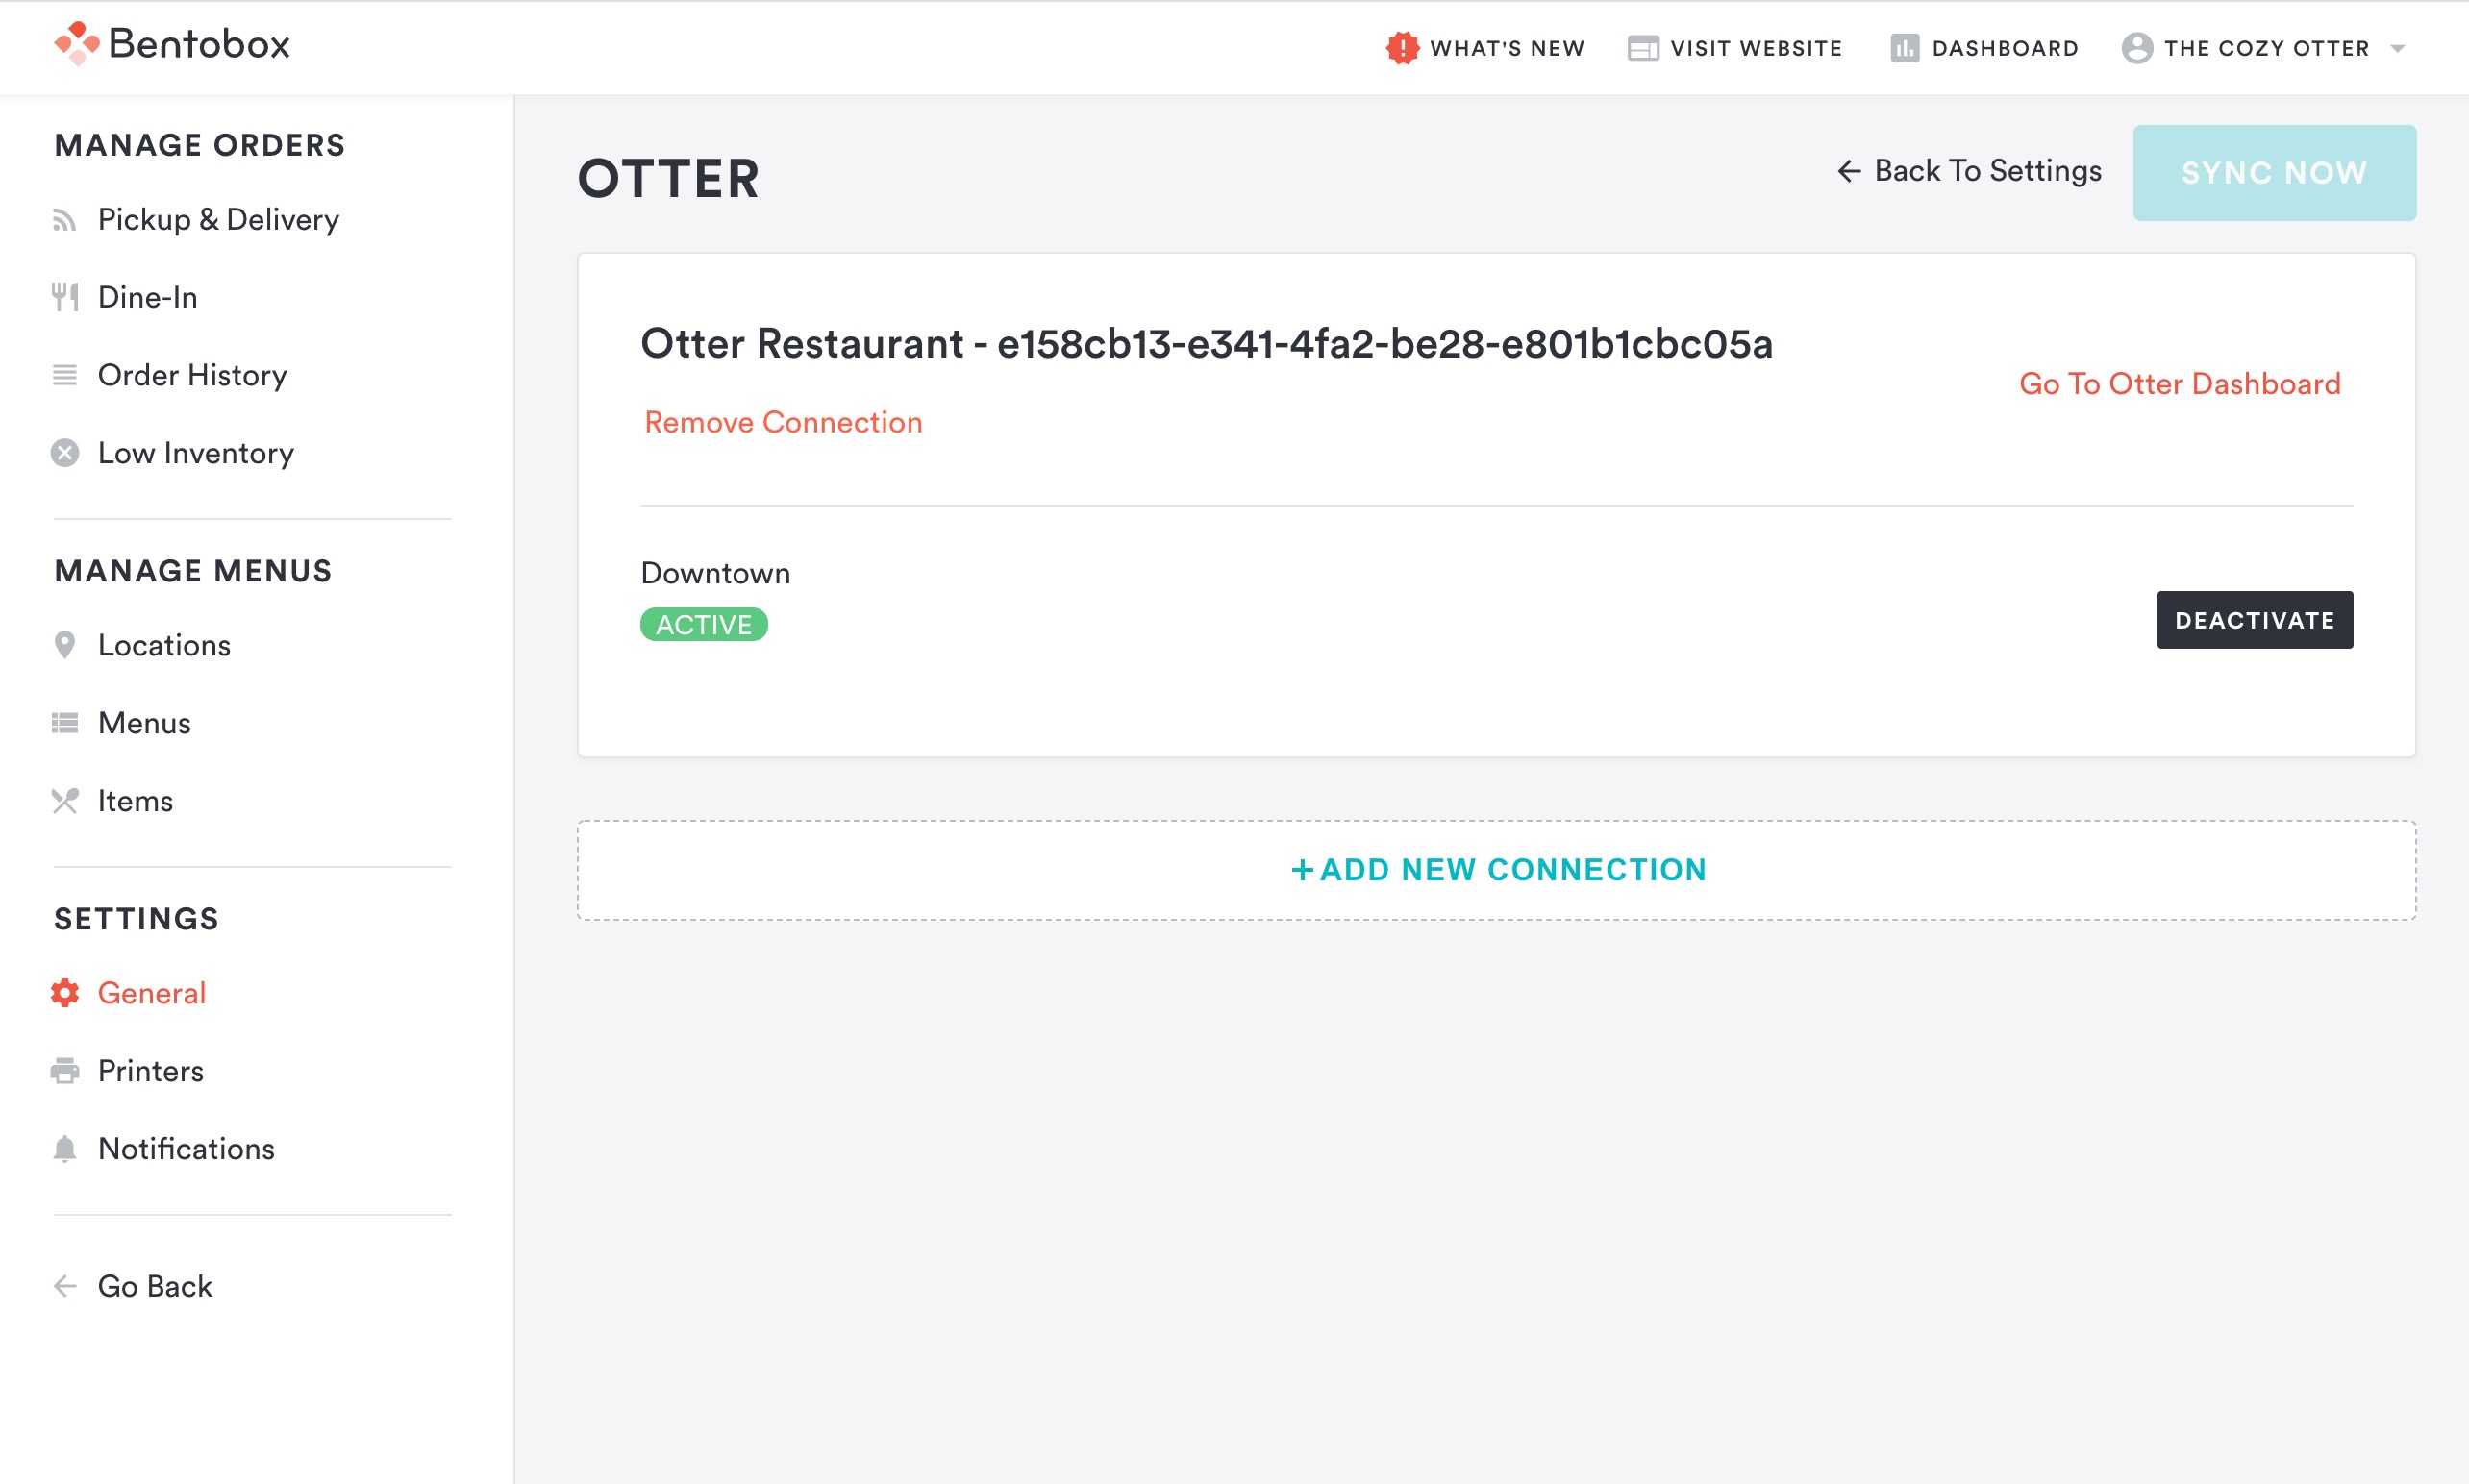
Navigate to the backend, navigate to SETTINGS > Integrations > Online Ordering > Otter, and press Manage. From here you will press the DEACTIVATE button
Press the CONFIRM button on the pop-up, confirming you wish to perform this action, which will leave the various data points, hiding them from display, and redisplay your previous manually created data (items, settings) and allow you to operate without a POS connection/
How to deactivate the Otter integration