
Low Inventory Items
Overview
Low Inventory is a feature that helps restaurants mark quantities for items that typically sell out across pickup, delivery, and dine-in orders. Restaurants using this feature can automatically track sales and communicate with guests in real-time when items are running low. Online Ordering tracks sales for these items and shows guests on your menu when there's 5 or fewer of that item remaining, driving urgency to purchase. Sold out items are visibly marked as sold out.
Where in Clover Hospitality by BentoBox can you access the Low Inventory feature?
Log in and go to Online Ordering > Low Inventory > Add Item.
Here’s what a guest sees while shopping for an item with Low Inventory:
How to add an item to Low Inventory
To add items to Low Inventory, follow the steps below
Navigate to the “Low Inventory” section.
Click the button “Add Item” at the top right.
Select the location(s) where the menu item is not available.
Select which item(s) should be marked as sold out. You can use the search feature to find an item quickly, or scroll through all menu items.
Enter your number for inventory.
Determine how you want to track inventory by using the checkbox “Only track inventory for same day orders”.
When ON, inventory will only be counted when your guests place orders for the current day. Orders placed for future days will not be tracked against your inventory quantity.
When OFF, inventory will be tracked regardless of the day, so that orders for the current day and future days will reduce inventory.
Set the Availability Reset time.
Select “No Reset Time” if you would like to manually indicate when this item will be available again. Use this if you’re not sure when your inventory will be replenished.
Select “Reset to Not Low at a specific time” to automatically re-list the item to be available again at a specific time. Note: This is calculated based on the timezone of the browser you’re using to edit Low Inventory, so if you are traveling away from your restaurant location and adjusting reset times, please factor your current time into the reset time.
Click “Set Inventory”.
Setting notifications for Sold Out items
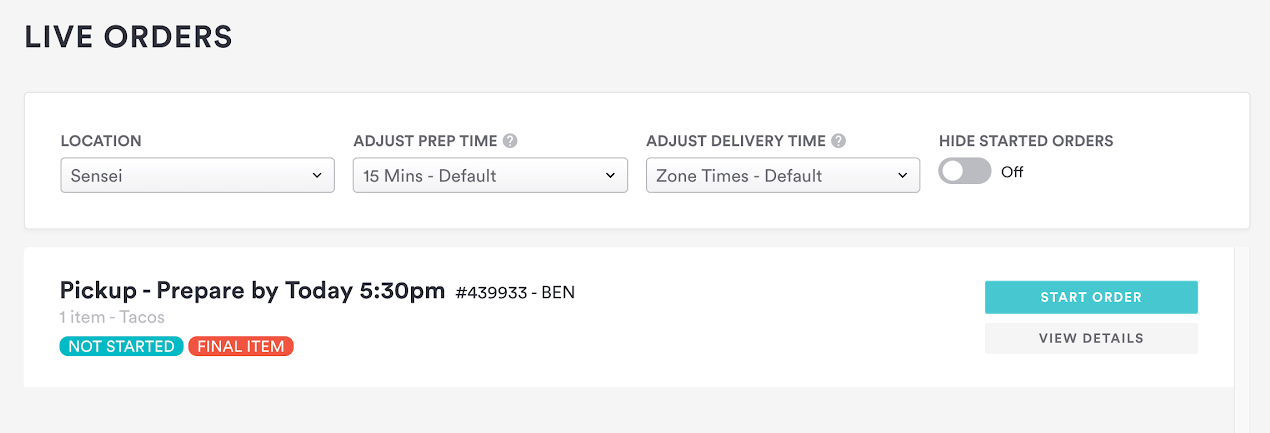
On the Live Orders screen, when an order contains the last count for an item that has sold out, you’ll see a ‘Final Item’ indicator on that order.
If you want to be actively notified of new Sold Out items as well, you can add your email in a notification group for “New Sold Out Item”. Learn more.
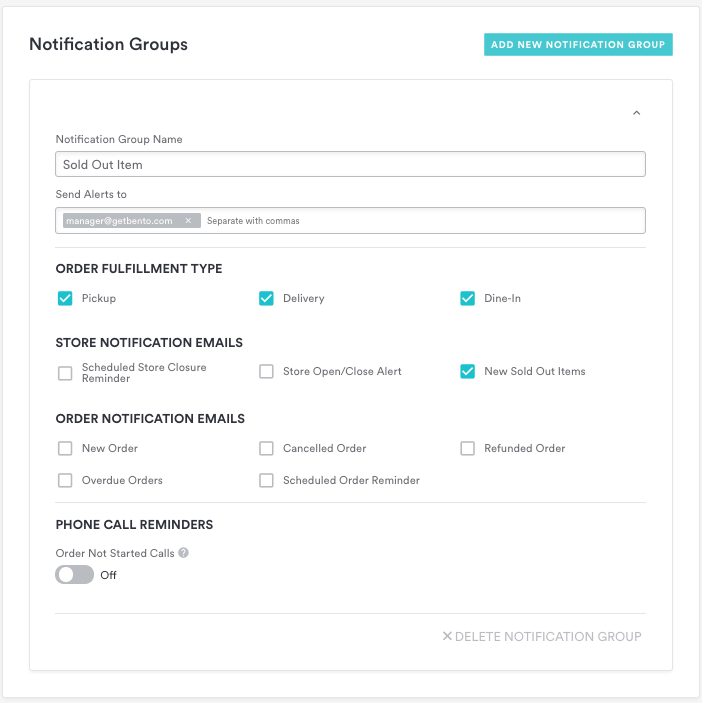
Go to the “Notifications” tab within Online Ordering and then add a new notification group.
Check the “New Sold Out Items” option for pickup and delivery, and add email addresses (separated by commas) for any staff members who should receive the notification.
Then, click “Save.”
If you do not set this up, you will not receive a notification when a Low Inventory item sells out.
How to edit an item in Low Inventory
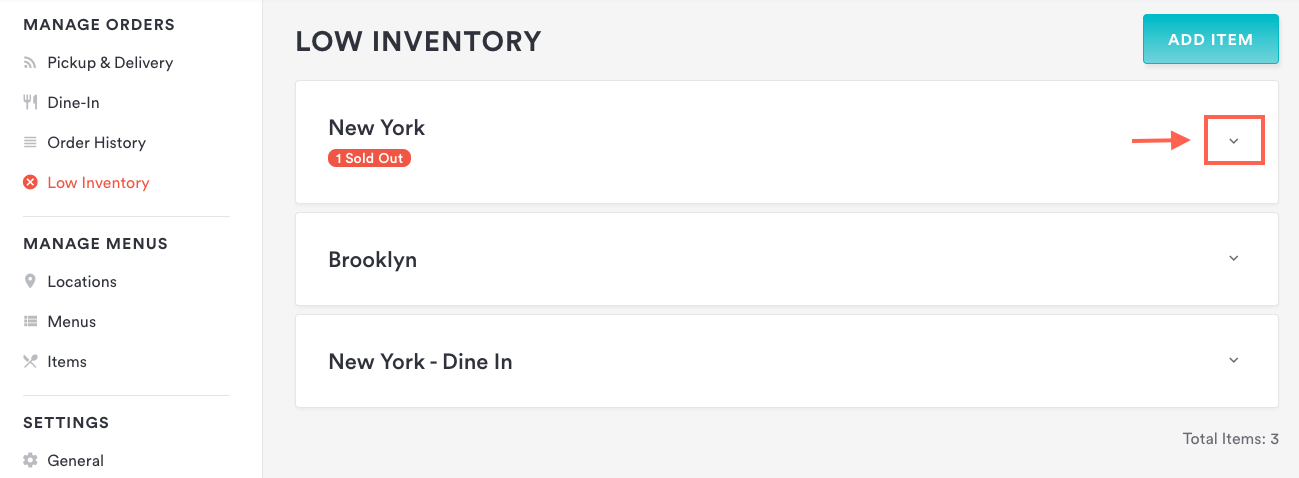
Navigate to the “Low Inventory” section.
Select the location you want to edit inventory items for by clicking the expand icon on the right hand side to reveal all Low Inventory Items.
For the item(s) you want to make available you can either remove the item from Low Inventory OR simply indicate the status as “Not Low”.
To set inventory amount, find the item in Low Inventory, then click the 'edit' icon
Input the new inventory value
Click “Set inventory
To keep the item accessible on the Low Inventory screen, but without setting a specific quantity available (useful for items that currently have plenty of stock, but might sell out in the future), click the 'edit' icon
Then select the “Not Low”
Click “Set inventory
To remove entirely, you can can click the 'remove' icon

Click “Confirm”
How to view current Low Inventory and Sold Out items
Navigate to the “Low Inventory” section
Select the location you want to edit sold out items for by clicking the expand icon on the right hand side to reveal all low inventory and sold out items
What the Low Inventory statuses mean
Items added to Low Inventory are grouped into up to 4 categories, defined below:
Sold Out: Items that are not available for purchase in your store currently
Under 10: Items with an inventory amount up to 10
Over 10: Items with an inventory amount over 10
Not Low: Items that are not currently being tracked for inventory, but are available for quick edit access. If you know that an item sometimes sells out, but currently has plenty of stock, it’s helpful to add it to the Low Inventory screen with the status of ‘Not Low’. That way, the next time the item runs low, you can quickly set its inventory count or mark it as sold out. Items are also marked as “Not Low” when you schedule an inventory reset time.
Tips for managing Low Inventory
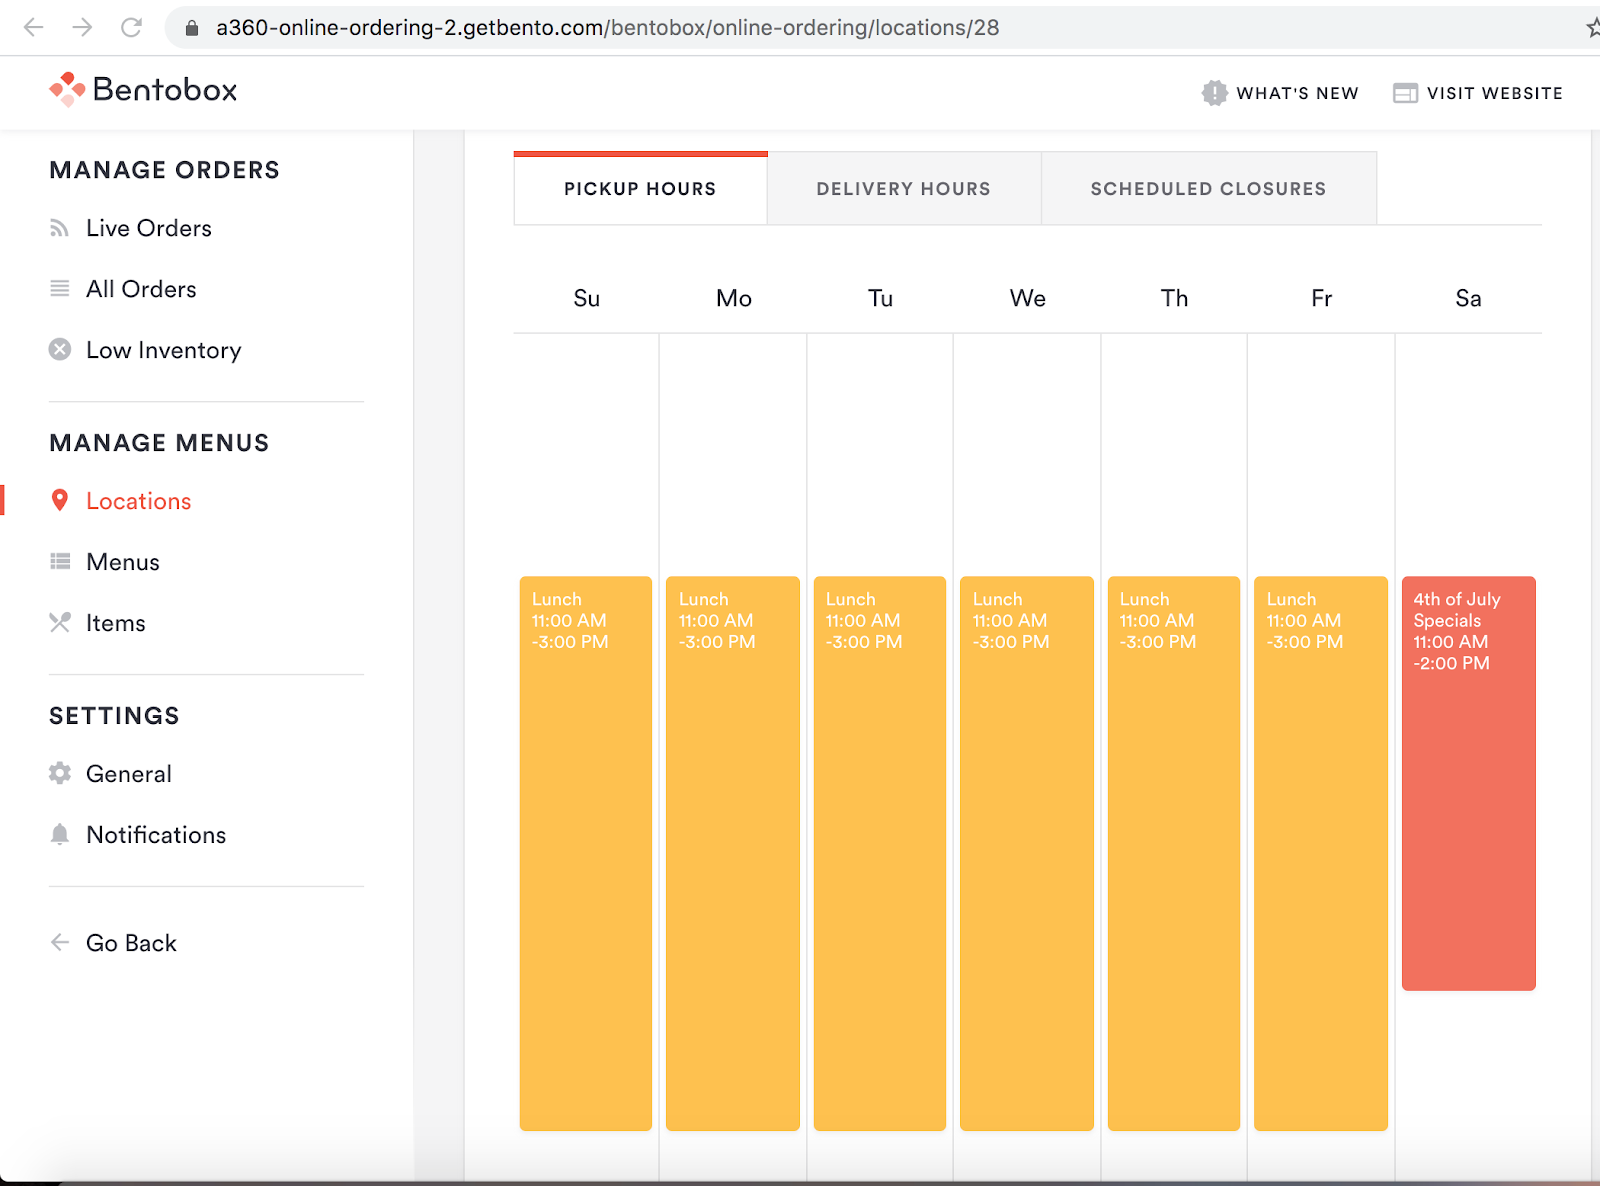
Using Low inventory along with menu hours can help you best plan for specials or holiday menus for you and your team.
For example, when planning a Fourth of July menu you can take the following steps to offer a unique Fourth of July menu with limited availability. Because Online Ordering only allows orders up to a week in advance, the earliest you can set a new menu live without disrupting current day menus is 1 week in advance.
Determine if you will be creating any new menu items for this special menu. If you plan to use existing items, just remember that Low Inventory will affect all instances of an item at a location.
(e.x. If a special brunch menu uses french toast, and that is part of your normal Lunch menu, adding inventory will affect both menus).
You can get around this by copying an item, and then renaming the item internally while keeping the same item display name.Create a new menu and add menu sections, and your menu items.
Go to Locations and add the new menu to menu hours on your location for the holiday. Remember that menu hours can not overlap. If you want to offer a blend of specials and regular items, consider adding regular items to your new menu as well.
Go to Low Inventory and select “Add Item”
Add the inventory for each item individually.
a. If you are posting your menu ahead of time, you will want to ensure “Only track inventory for same day orders” is OFF. This way, you can allow pre-orders and count towards inventory.
b. Set the Availability Reset time to “No Reset Time” since the specials are a one-time offer
c. Click “Set Inventory”
Promote your menu!
FAQ
A guest placed an order of an item that's out of inventory, why did this happen?
If the sold-out Item is added as a modifier it needs to be manually removed. Low inventory only applies to items at this time, not modifiers.
Click here for more information on managing modifiers.
If you need need help updating your inventory, please contact Support.