Takeout & Delivery: How to Use The V2 Square POS Integration
At the end or March 2022, we rolled out the v2 Square POS integration for Takeout & Delivery . This updated version of the integration automatically syncs orders, items, modifiers, and options. Payments for orders are processed through your Square account at the time the order is placed, and then the details of each order are sent directly to your POS when it is time to prepare the order (pickup time - current prep time). With order data in your Square POS system, reporting is centralized and your team does not need to actively manage a new platform to fulfill online orders.
When integrated, adjustments to your menu items, modifiers, variants, and options will automatically sync with your menu, allowing you to manage those details in one place, your Square POS.
Setting Up the Integration in the backend
Setting up Square as your Takeout & Delivery Payment Processor
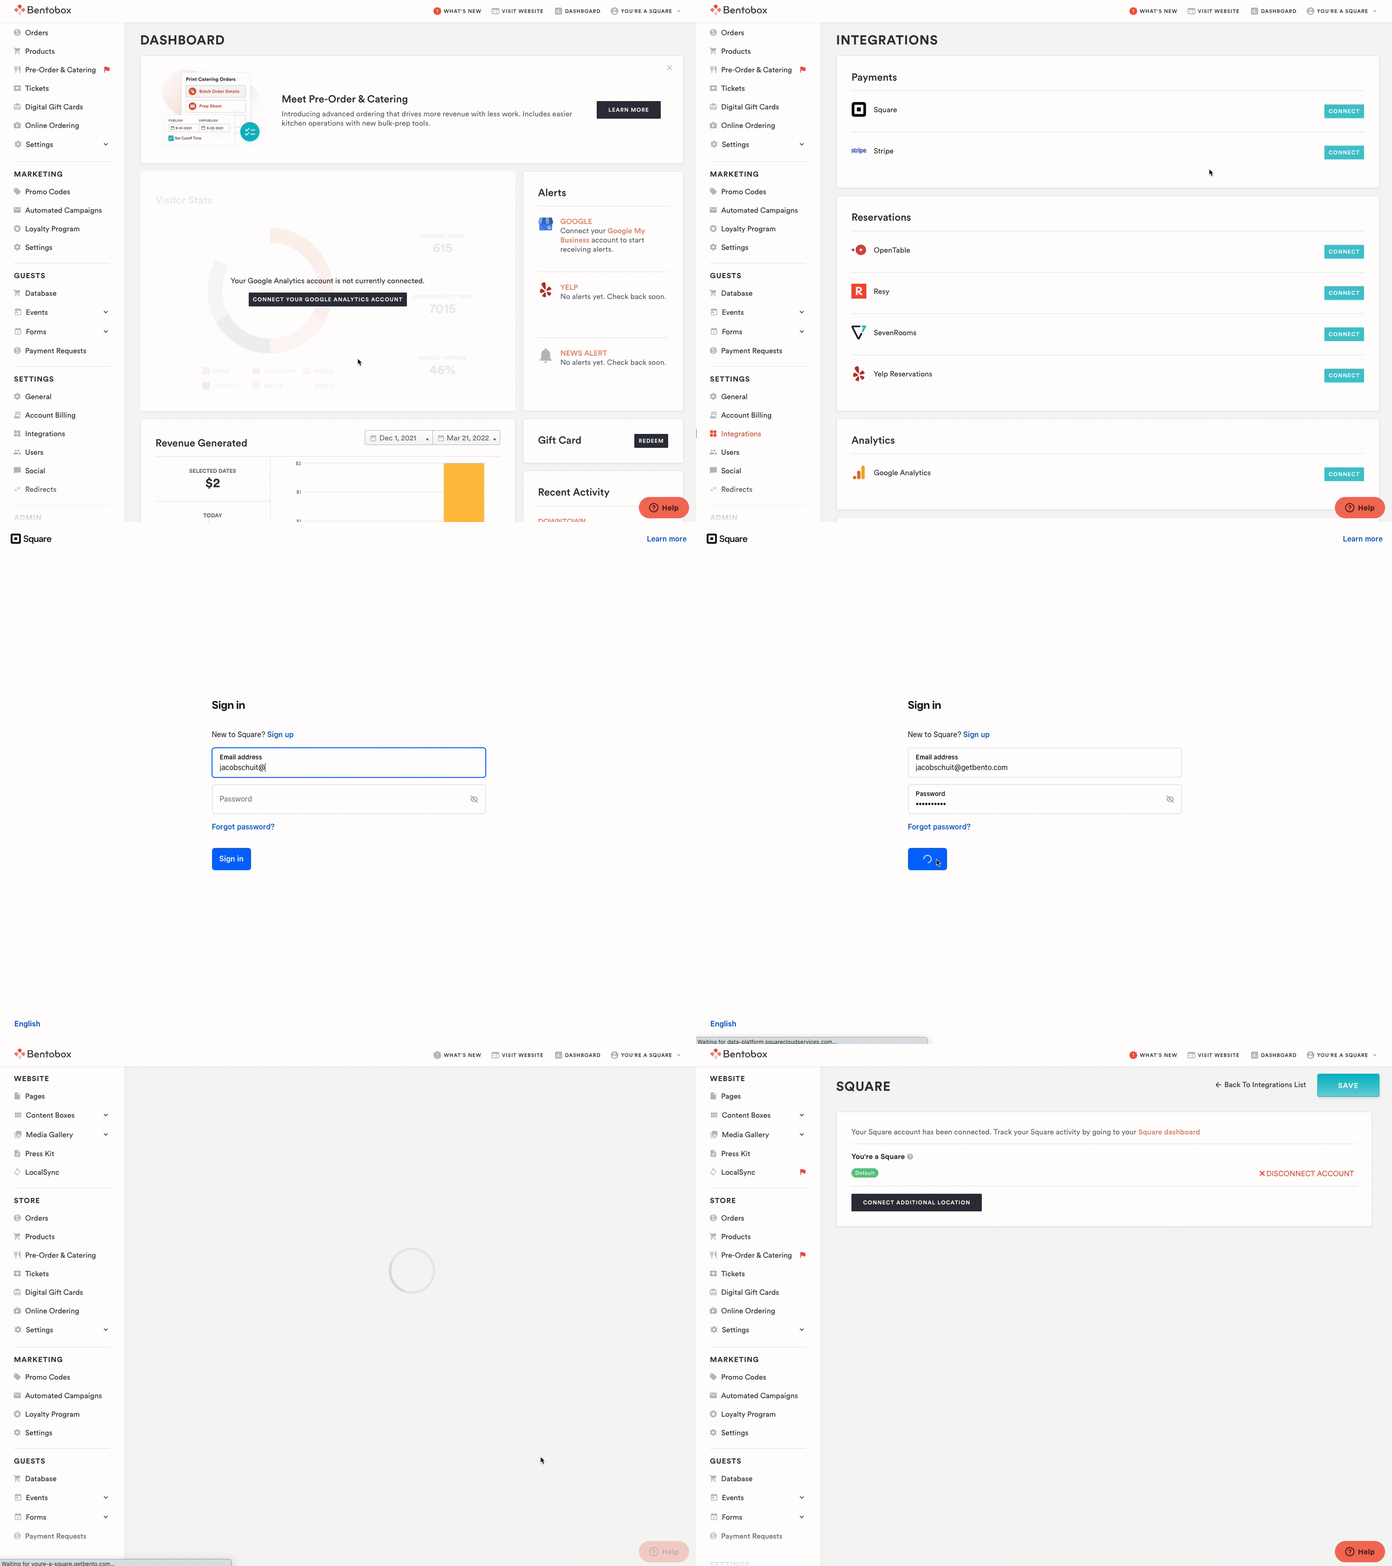
The first step is to be sure you have connected Square as your Payment Processor within the backend. This can be done by signing in at getbento.com/login > Integrations > Payments > Square > Connect. You’ll be prompted to sign into your Square account and allow the various permissions. Check out this help article for more specifics. NOTE: If you are an existing customer with Square payments already connected, you will need to disconnect and reconnect your Square account before moving forward (video here)
Activating the Integration within Takeout & Delivery
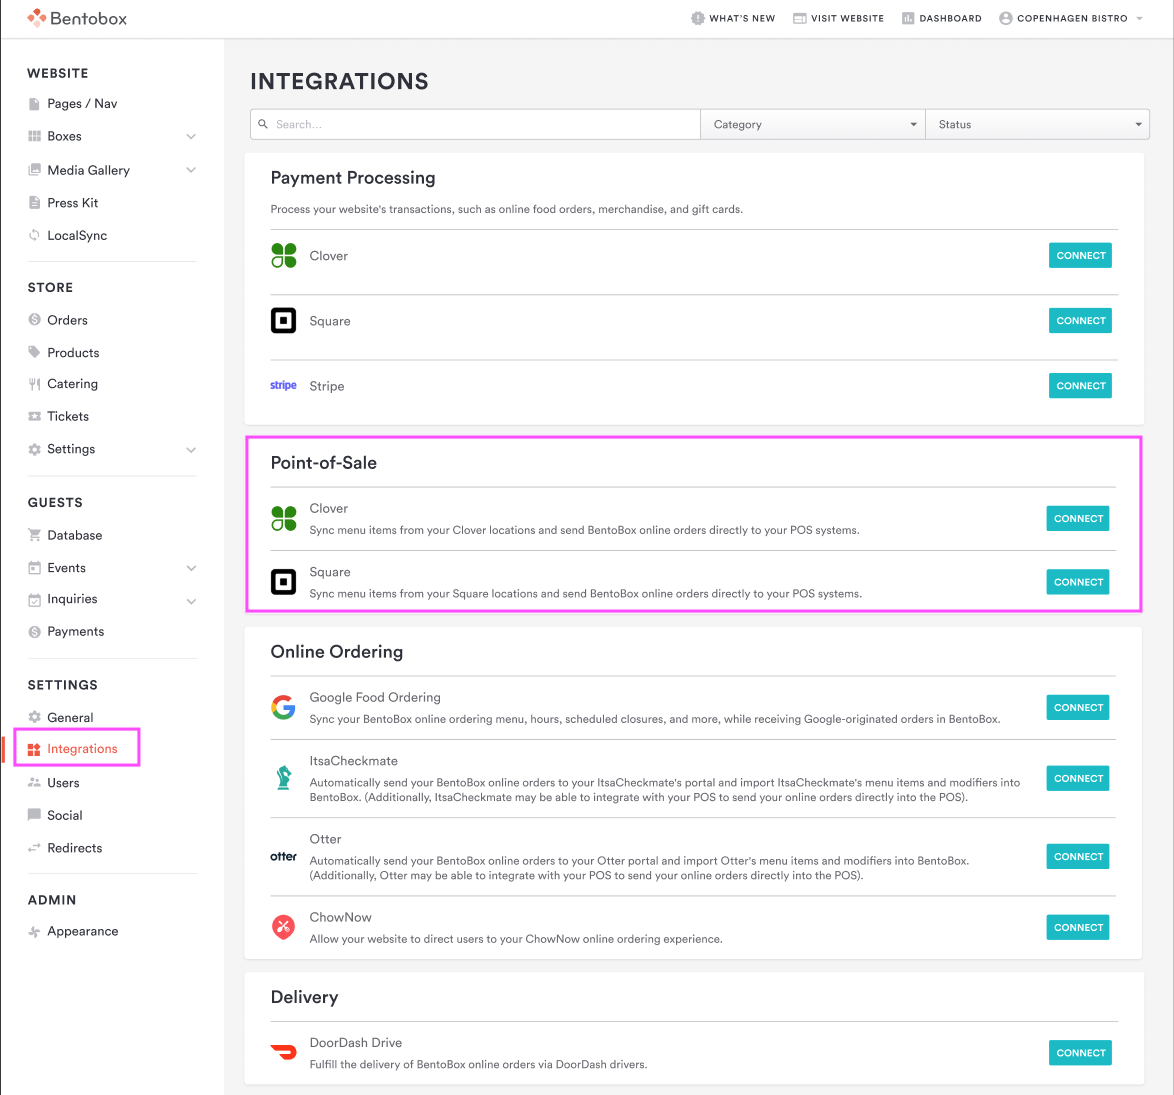
Once you have Square connected as your Takeout & Delivery Payment Processor, you will be able to activate the integration within the Takeout & Delivery section of your backend. From the main page, visit Settings > Integrations > Point of Sale > Square > Connect. From there, you will select the corresponding Square Location and Takeout & Delivery Location.
Once the integration has been activated, all items from your Square menu will be displayed in your backend. They will then need to be added to a corresponding menu in your Takeout & Delivery system.
Associating Square POS synced items to a menu within the backend
Now that the integration has been activated, the items synced from your Square menu will be added to an automatically created menu within the backend. Your items will be added to their corresponding menu sections and have the relevant modifiers and items associated with them. In essence, your menu will be automatically created and all you have to do is customize your Takeout & Delivery location settings [see below].
Customizing your Takeout & Delivery location settings
In order to finalize the process and make your Takeout & Delivery site available, you need to establish the settings within your Takeout & Delivery location(s) page. These help articles will show you how to set up your location with the settings you need to get your Takeout & Delivery store up and running. Feel free to also reference this short video.
Setting Up the Integration in Square POS
Connecting your Square POS allows orders you receive through Takeout & Delivery to automatically appear and print directly through printers setup within your Square POS system. Clover Hospitality by BentoBox not recommend using a Square POS for Takeout & Delivery without being connected to an impact/thermal printer. For a list of recommended and compatible hardware with a Square POS, click here.
To configure your Square POS to properly accept orders online, follow the steps below:
Ensure you have the latest version of the Square POS app from the app store on your iPad.
Go to Settings > Printer > Order Tickets within Square and choose to “Print” Order Tickets by following the instructions here.
Orders will now appear within the “Orders” section of your Square POS as they are received.
For any additional help with configuring your Square POS, follow their entire guide here.
Managing Orders with Square POS
Once activated, orders will now be sent to your Square POS along with the guest’s desired fulfillment time and the prep time for the order set within Takeout & Delivery . Orders will print and move to “Active” once the fulfillment time - prep time = current time. (Ex. An order placed for 5:30pm, with a prep time of 30 minutes at the time of order will print at 5:00pm)
As a reminder, notifications are sent to your guests based on the status of an order within the backend. Within the Square POS, you are required to update orders, and eventually mark them as complete. These statuses have no effect on the status of orders in the backend. (So, marking an order as complete in Square does not trigger an email to your customer. Your customer receives a “your order is being prepared” and “Your order is ready for pickup” email/SMS alert automatically from the backend based on your prep time and their pickup time.)
Square POS uses the following sections to segment online orders:
Active
Upcoming
Completed
Type
Source
Active: Orders that are within the timeframe to prepare them, or have been manually accepted on the Square POS.
Upcoming: Orders that are placed for a time in the future.
Completed: All orders that have been manually moved through Square POS’s order workflow
Type: All Takeout & Delivery orders will appear as Pickup.
Source: All Takeout & Delivery orders will appear as the source “Clover Hospitality by BentoBox”
Canceling Orders
To successfully cancel an order when using Square POS, you must follow these steps:
Log into the backend from a web browser and go to Online Ordering > All Orders.
Click into the order that you want to cancel.
Click “Cancel Order” and confirm the cancellation. This will issue the refund from your Square Account and alert your guest their order was cancelled.
If the order was already printed, then return to your Square POS.
Locate the order and cancel the order.
Ensure the correct team members preparing orders are aware of the cancellation if they have already started preparing the cancelled order.
Are you using Square for Restaurants?
First, you'll need to enable the specific device in the dashboard.
Head to your online Square dashboard > Orders > Order Partners
Click Get Started for the ordering partners you’d like to integrate with your Square account.
Next, you’ll need to enable Online Orders per device. Keep in mind, you do not need to enable for every device at a location — just enable for each device you’d like to manage orders from. If you don’t have an active point of sale yet, you’ll see the option to Create a Device.
For more information, visit Square's help center.
For further assistance with this, or anything else related, please reach out to our Support team by email at support@getbento.com or by phone at (646) 585-5021.


